GAML Editor tools
The GAML Editor provides some tools to make the editing easier, covering a lot of functionalities, such as tools for changes of visualization, tools for navigation through your model, tools to format your code, or also tools to help you to find the correct keywords to use in a given context. Some can be accessed directly from the toolbar on top of the editor, but most of the tools are available in the menu "Model", that is only available when the GAML editor is active (i.e. when the modeler is editing the model).
Table of contents
Navigation tools in the editor
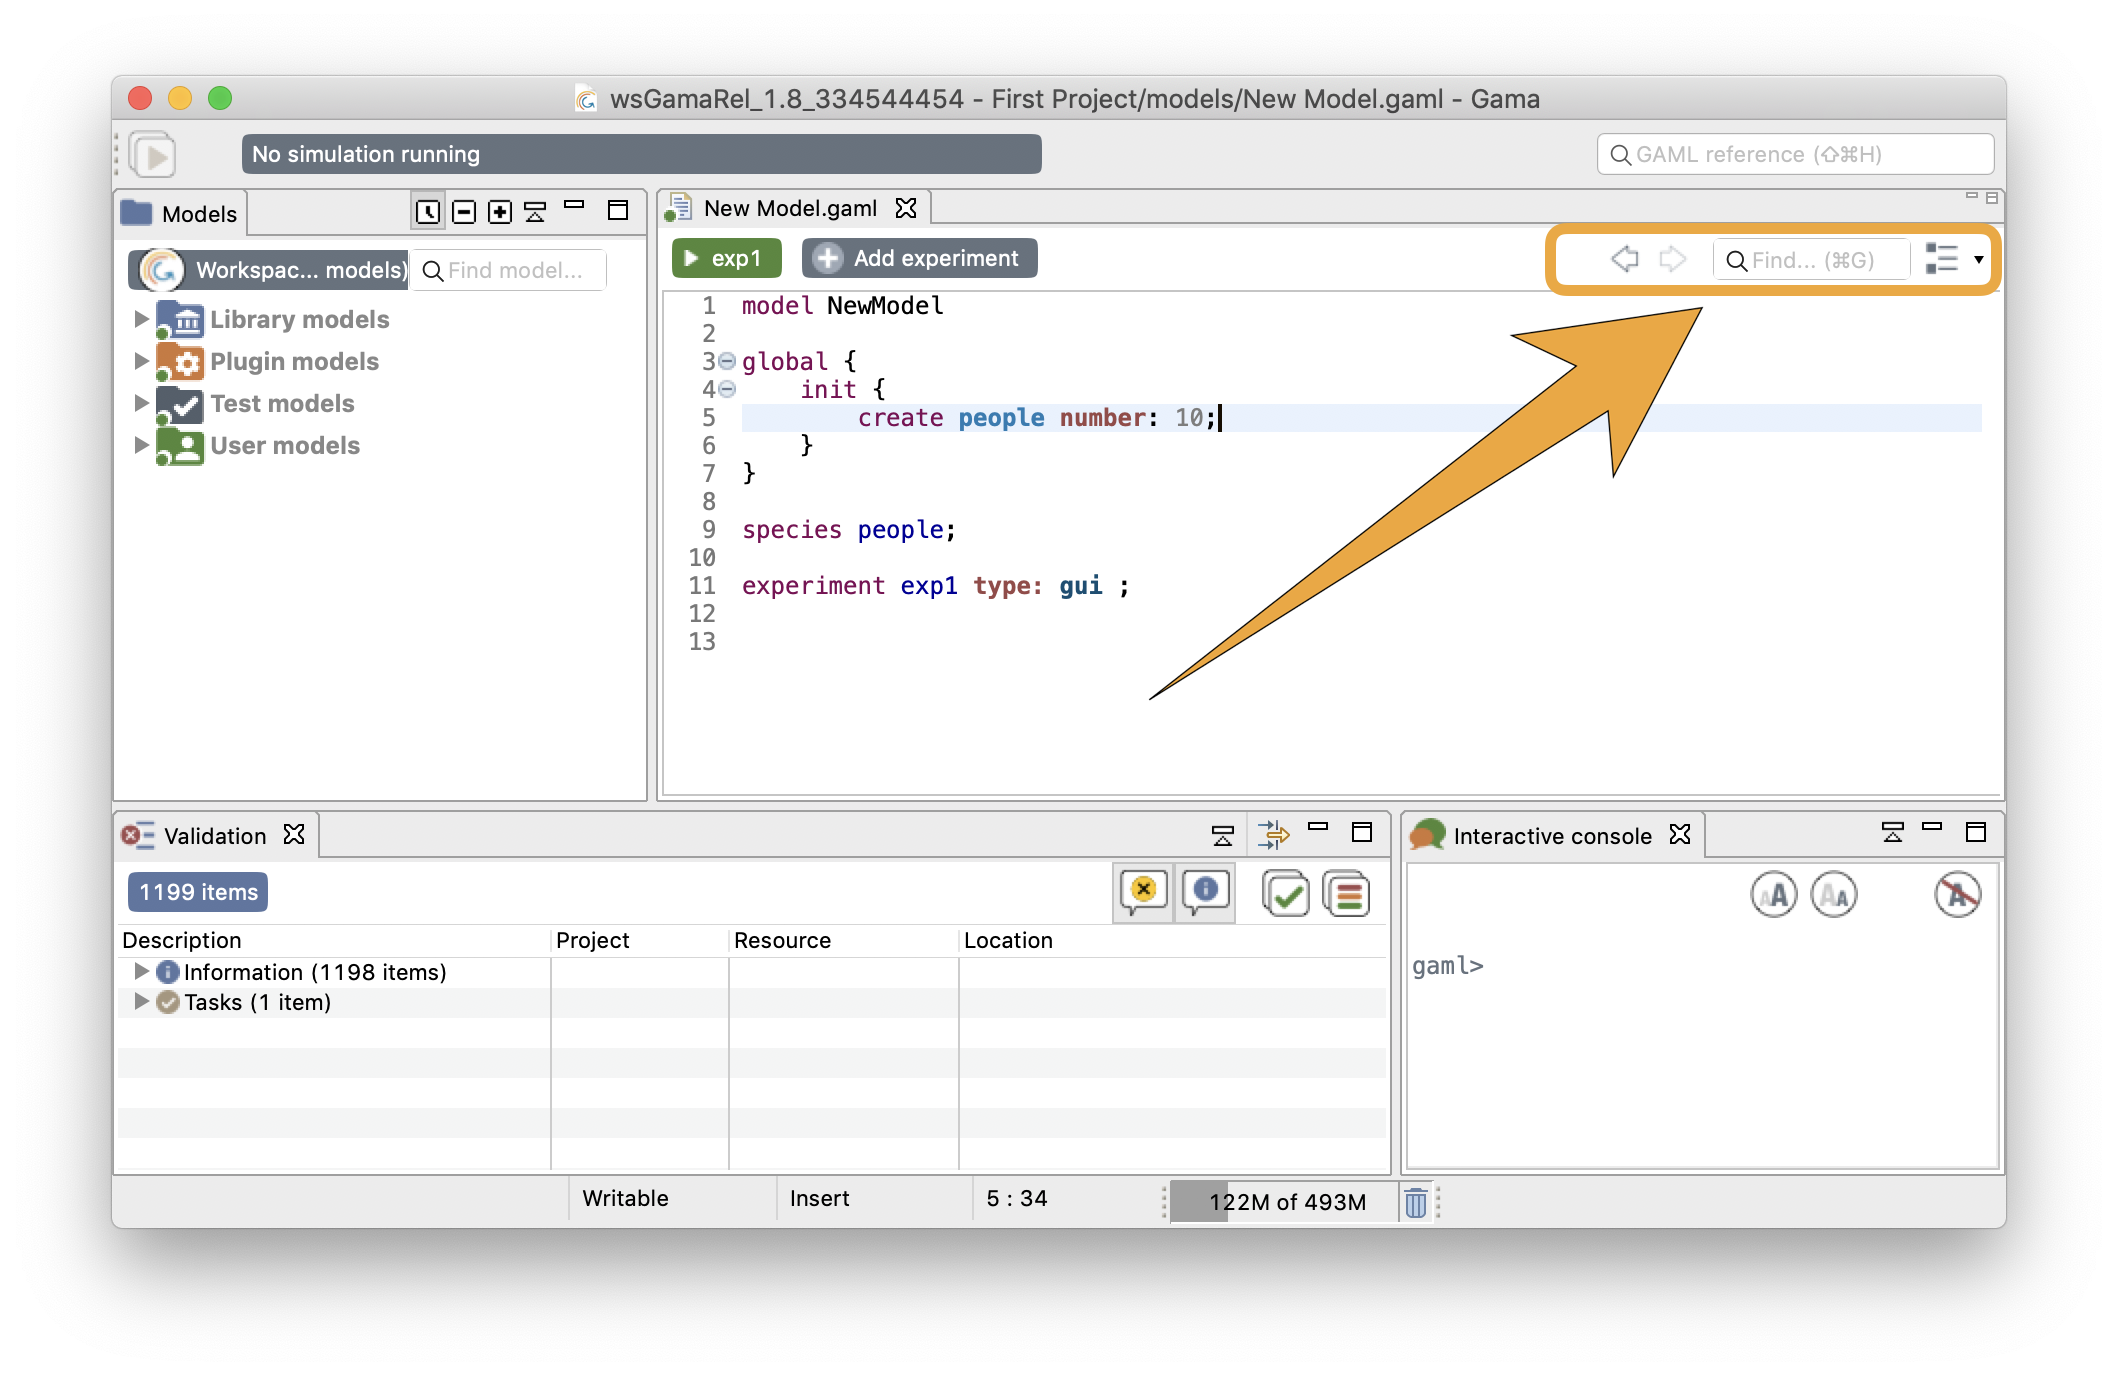
In the Editor toolbar, you have some tools for search and navigation through the code. Here are explanations for each functionality:
Previous/next edit locations
The two arrow shape buttons that are coming first are used to jump from the current location of your cursor to the last position, even if the last position was in another file (and even if this file has been closed !).
The search engine
To search an occurrence of a word (or the part of a word), you can type your search in the field, and the result will be highlighted automatically in the text editor.
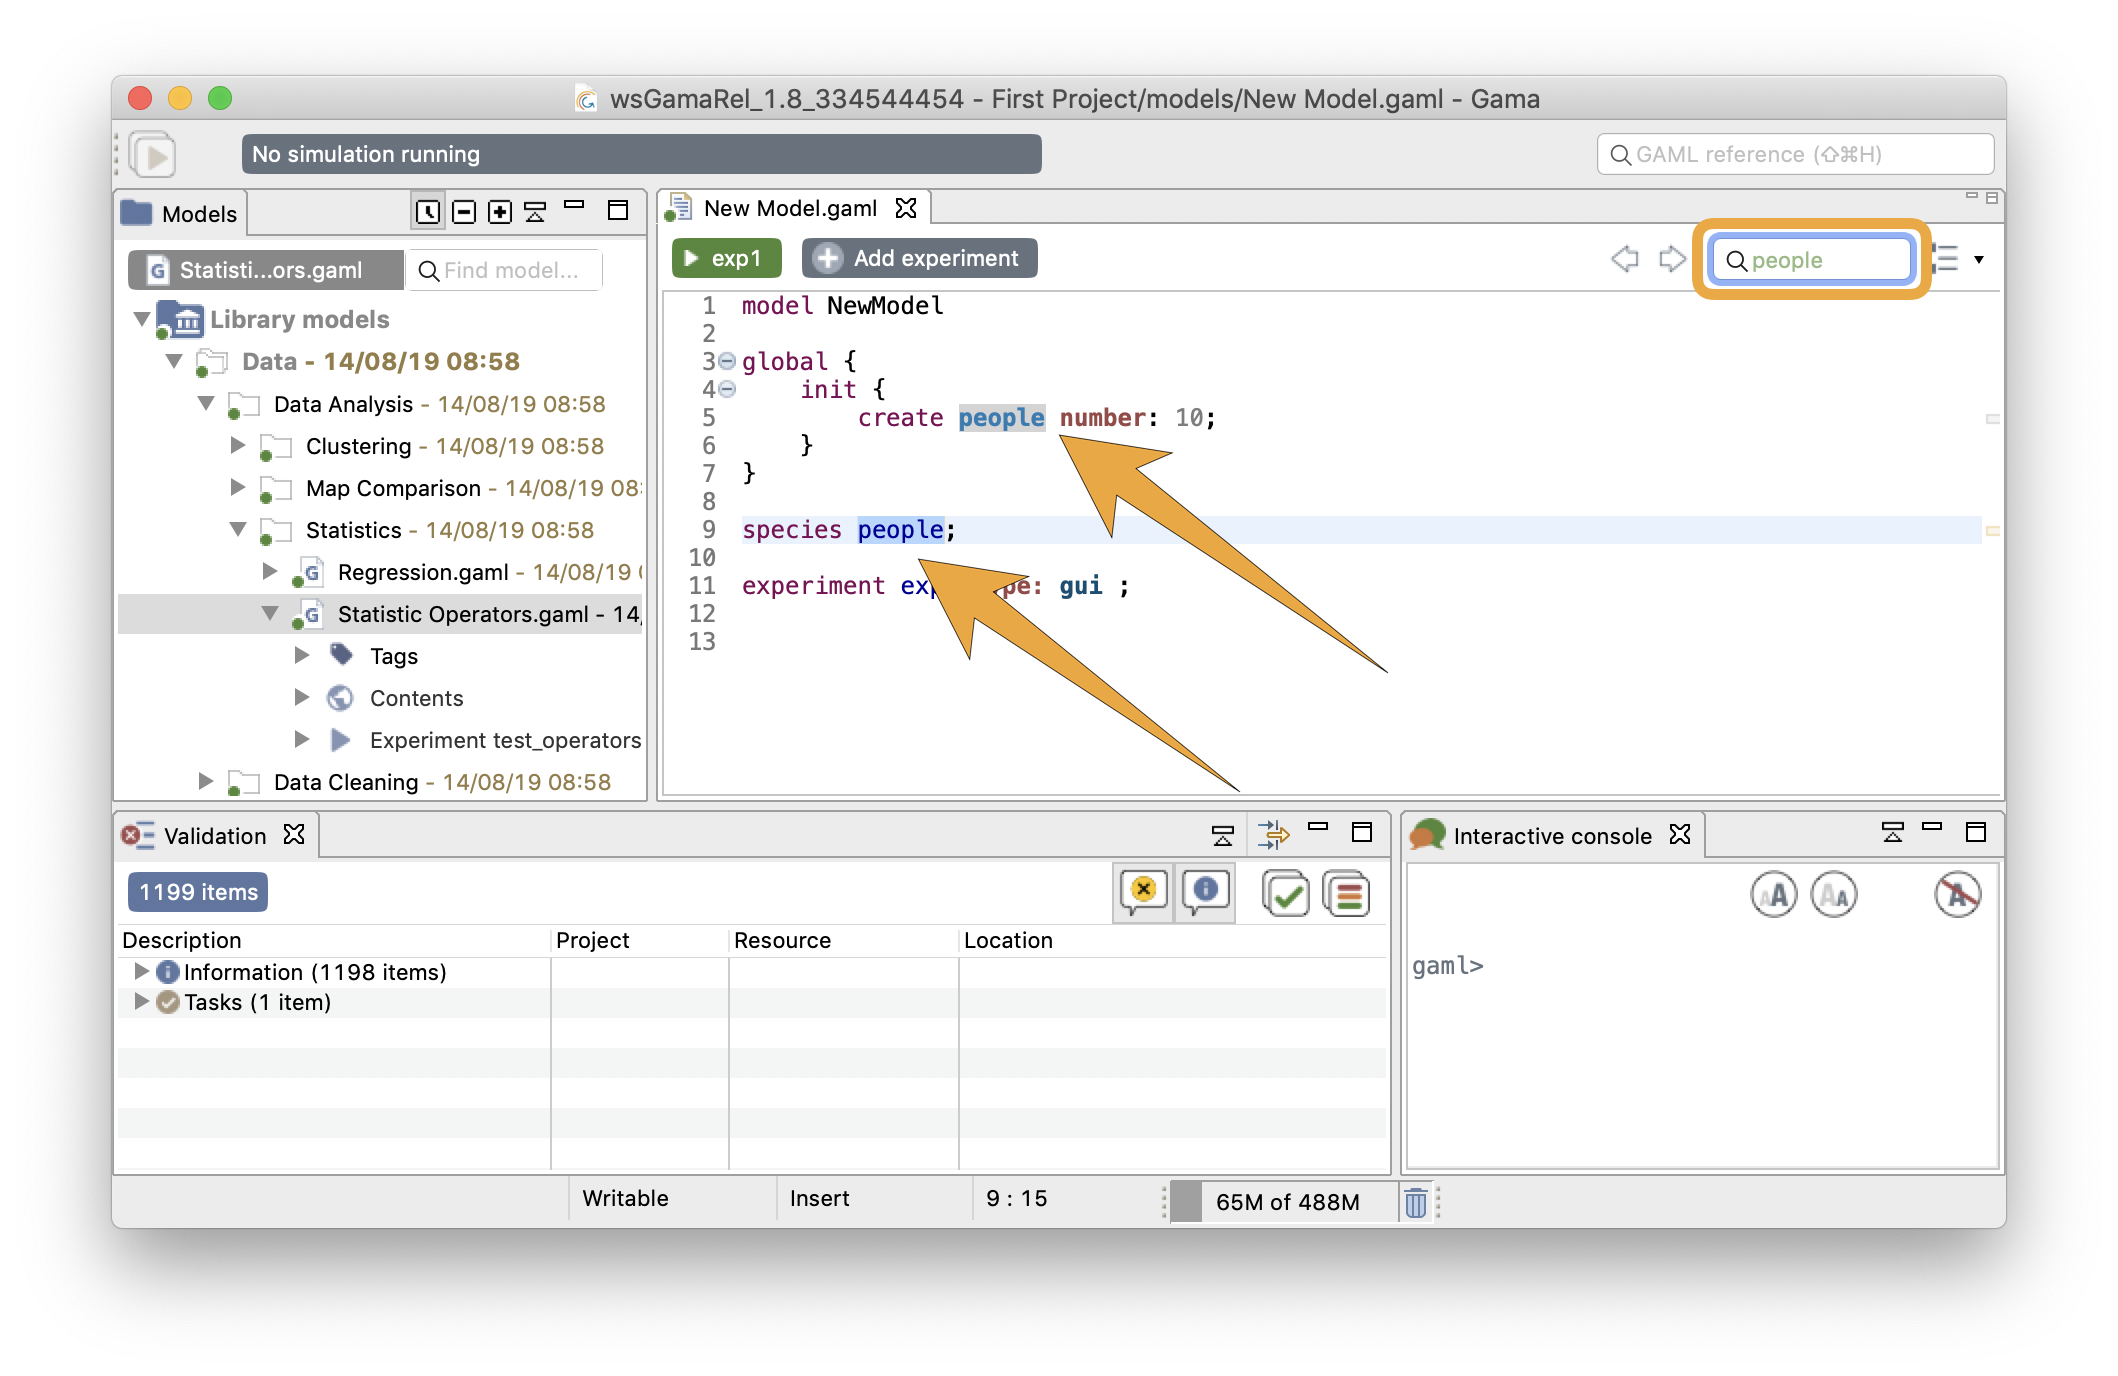
With the left/right arrows, you can highlight the previous/next occurrence of the word. If you prefer the eclipse interface for the search engine, you can also access the tool by taping Ctrl+F.
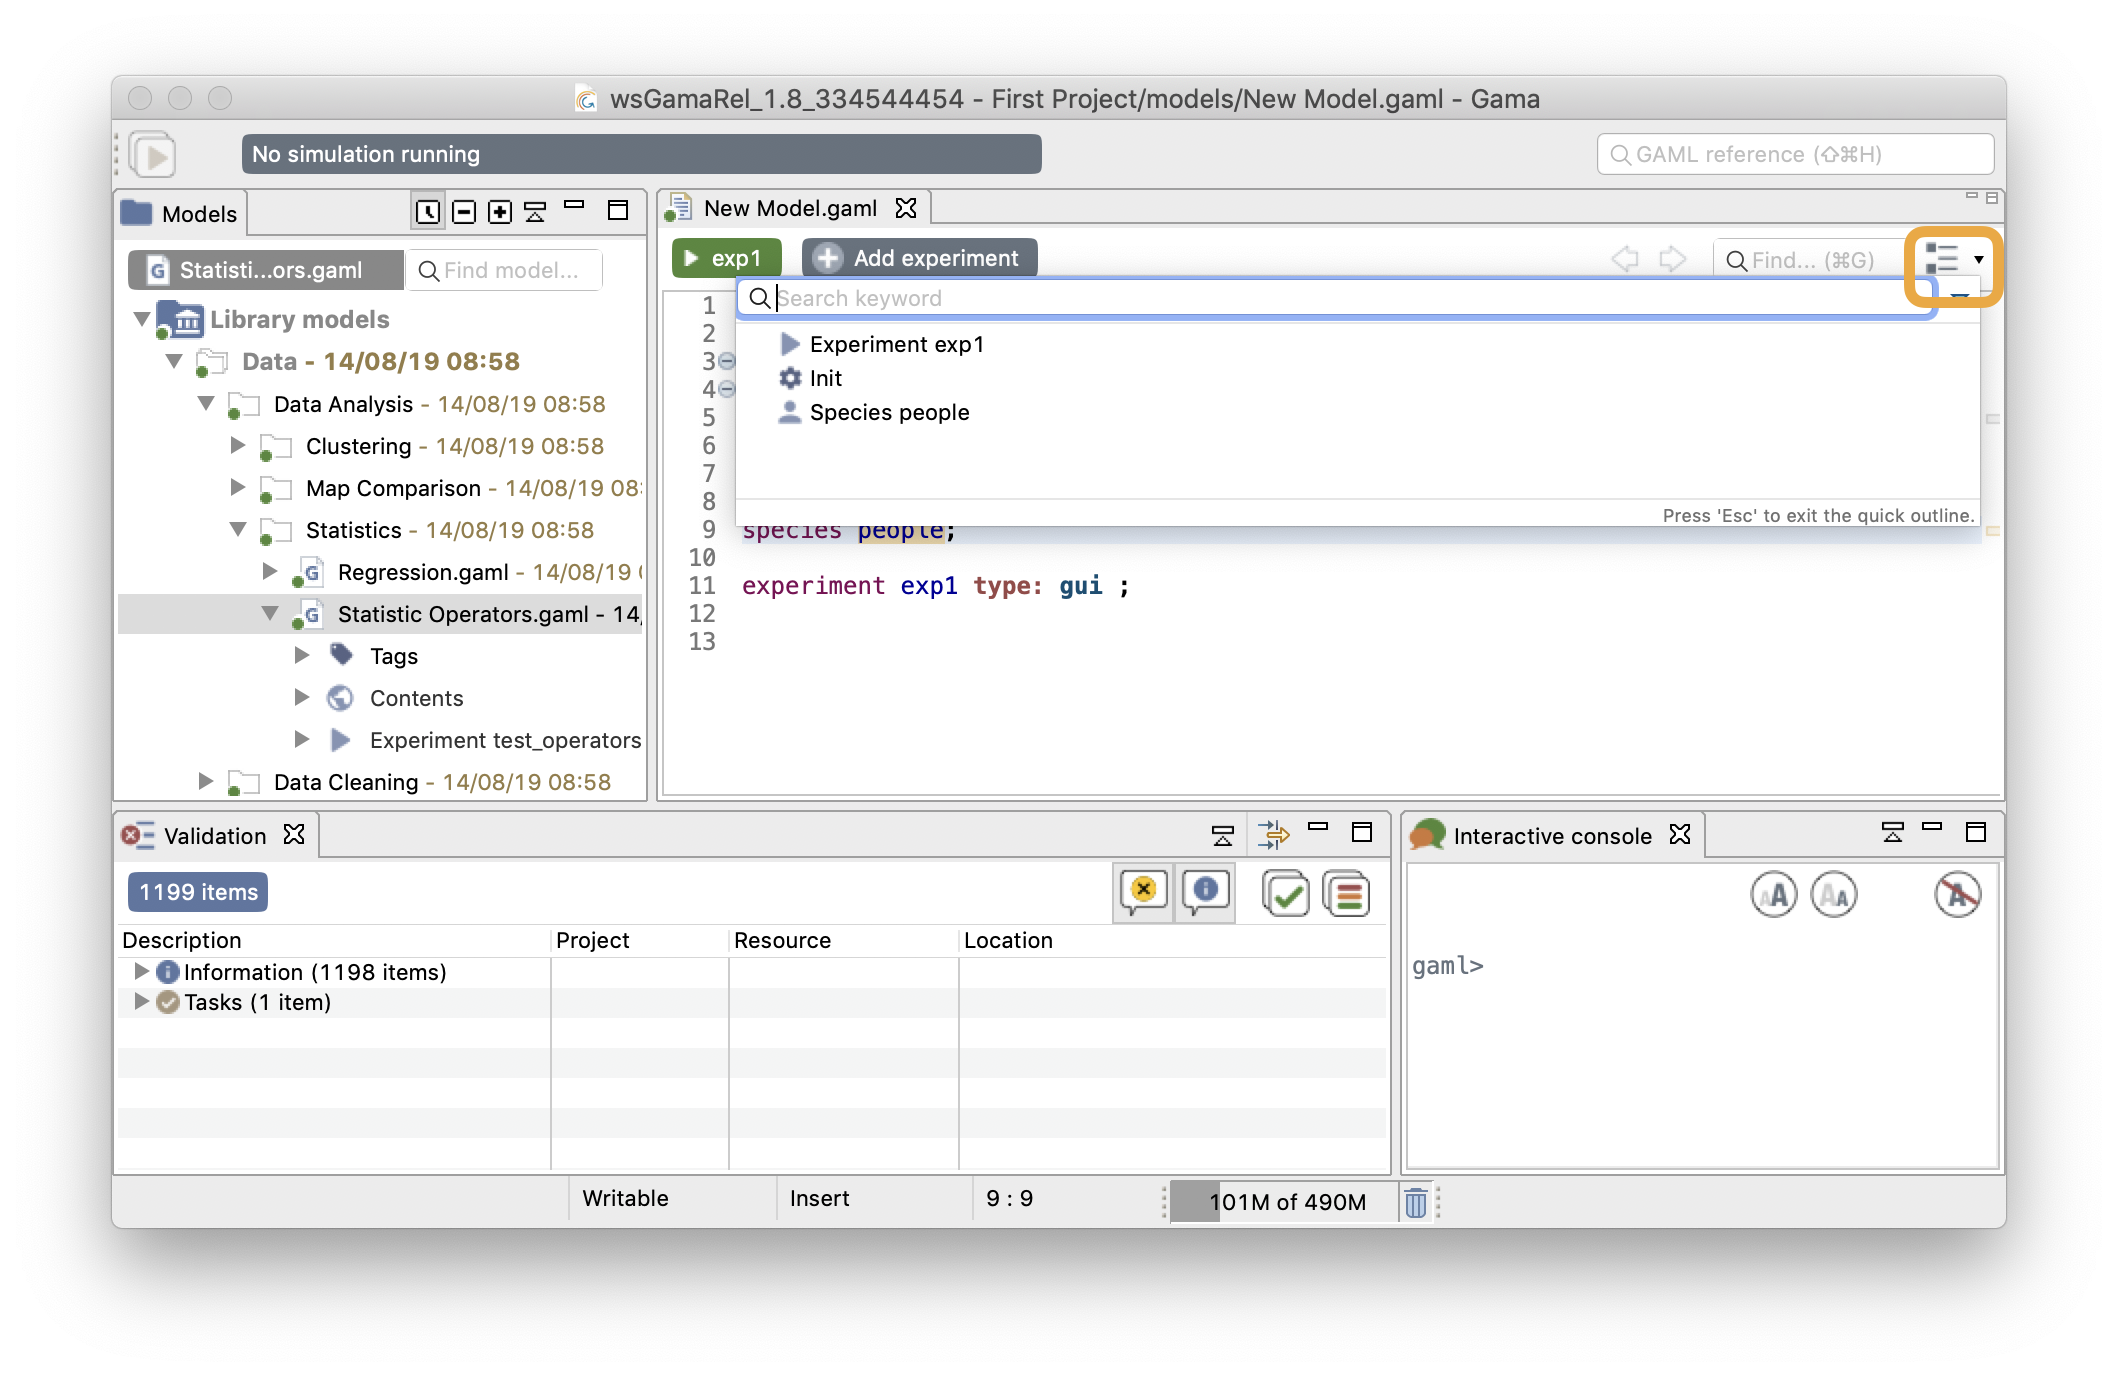
Show outline
This last tool of this section is used to show the global architecture of your model, with explicit icons for each section. A search field is also available if you want to search for a specific section. By double-clicking one line of the outline, you can jump directly to the chosen section. This feature can be useful if you have a big model to manipulate.
Visualization Tools in the menu
You can choose to display or not some information in your Editor, from the Model menu. Here are the different features available.
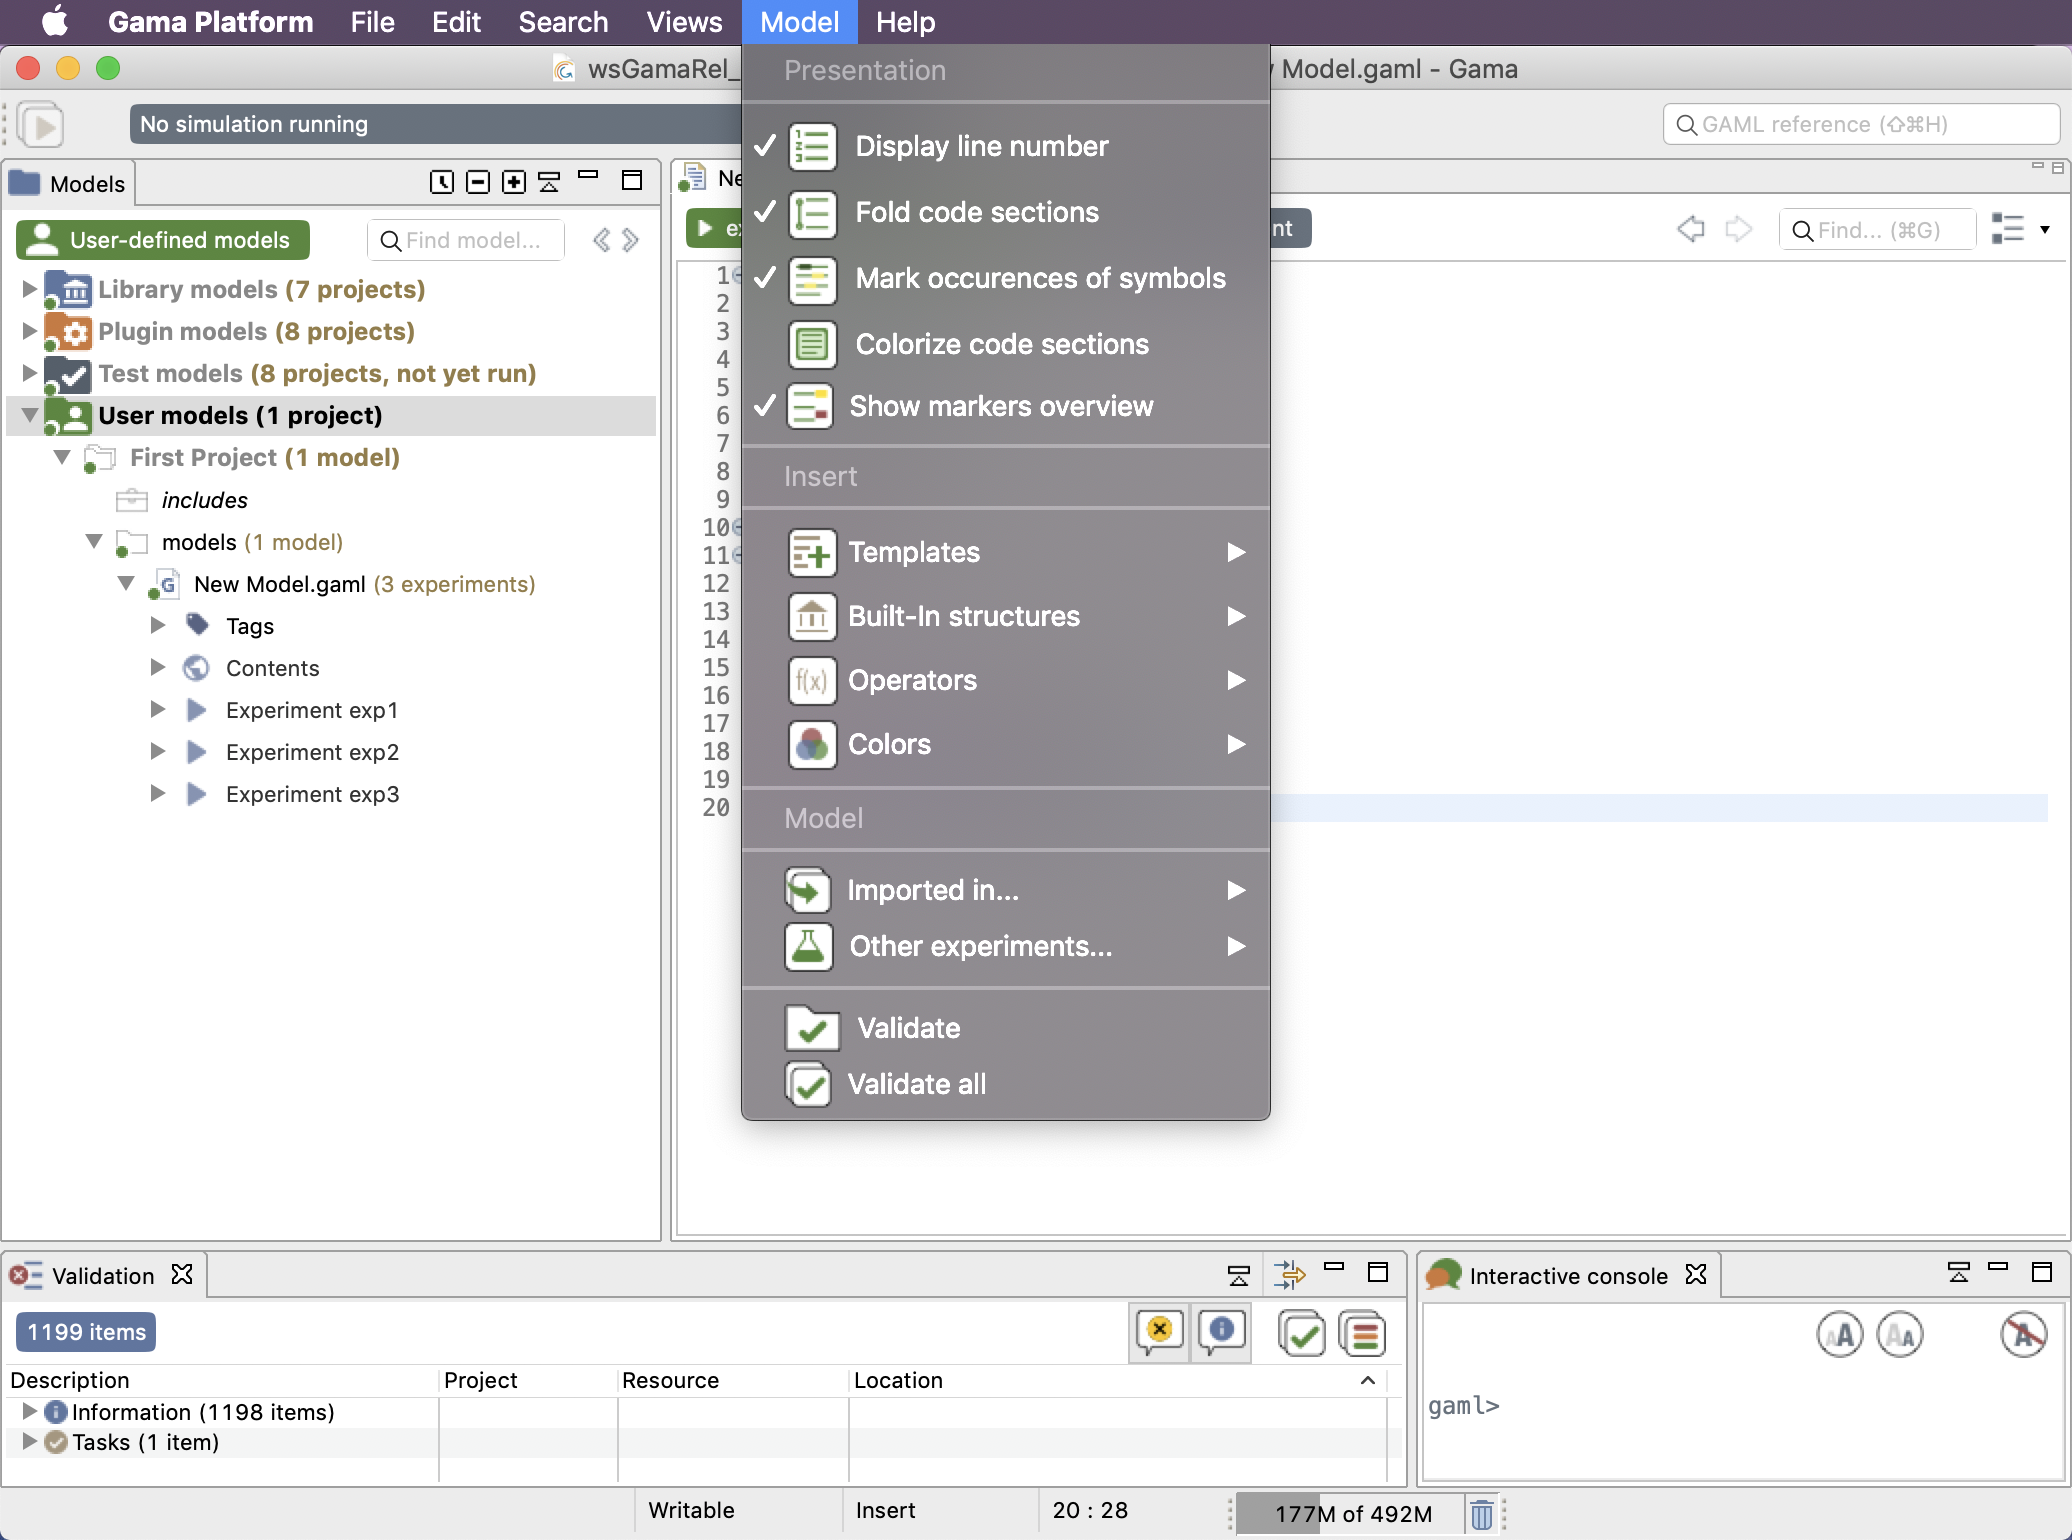
Display line number
The first toggle is used to show/hide the number of lines.
Fold code sections
The second toggle provides you the possibility to expand or collapse lines in your model depending on the indentation. This feature can be very useful for big models, to collapse the part you have already finished.
Mark occurrences of symbols
This third toggle is used to show occurrences when your cursor is pointing on one word.
Colorize code sections
One particular option, shipped by default with GAMA, is the possibility to not only highlight the code of your model but also its structure (complementing, in that sense, the Outline view). It is a slightly modified version of a plugin called EditBox, which can be activated by clicking on the "green square" icon in the toolbar.

The Default theme of EditBox might not suit everyone's tastes, so the preferences allow to entirely customize how the "boxes" are displayed and how they can support the modeler in better understanding "where" it is in the code. The "themes" defined in this way are stored in the workspace, but can also be exported for reuse in other workspaces, or sharing them with other modelers.

Show markers overview
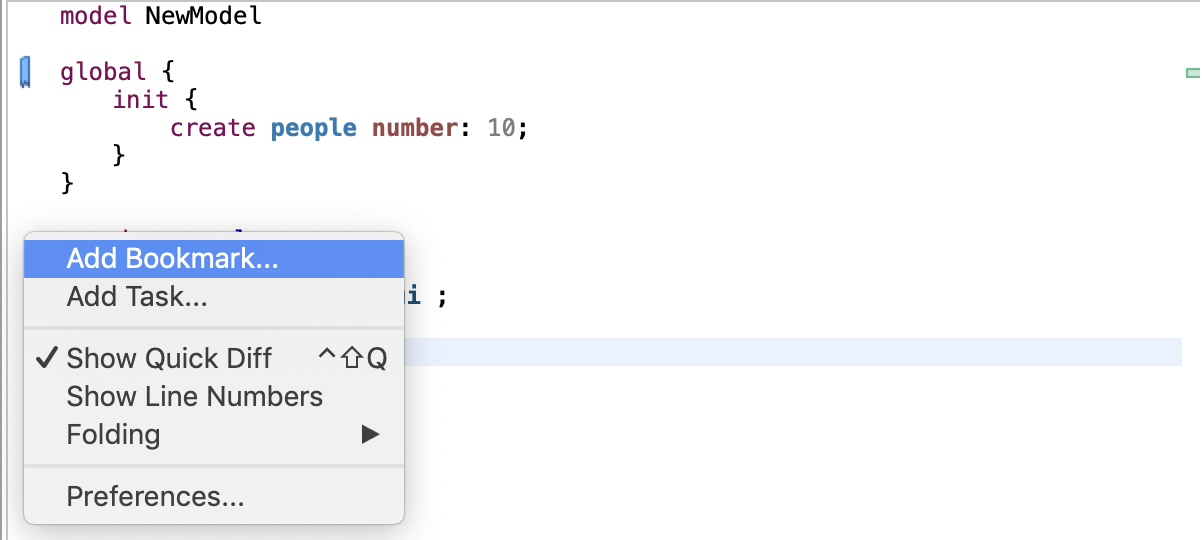
It is possible to add two kinds of marker on the code: Bookmarks (a simple bookmark on a line of code that helps to go back to some lines of interest) and Tasks (in addition to a marker on a line, a Task expresses that something should be done, with a given priority, on the code line). The markers are also visible in the right margin of the editor. An additional view (named Tasks, that can be opened from the Views menu) gathers all the tasks, helping modelers to organize their work.
Vocabulary tools in the menu
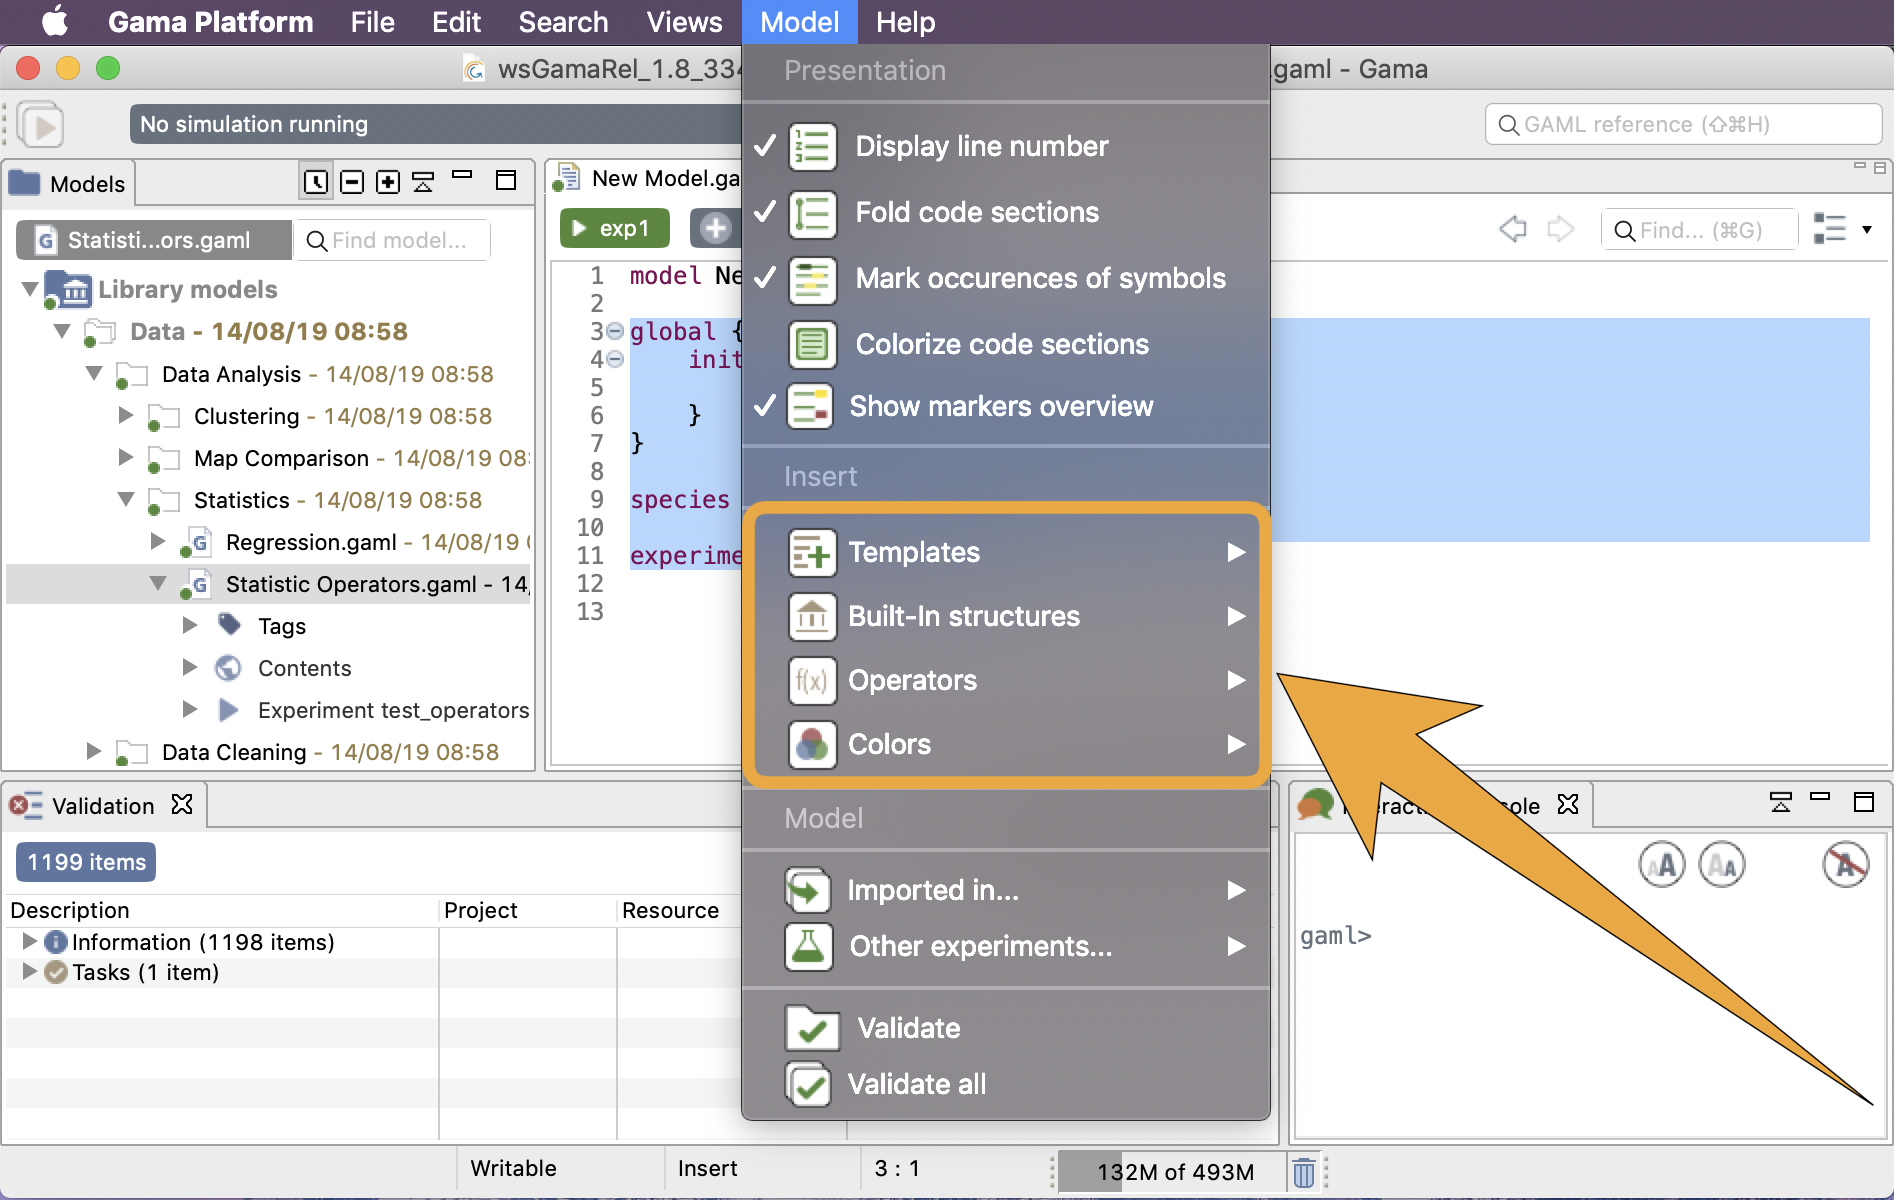
The second group of commands in the Model menu are used to search the correct way to write a certain keyword.
Templates
The templates button is used to insert directly a code snippet in the current position of the cursor. Some snippets are already available, ordered by scope. You can custom the list of templates as much as you want, new templates can be added from the Preferences dialog.
For example, if the modeler clicks on Template > Species > grid > insert, the following code is generated:
grid name width:grid_w height:grid_h {

}
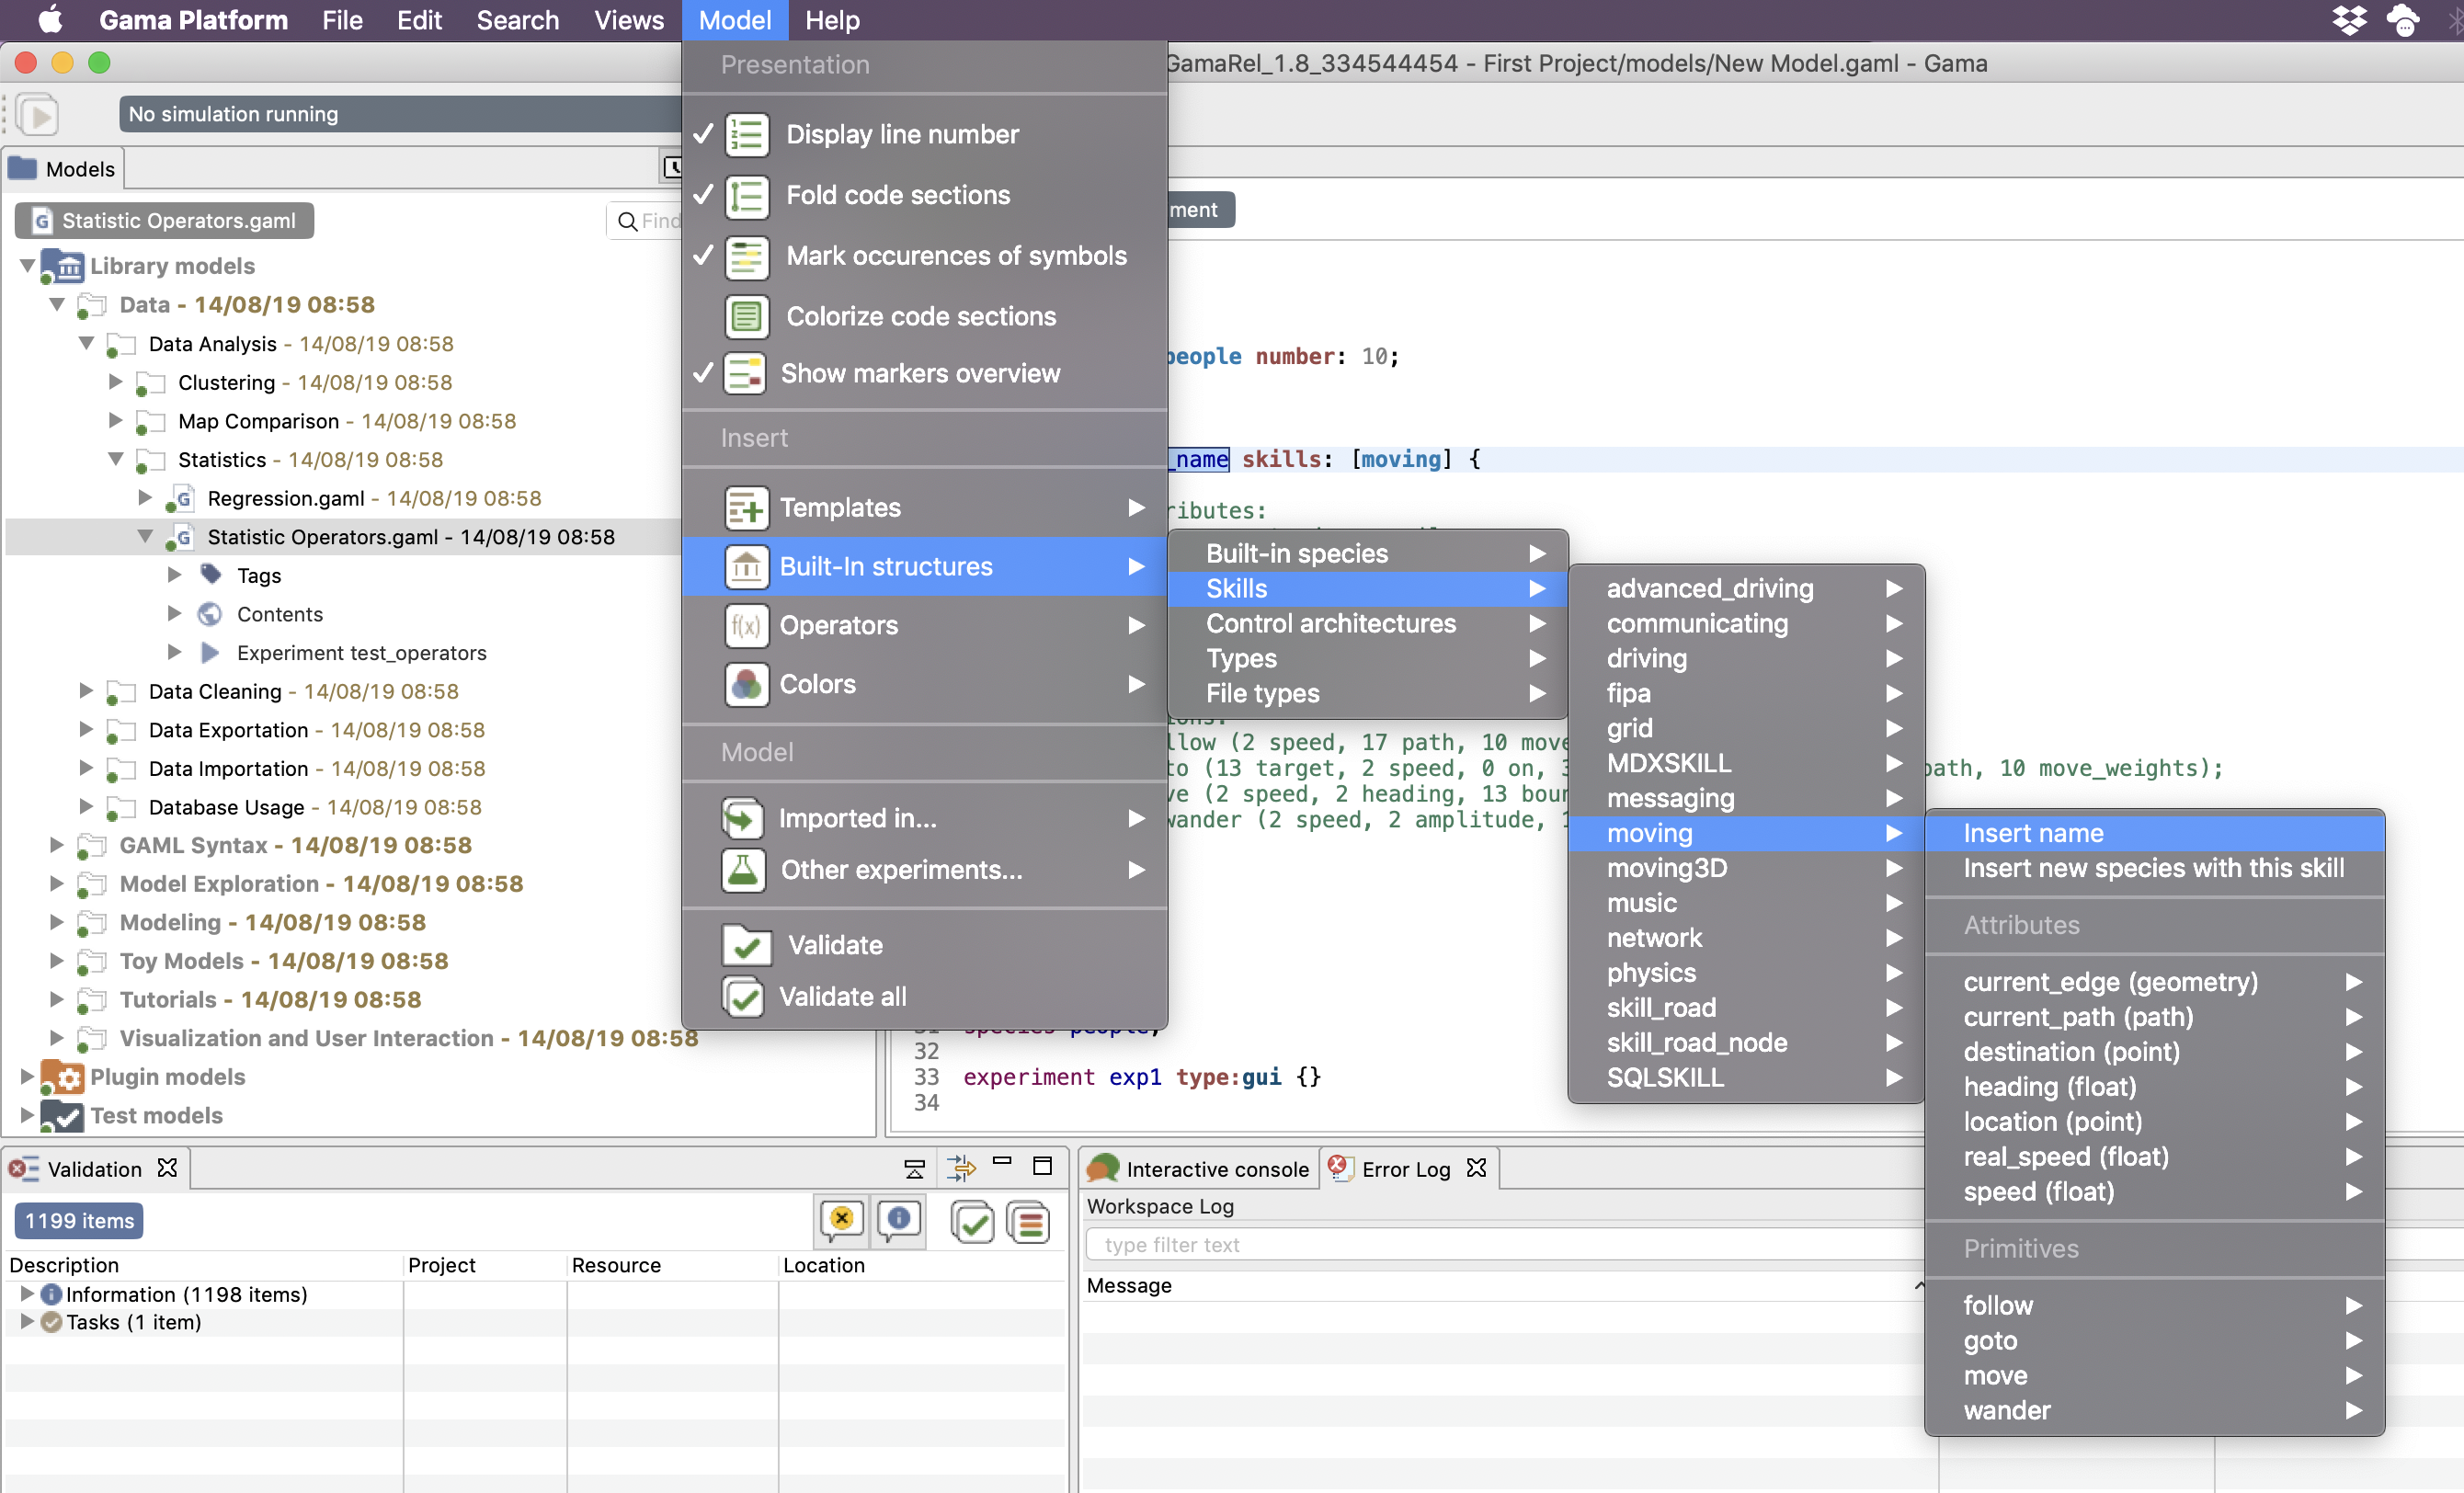
Built-in structures
With this feature, you can easily know the list of built-in attributes and built-in actions you can use in such or such context. With this feature, you can also insert some templates to help you, for example, to insert a pre-made species using a particular skill, as it is shown it the following screenshot:
... will generate the following code:
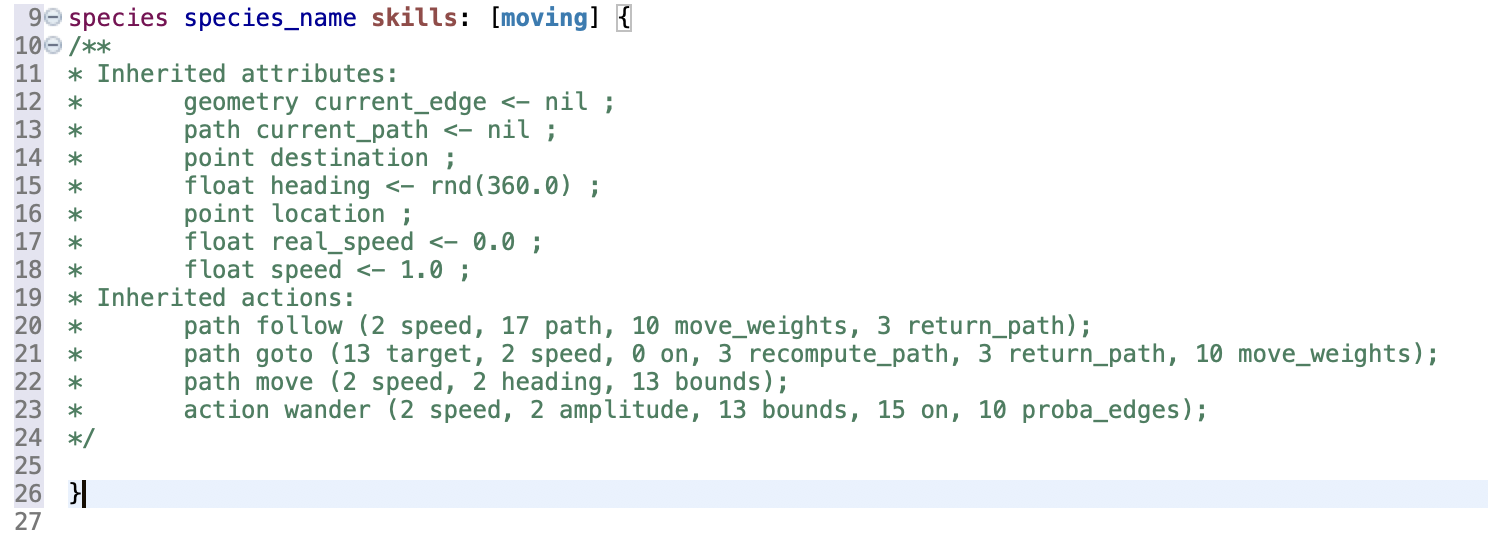
All the comments are generated automatically from the current documentation.
Operators
Once again, this powerful feature can be used to generate an example of structures for all the operators, ordered by categories.
Colors
Here is the list of the name for the different pre-made colors you can use. You can also add some custom colors.

Vocabulary tools in the toolbar
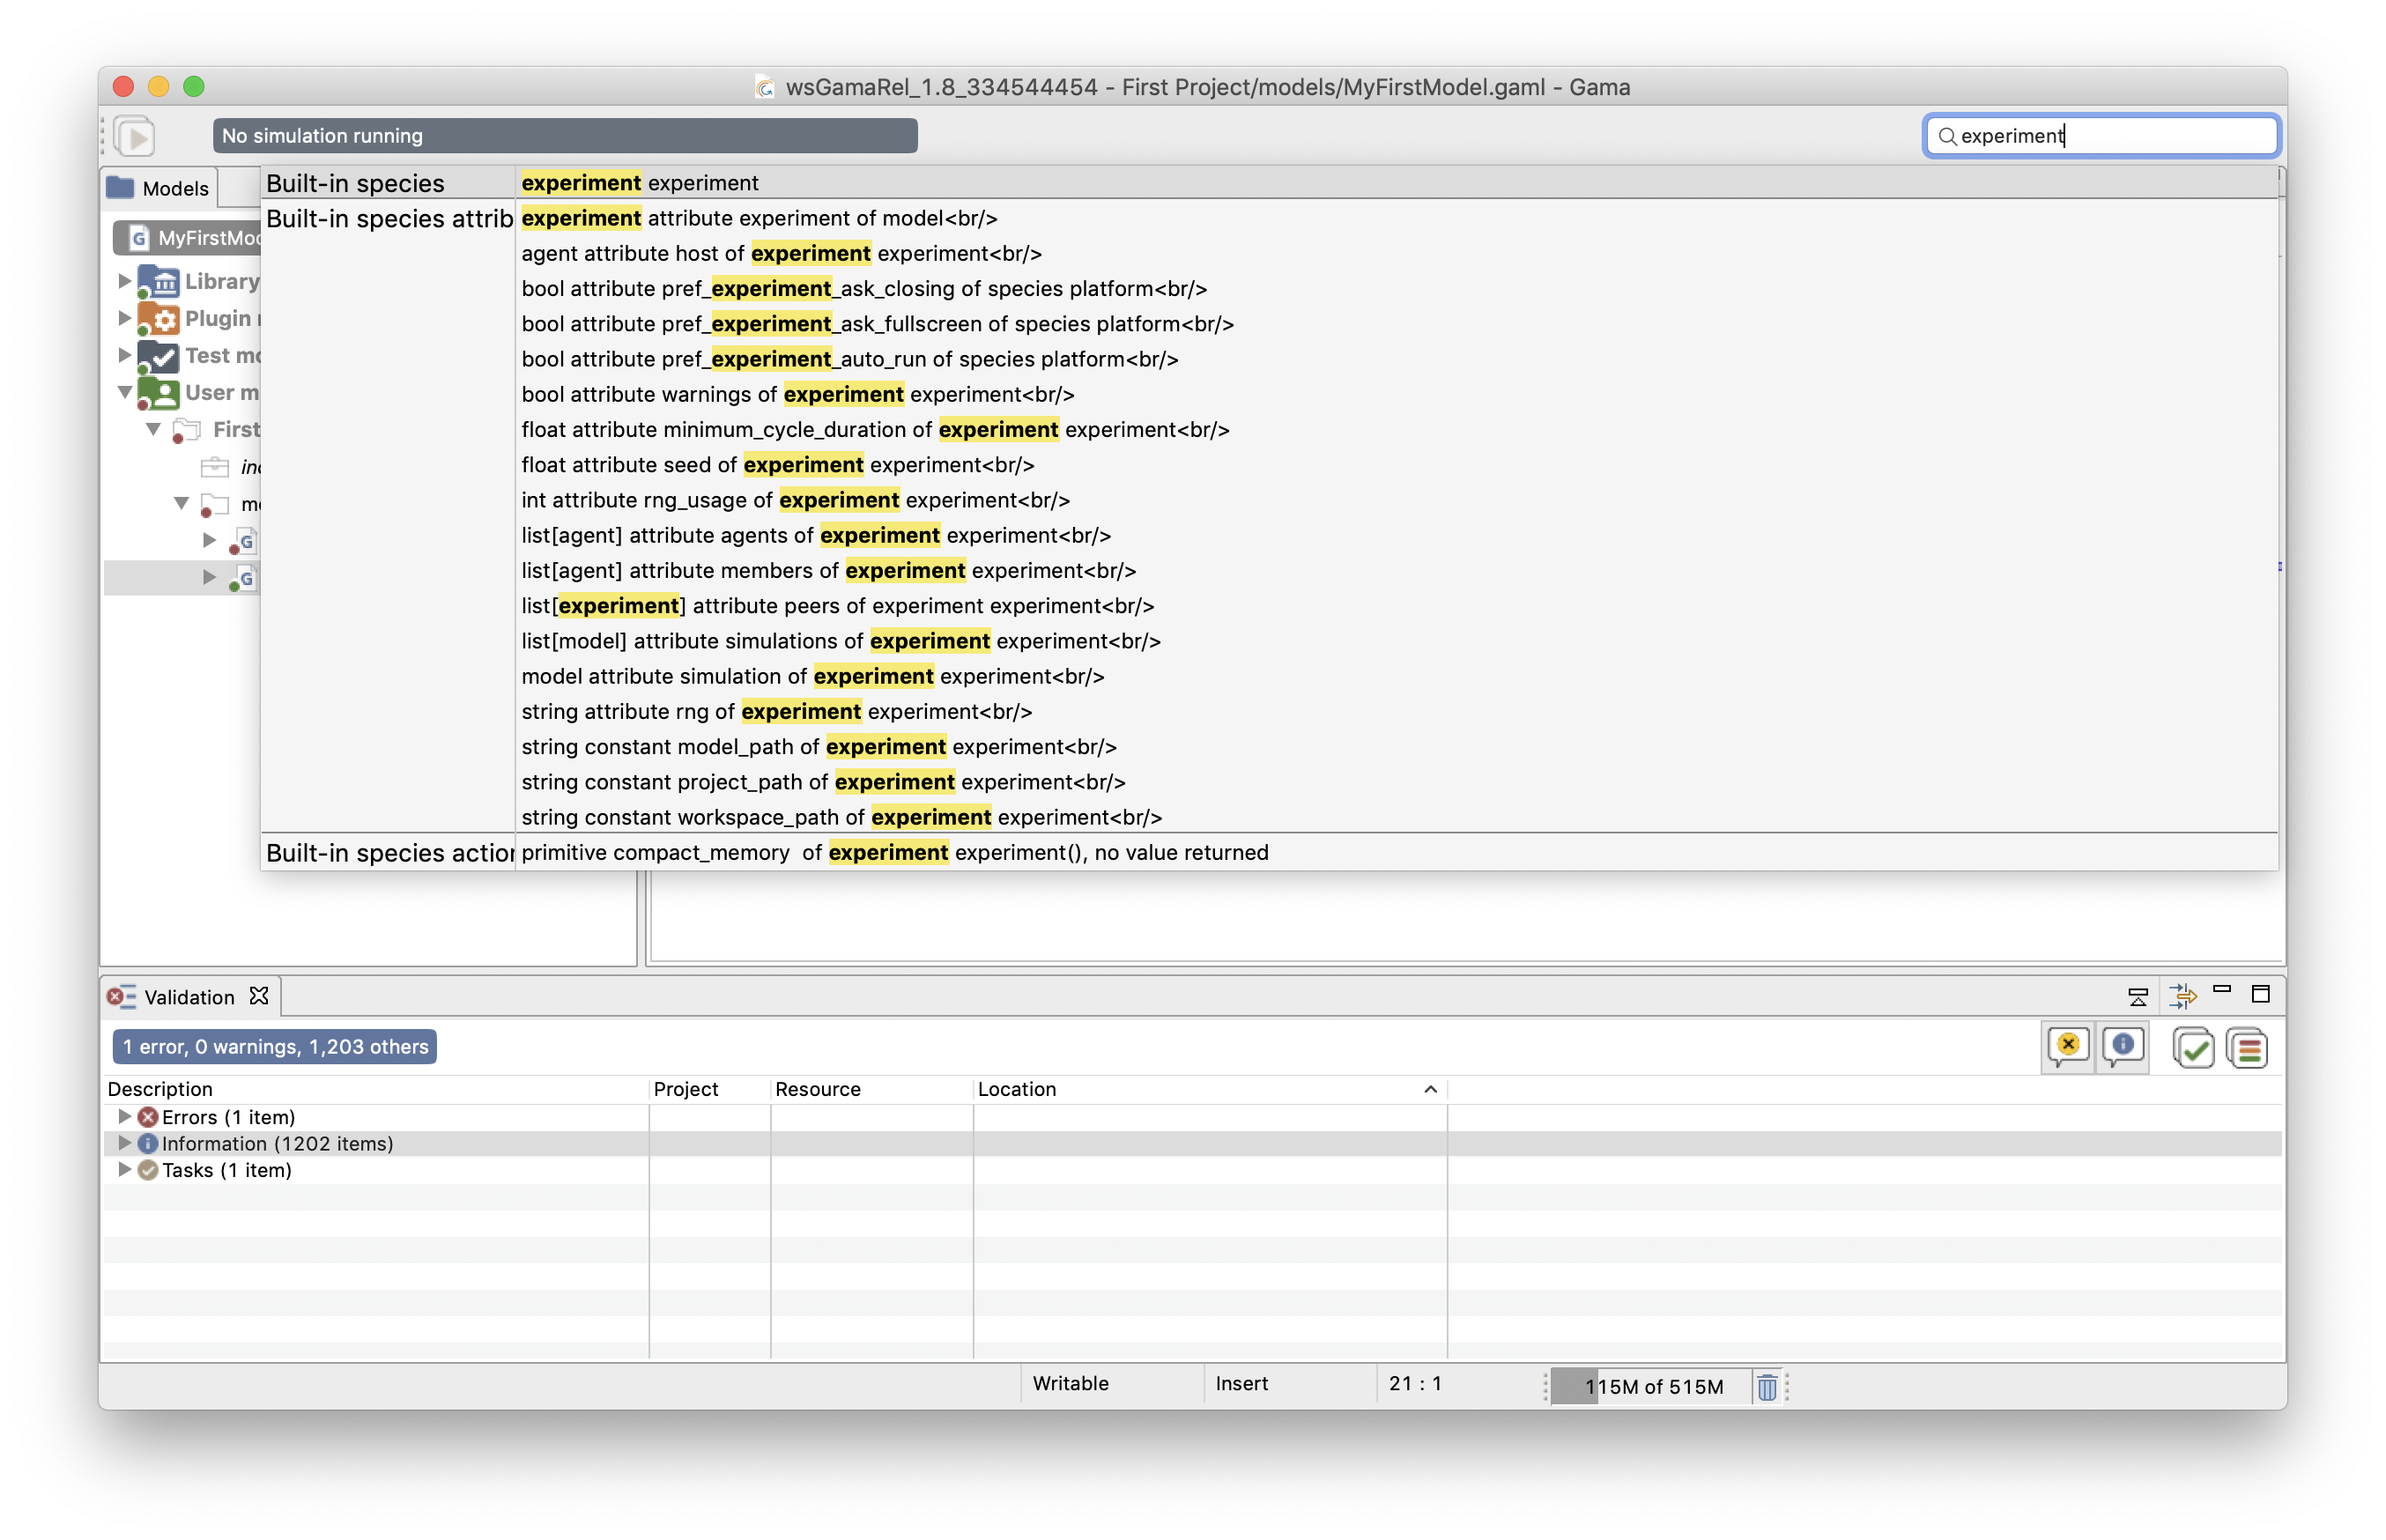
All the information that is available in the "Model" menu can also be accessed, in another way, from the research engine located in the GAMA interface toolbar, named "GAML reference". Any word typed in this search engine will be searched in all the keyword of the GAML language: for example, if the word experiment is searched, the search engine retrieves its occurrence as a built-in species, a statement, an attribute or a type... This is definitely the easiest way to get information about any GAML keyword.
Formatting tools in the contextual menu
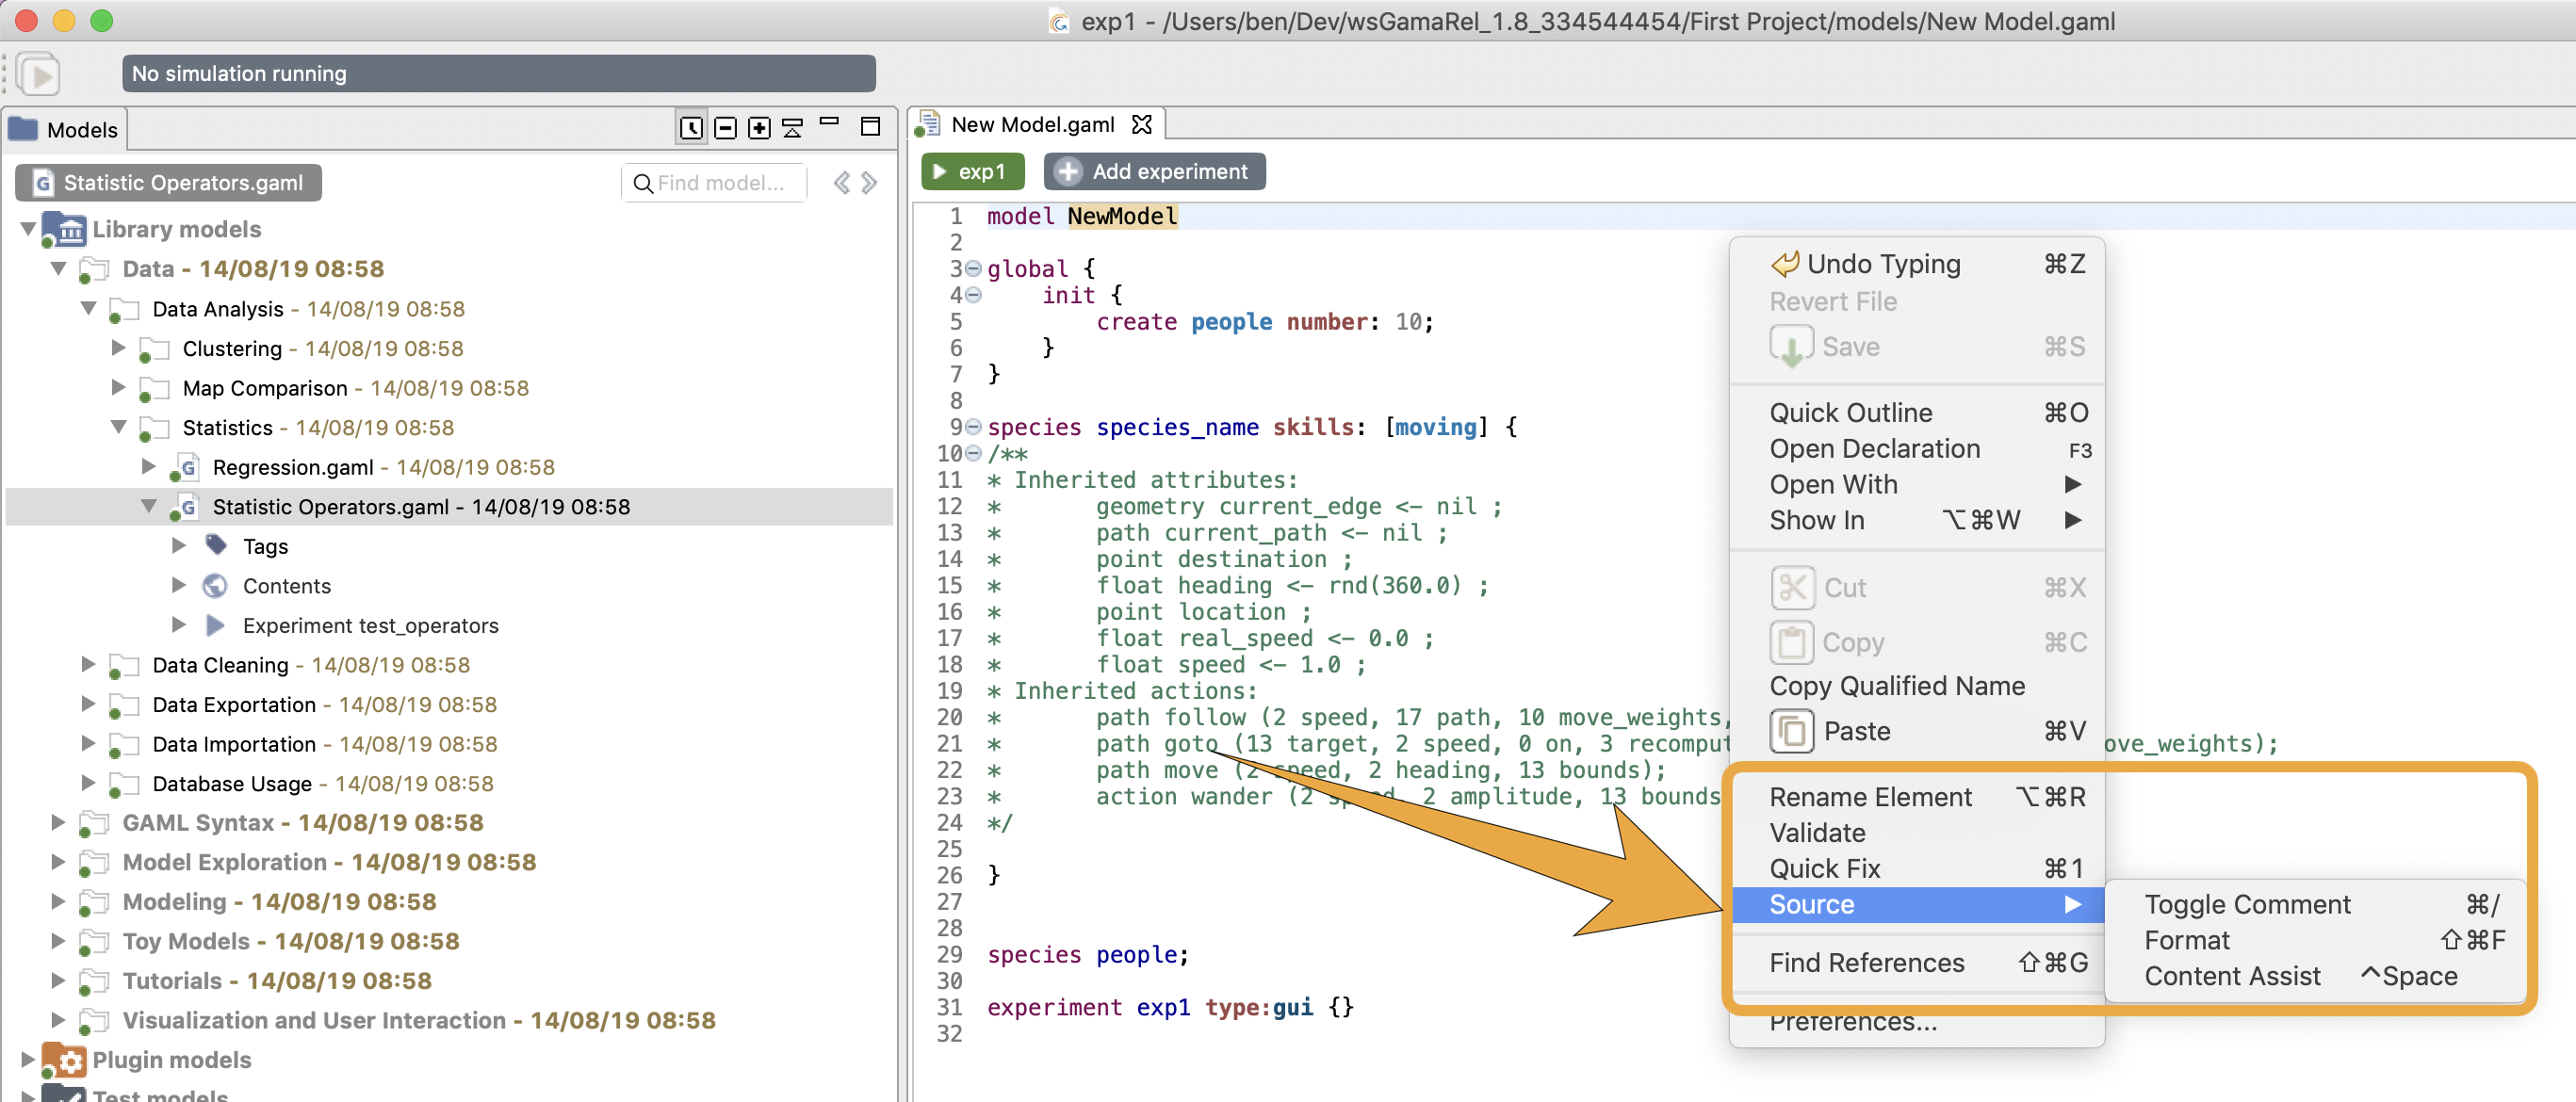
Some other tools are available in the contextual menu to help for the formatting and refactoring of the model:
Rename element
Once an element selected, this command allows the modeler to rename it. All the occurrences of this element name will be altered. This is particularly useful in a model when we want to refactor the model: e.g. rename an attribute and that this modification to be taken into account in all the model code.
Source > Comment
This command is used to comment a line (or a group of lines).
Source > Format
This useful feature re-indent automatically all your model.
Mini-map
The mini-map provides a view of the whole model in a very tiny font. It helps to have an overview of the model. The mini-map is a View that needs to be shown, from the View menu.
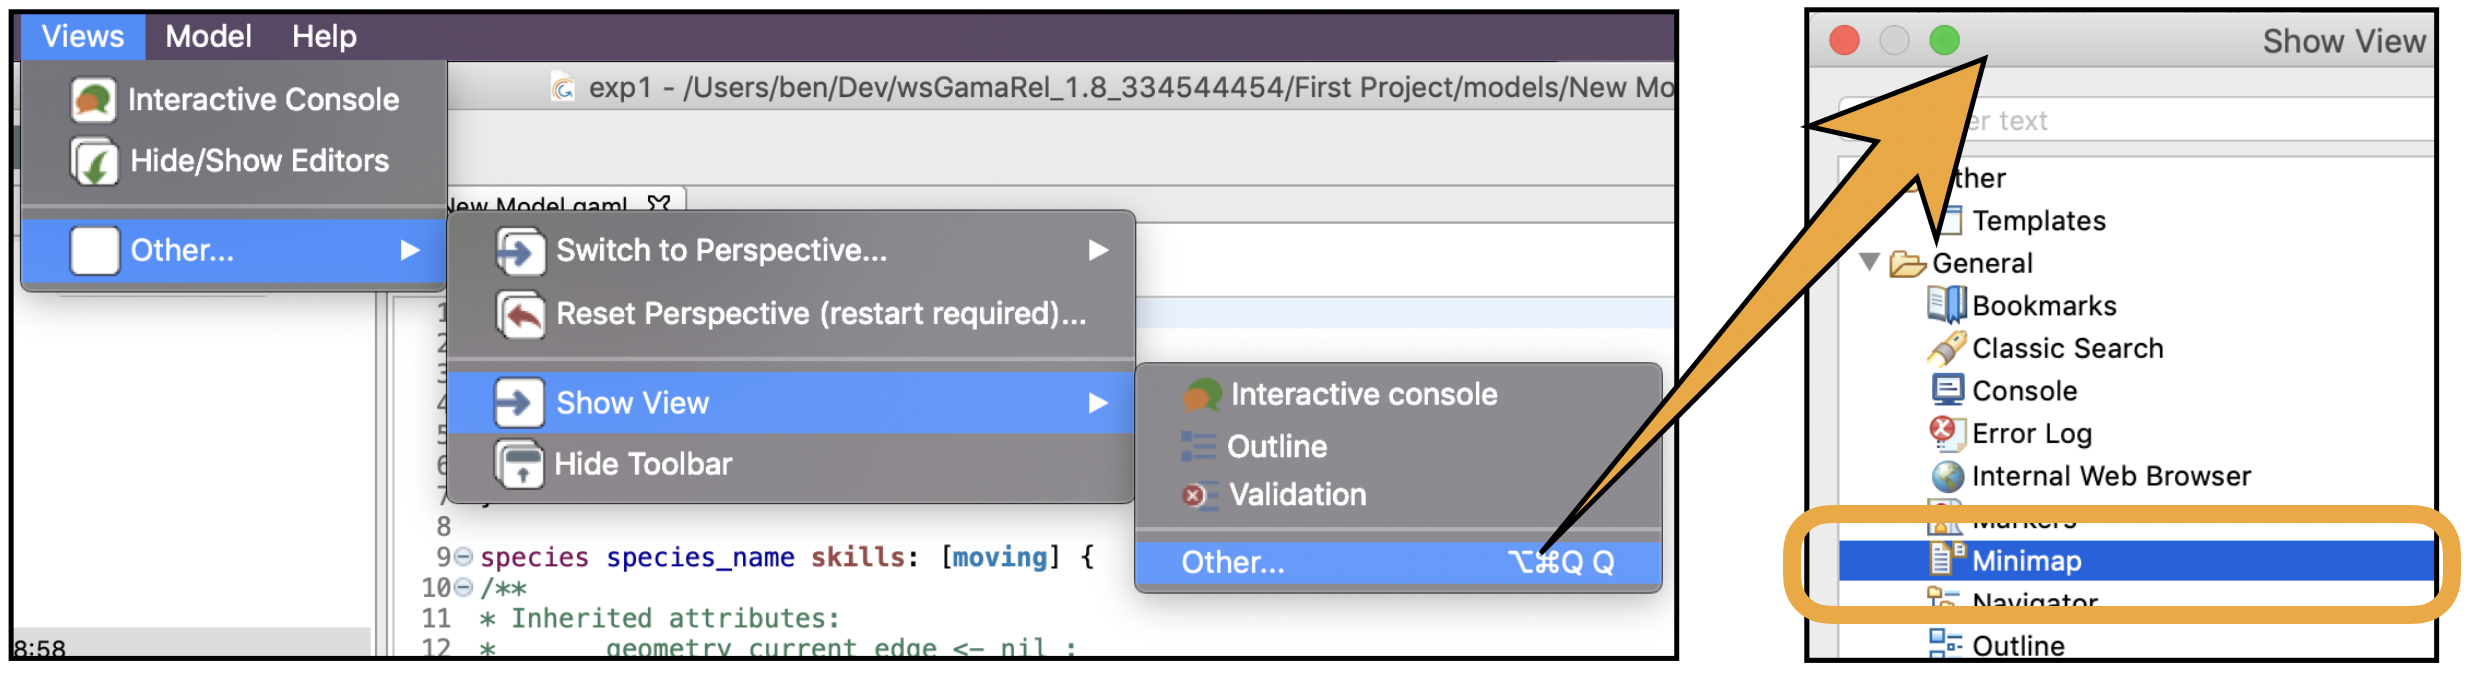
The mini-map view can be moved close to the editor. The modeler can navigate in the mini-map to move quickly between the various parts of the model.
