The GAML Editor - Generalities
The GAML Editor is a text editor that proposes several services to support the modeler in writing correct models: an integrated live validation system, a ribbon header that gives access to experiments, information, warning and error markers.
Table of contents
Creating a first model
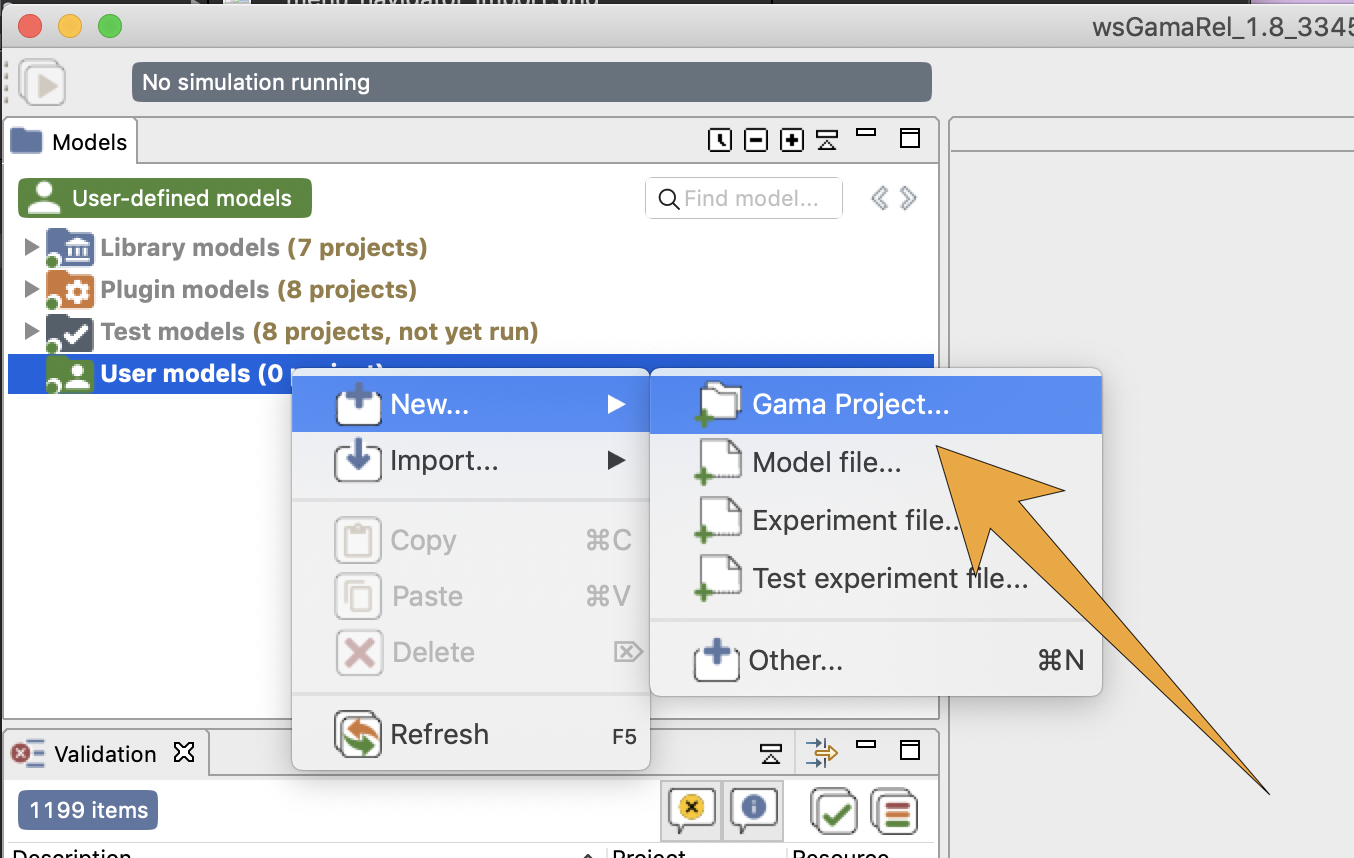
Editing a model requires that at least one project is created in User Models. If there is none, right-click on User Models and choose "New... > Gama Project..." (if you already have user projects and want to create a model in one of them, skip the next step).
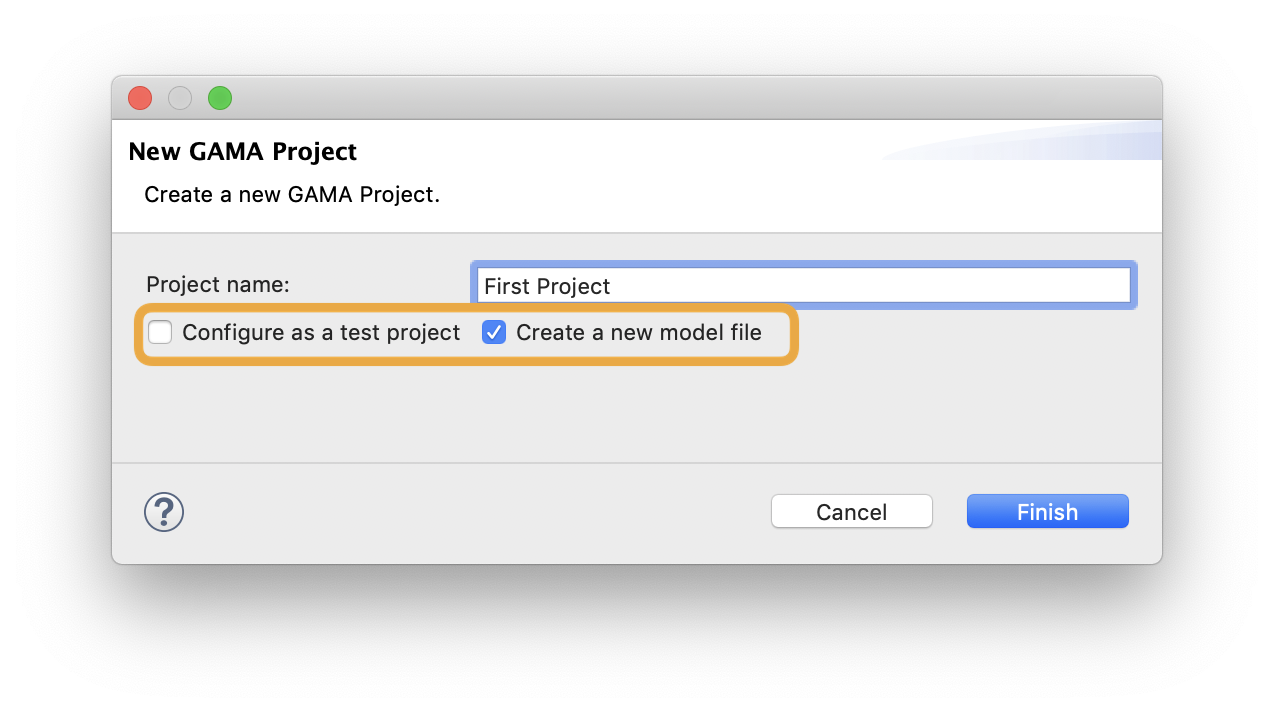
A dialog is then displayed, offering you to enter the name of the project. You can also choose whether you want to create at the same time a first model file and if you want the project contains test models. An error will be displayed if the project name already exists in the workspace, in which case you will have to change it. Two projects with similar names cannot coexist in the workspace (even if they belong to different categories).
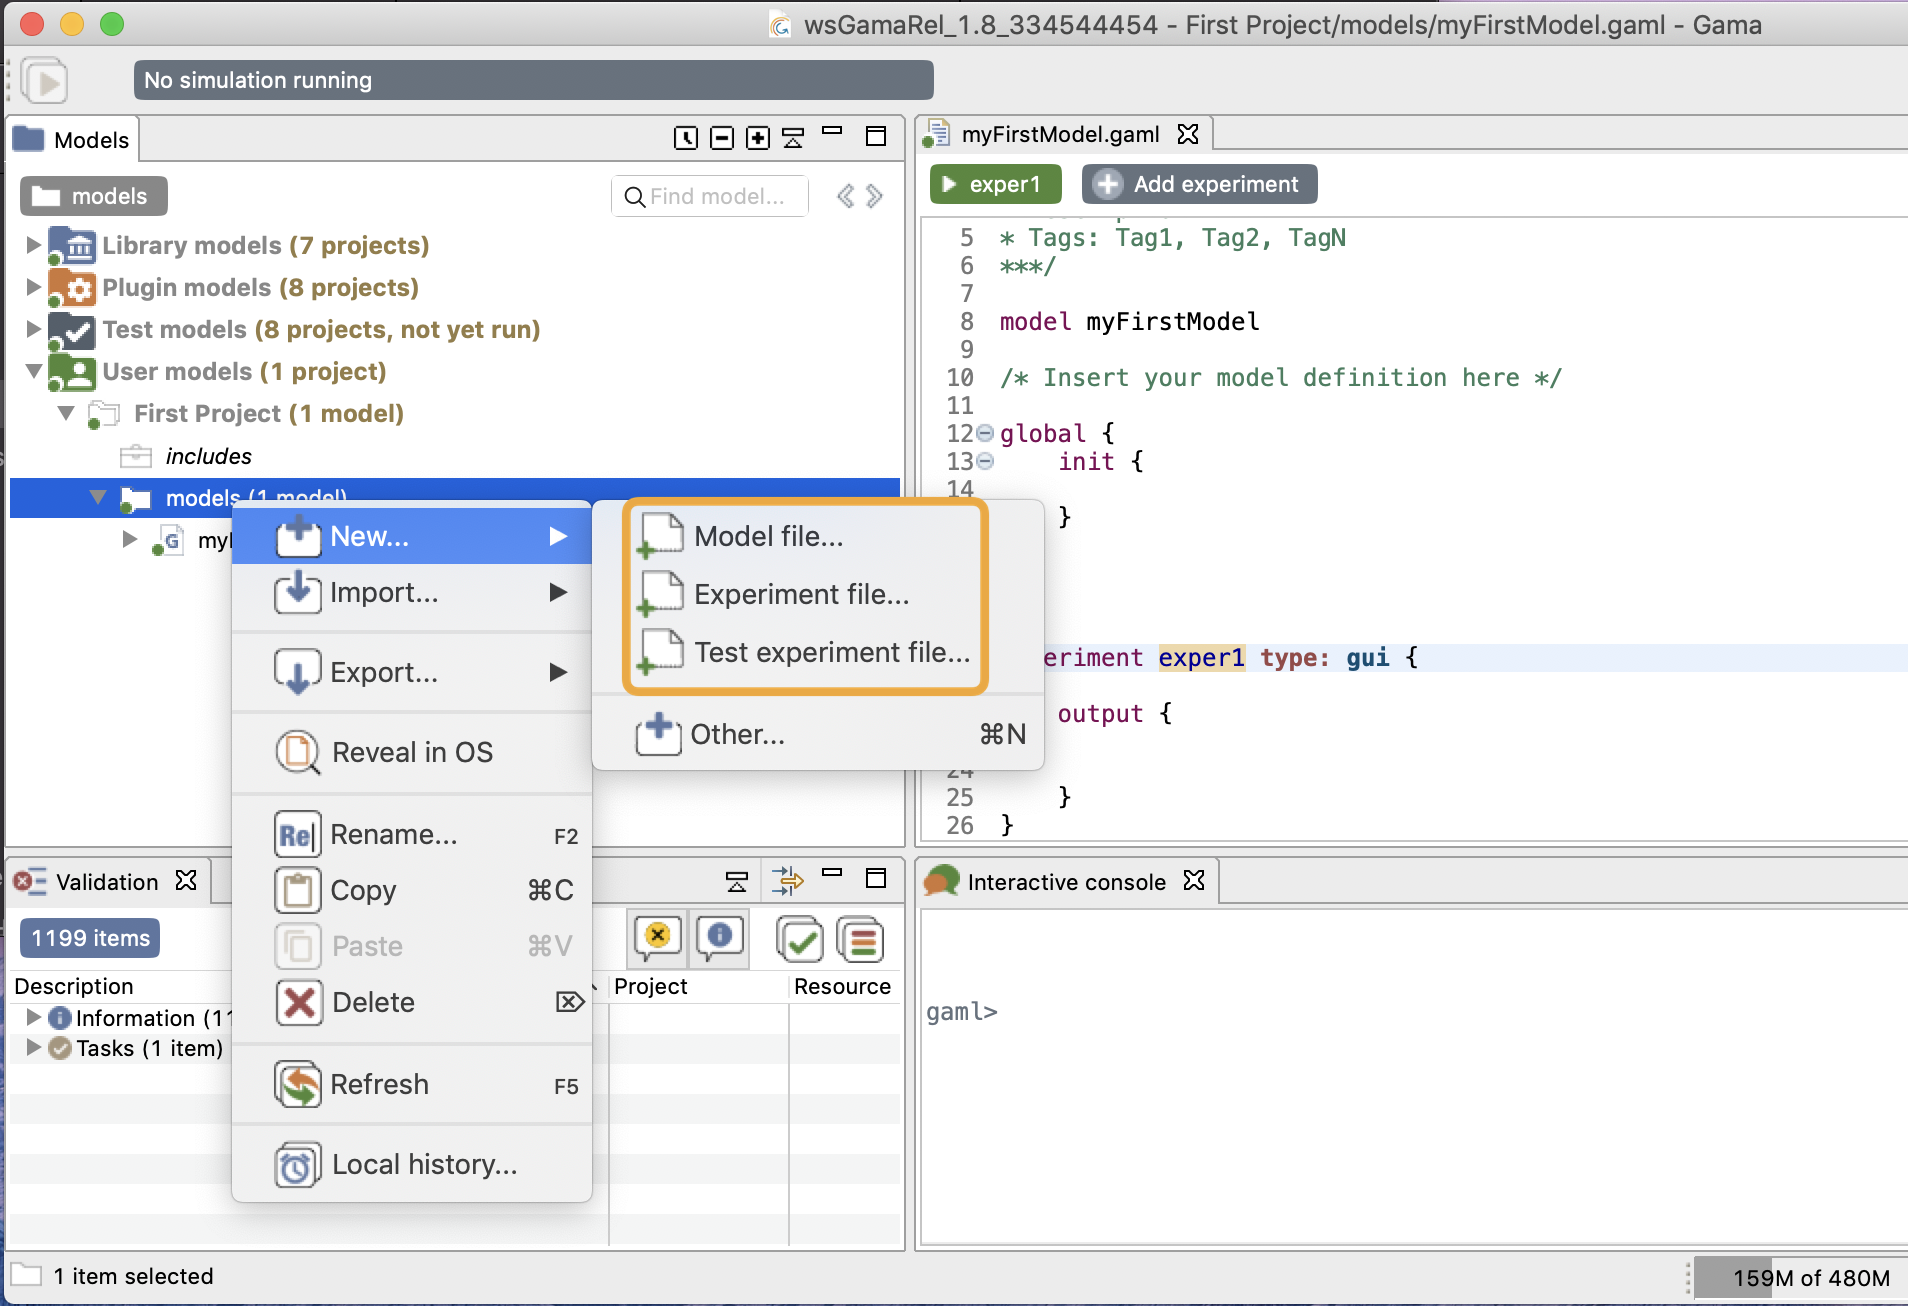
If you want to create a new model file in your project, navigate to it and right-click on it and on the command "New ...>". You have a choice between three kinds of file:
- Model file: to create a normal
.gamlmodel file used to define your model. - Experiment file: to create a file containing only an experiment on an existing model.
- Test experiment file: to create unit test experiment. It is typically used to define some unit test on a given model, to ensure its quality and prevent regression bugs.
Create a new model or test file
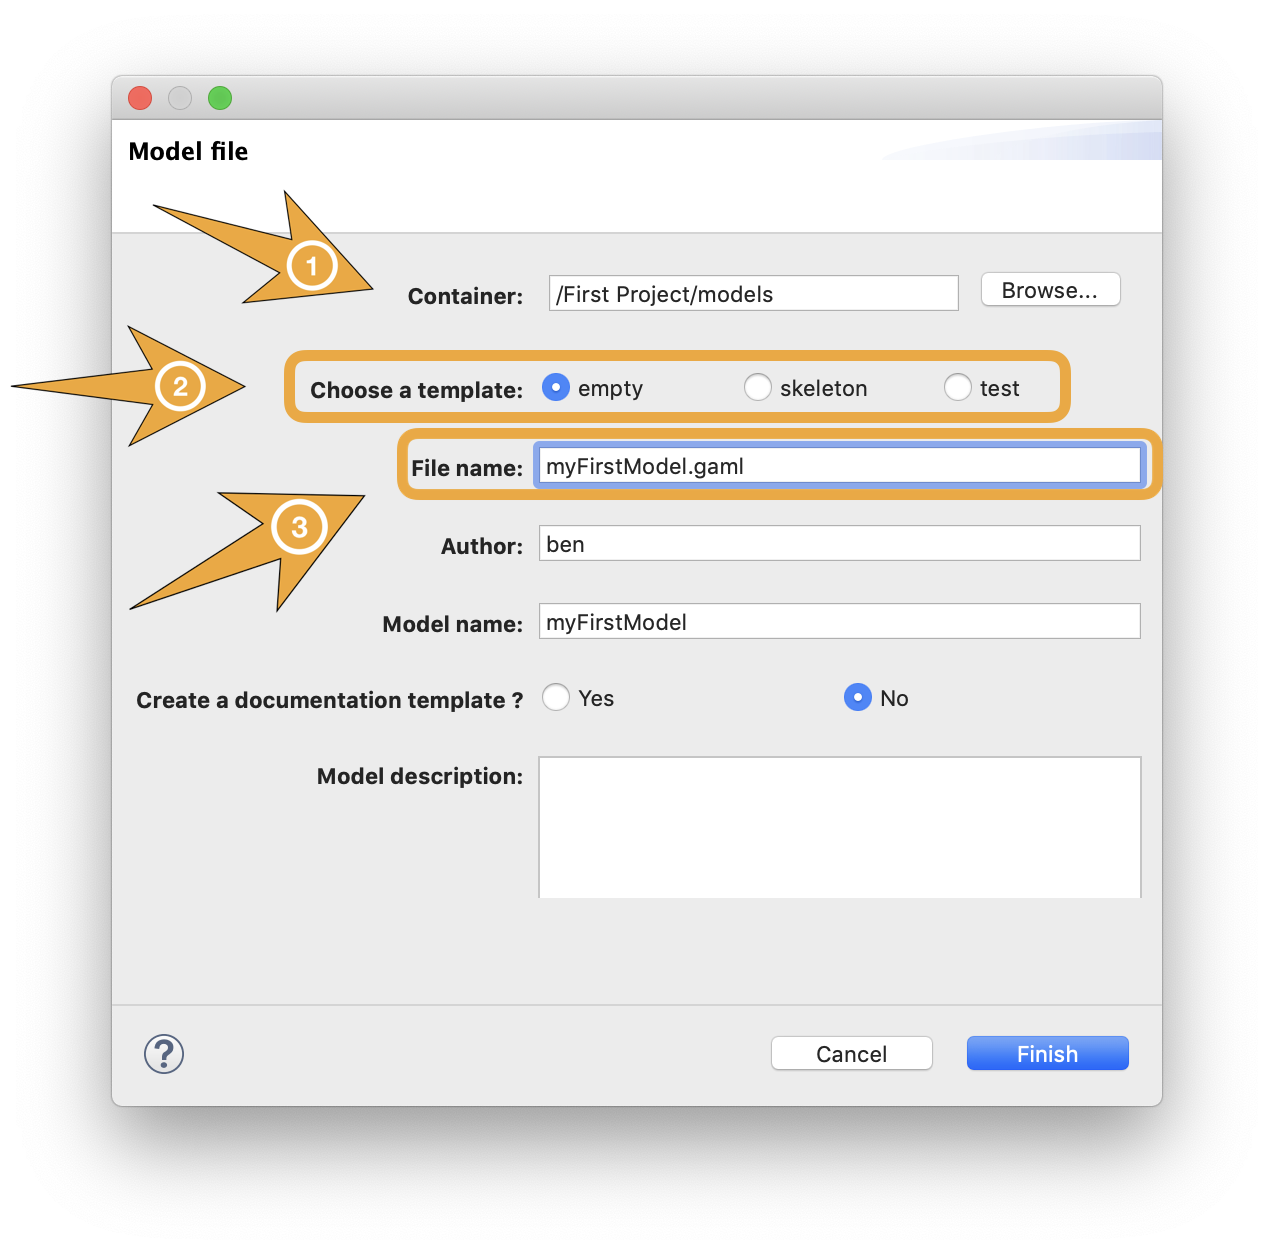
A new dialog is displayed, which asks for several required or optional information:
- The Container is normally the name of the project you have selected, but you can choose to place the file elsewhere. An error will be displayed if the container does not exist (yet) in the workspace.
- You can then choose whether you want to create an empty file, a file with already a skeleton of model (with the main needed elements of a model file) or simply a test model.
- Finally, you are invited to give this file a name. An error is displayed if this name already exists in this project. The name of the model, which is by default computed with respect to the name of the file, can be actually completely different (but it may not contain white spaces or punctuation characters). The name of the author, as well as the textual description of the model and the creation of an HTML documentation, are optional.
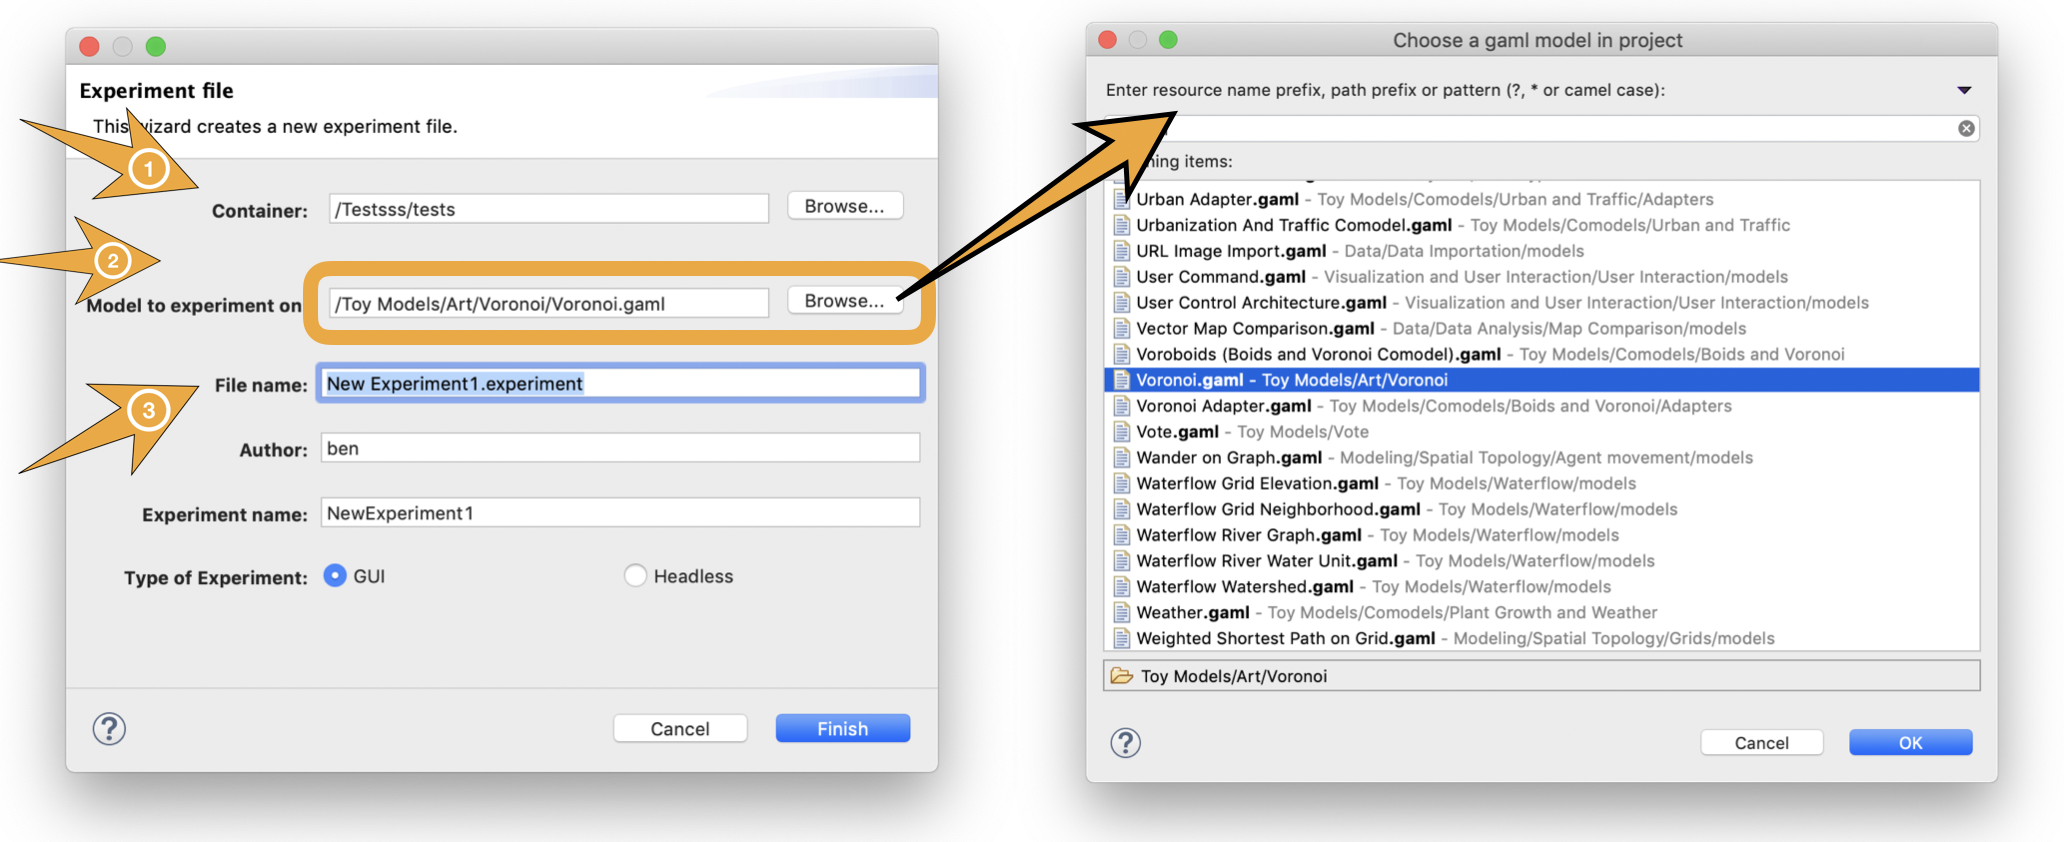
Create a new experiment file
A new dialog is displayed, which asks for several required or optional information:
- The Container is normally the name of the project you have selected, but you can choose to place the file elsewhere. An error will be displayed if the container does not exist (yet) in the workspace.
- You can then choose the model you want to experiment on. Just type the path toward this gaml model, or browse and select one among all the models existing in the workspace.
- Finally, you are invited to give this file a name. An error is displayed if this name already exists in this project. The name of the model, which is by default computed with respect to the name of the file, can be actually completely different (but it may not contain white spaces or punctuation characters). The name of the author, as well as the textual description of the model and the creation of an HTML documentation, are optional.
Status of models in editors
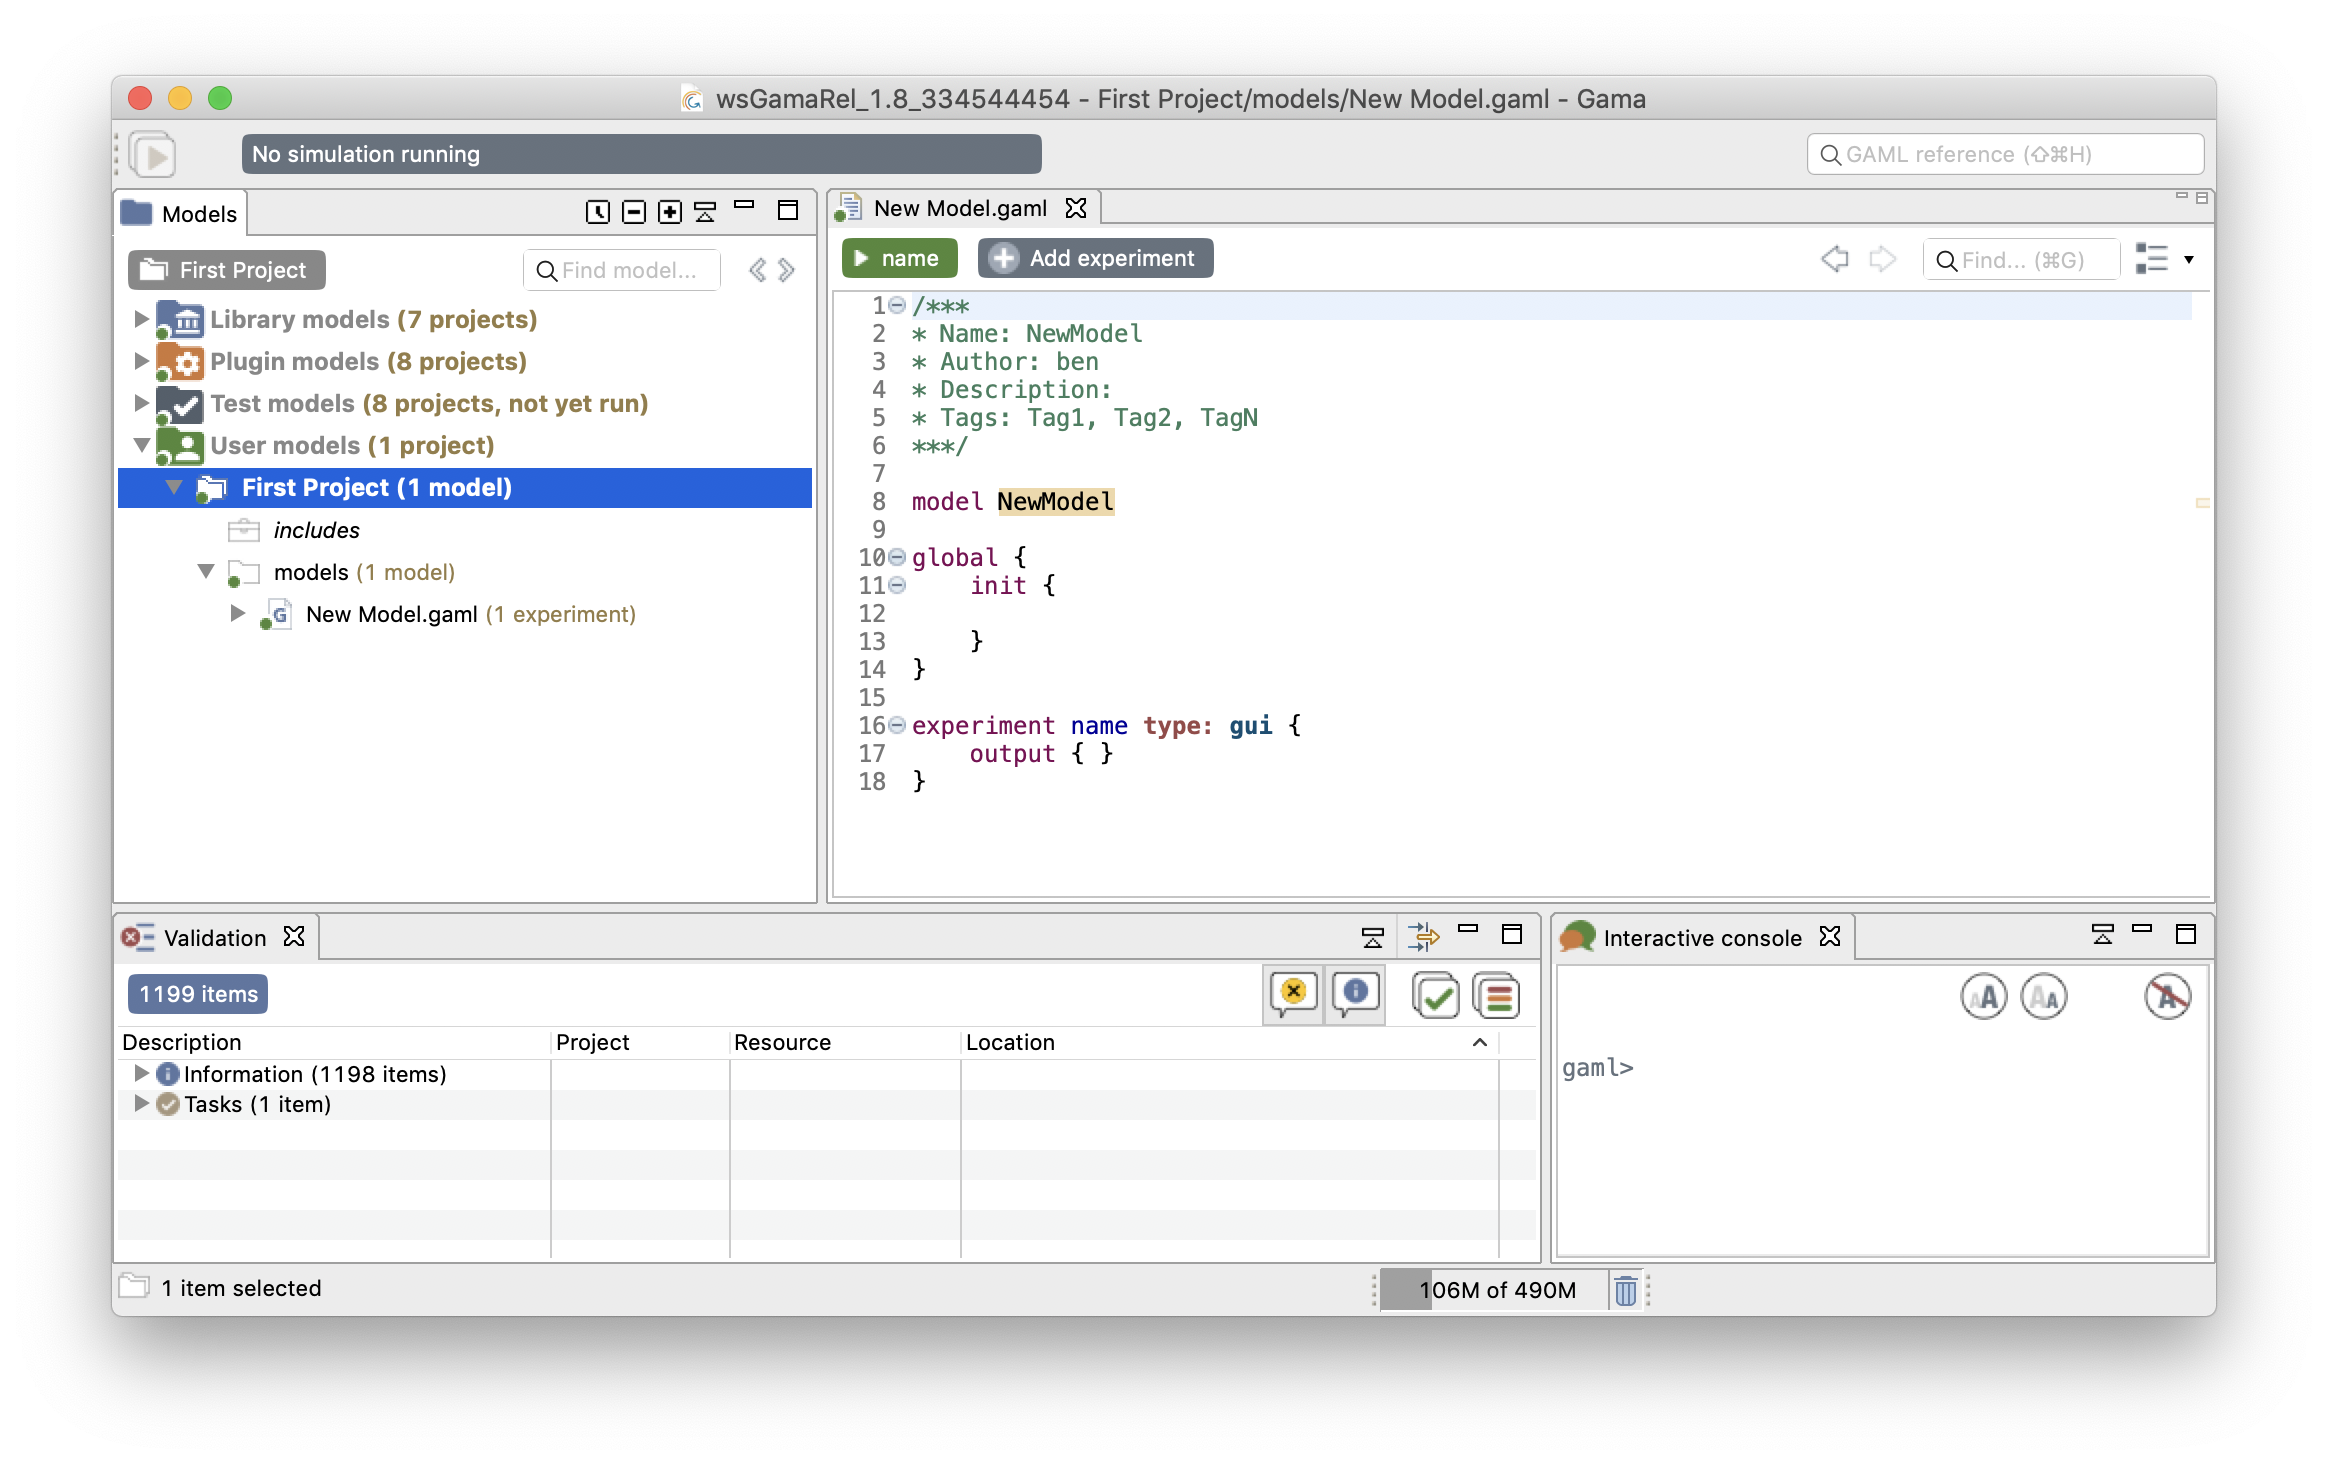
Once this dialog is filled and accepted, GAMA will display the new "empty" model.
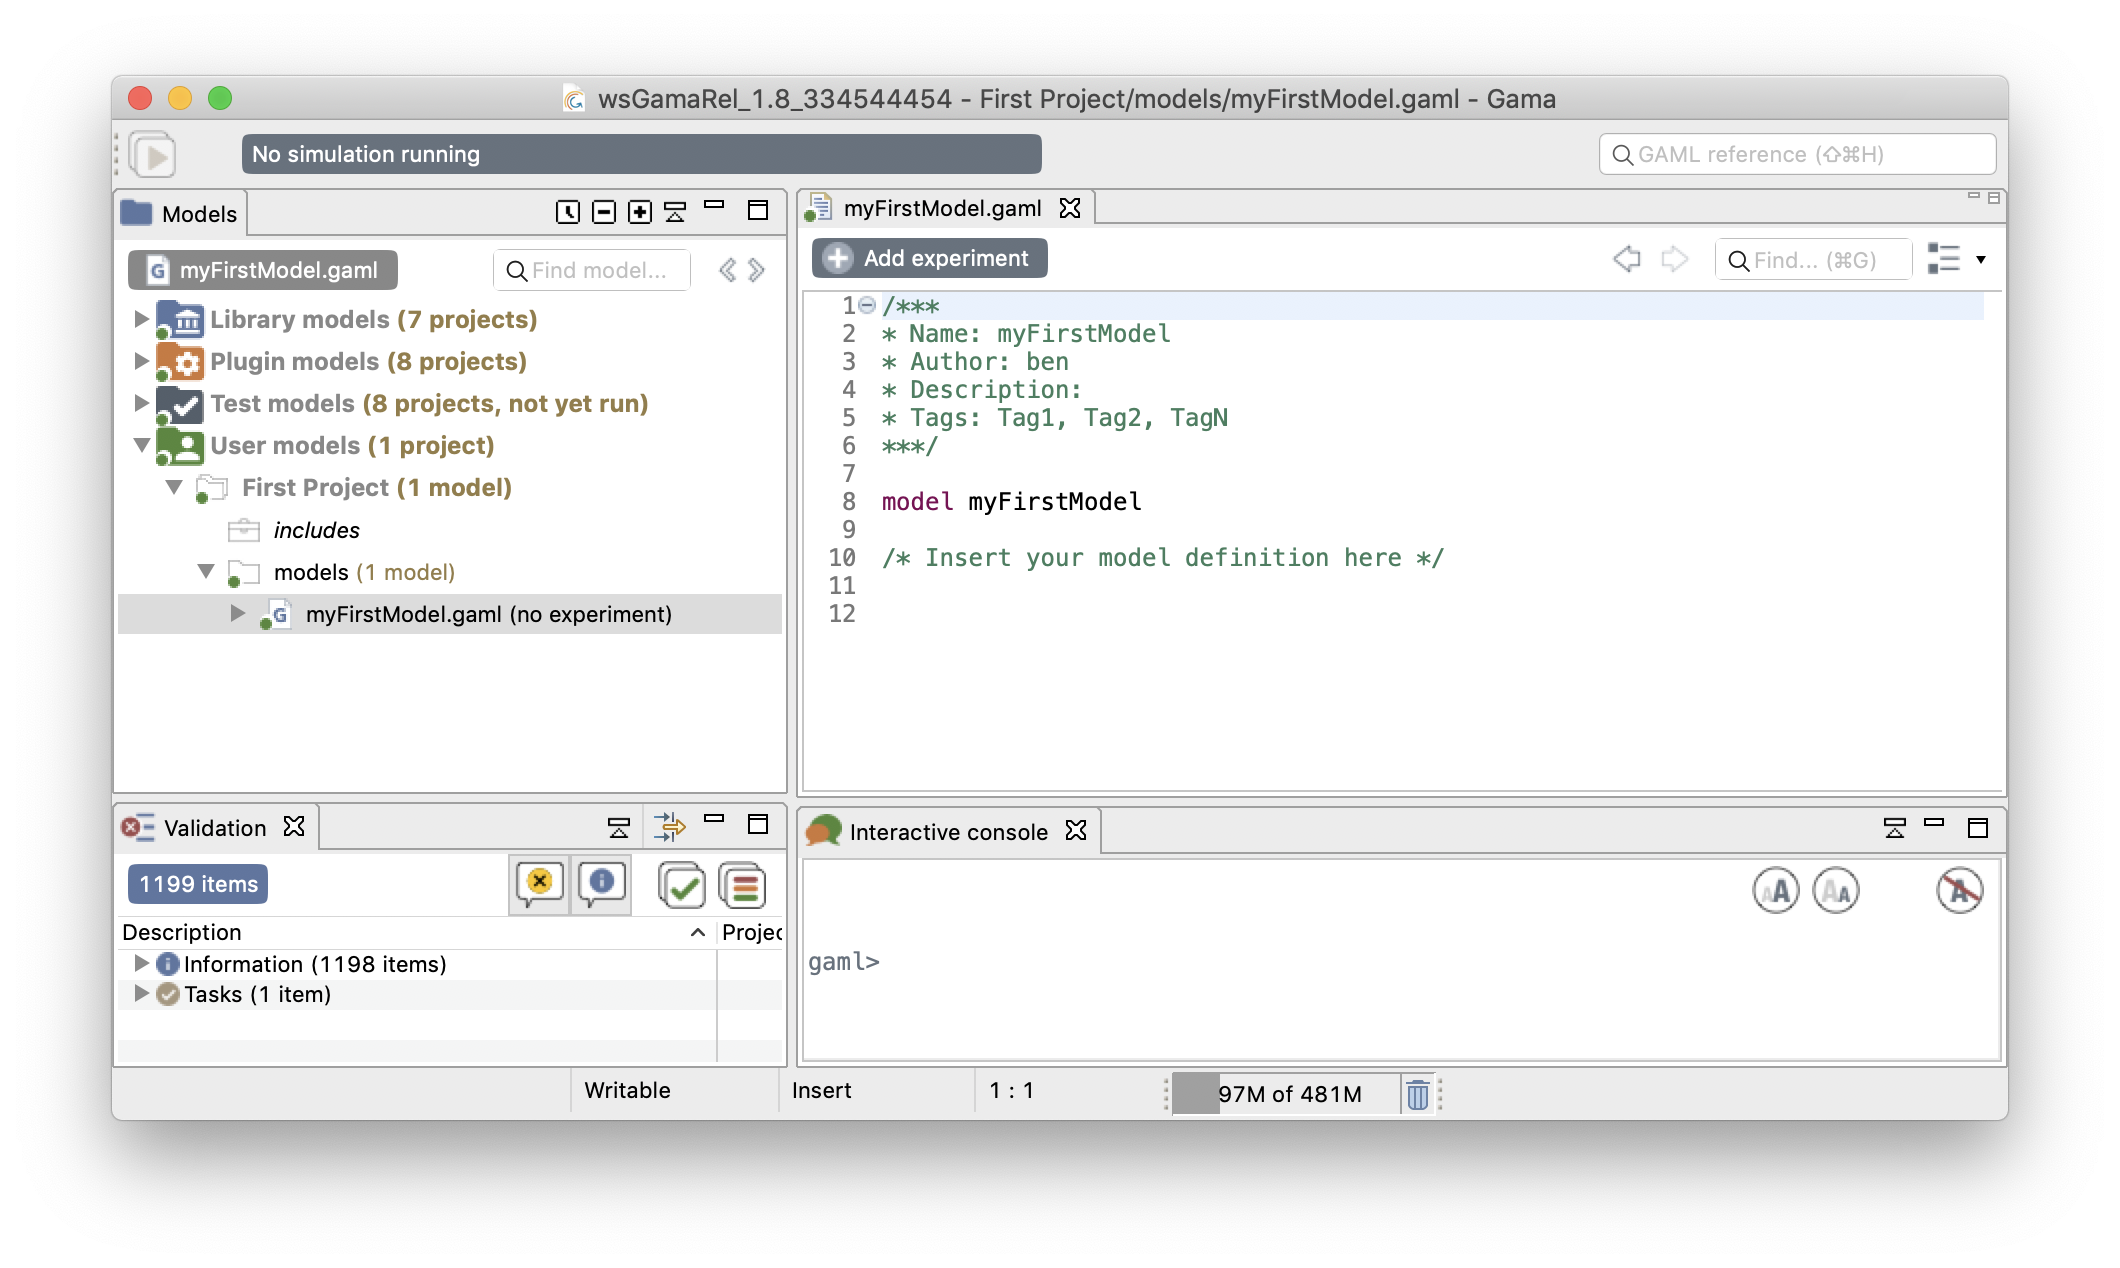
Although GAML files are just plain text files, and can, therefore, be produced or modified in any text processor, using the dedicated GAML editor offers many advantages, among which the live display of errors and model statuses. A model can actually be in four different states, which are visually accessible above the editing area: Functional (grey color), Experimentable (green color), InError (red color), InImportedError (red color). See the section on model compilation for more precise information about these statuses.
In its initial state, a model is always in the Functional state (when it is empty), which means it compiles without problems, but cannot be used to launch experiments. If the model is created with a skeleton, it is Experimentable. The InError state, depicted below, occurs when the file contains errors (syntactic or semantic ones).
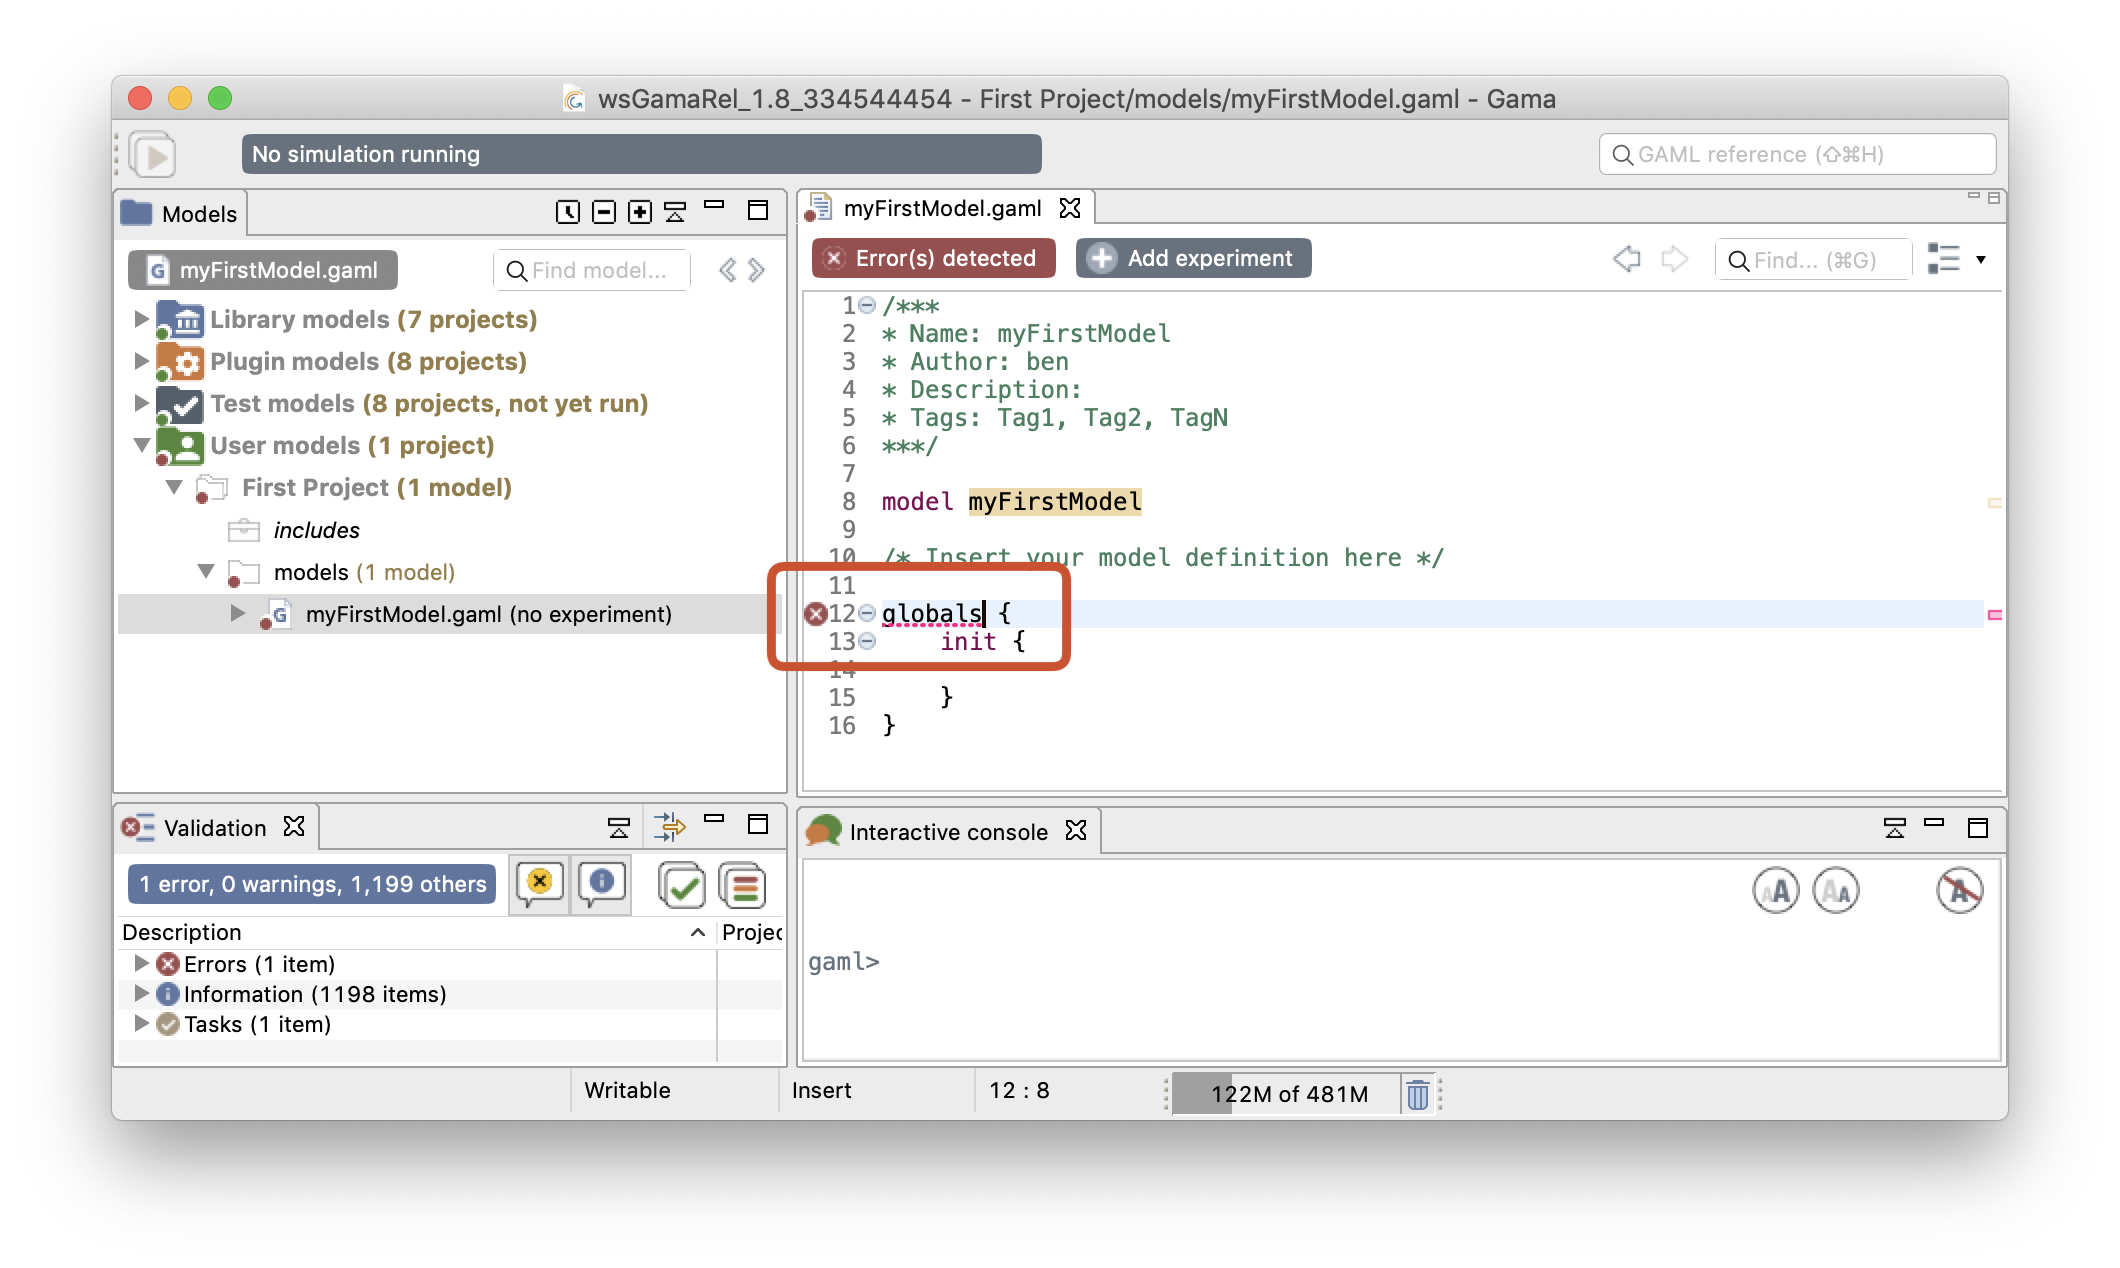
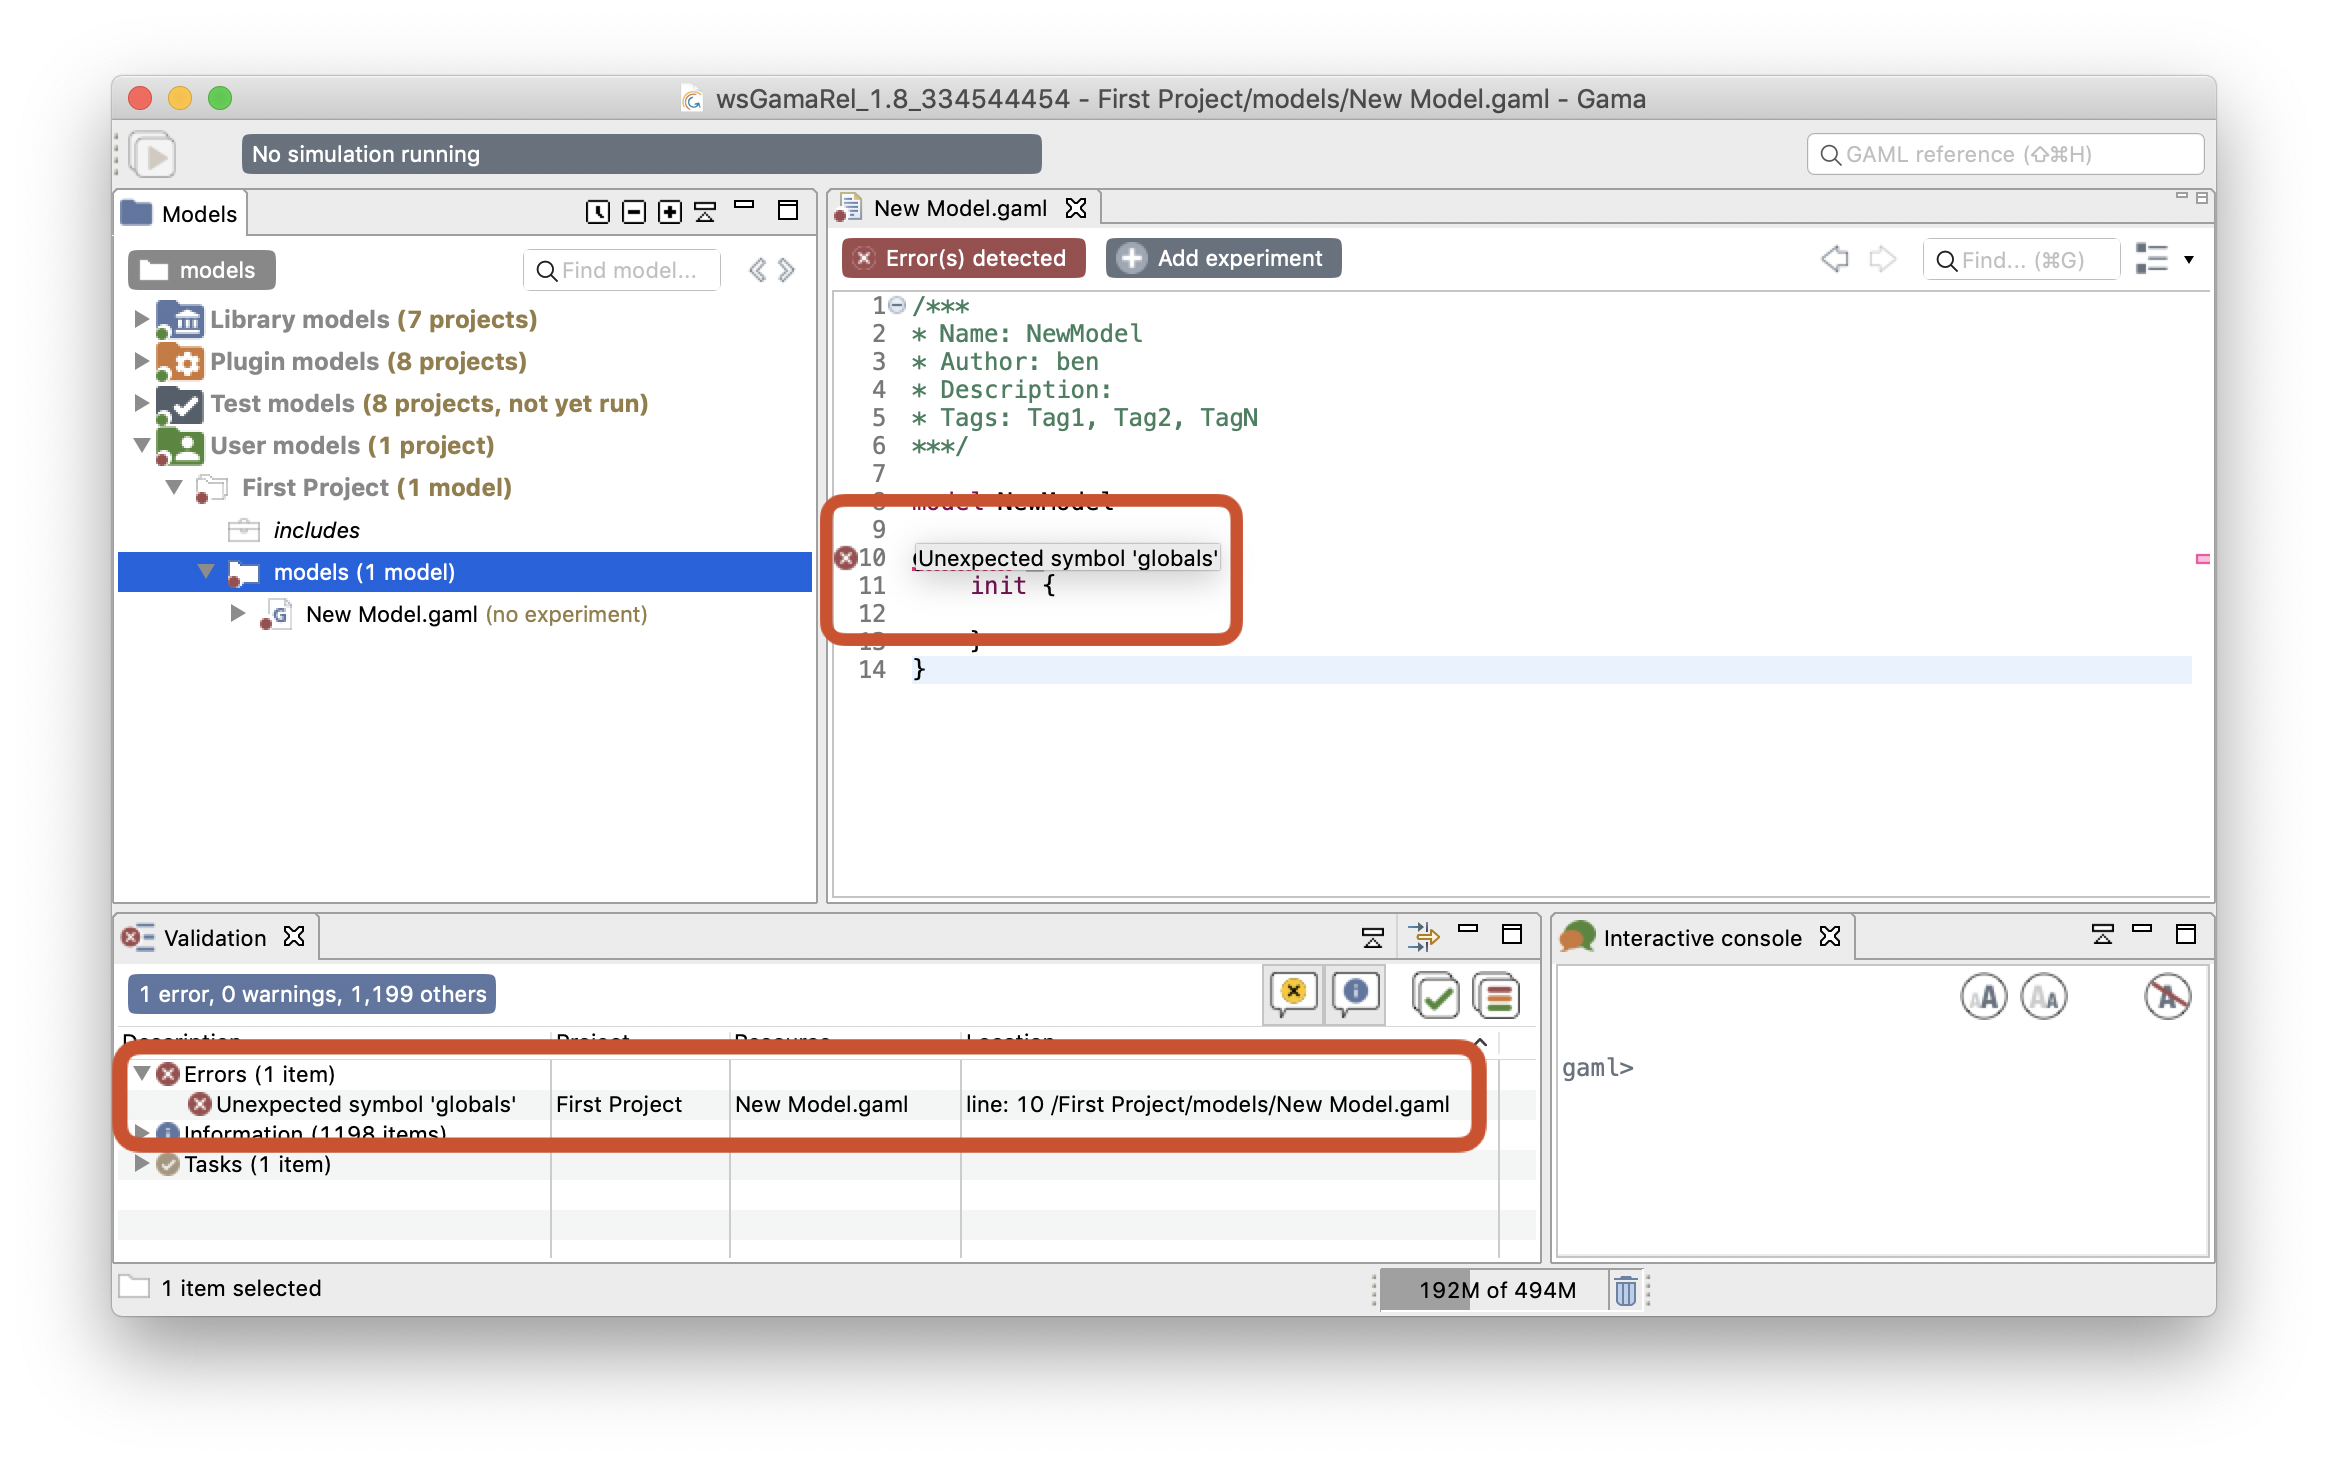
While the file is not saved, these errors remain displayed in the editor and nowhere else. If you save the file, they are now considered as "workspace errors" and get displayed in the "Syntax errors" view below the editor and explanation is available on the error icon in the GAML editor.
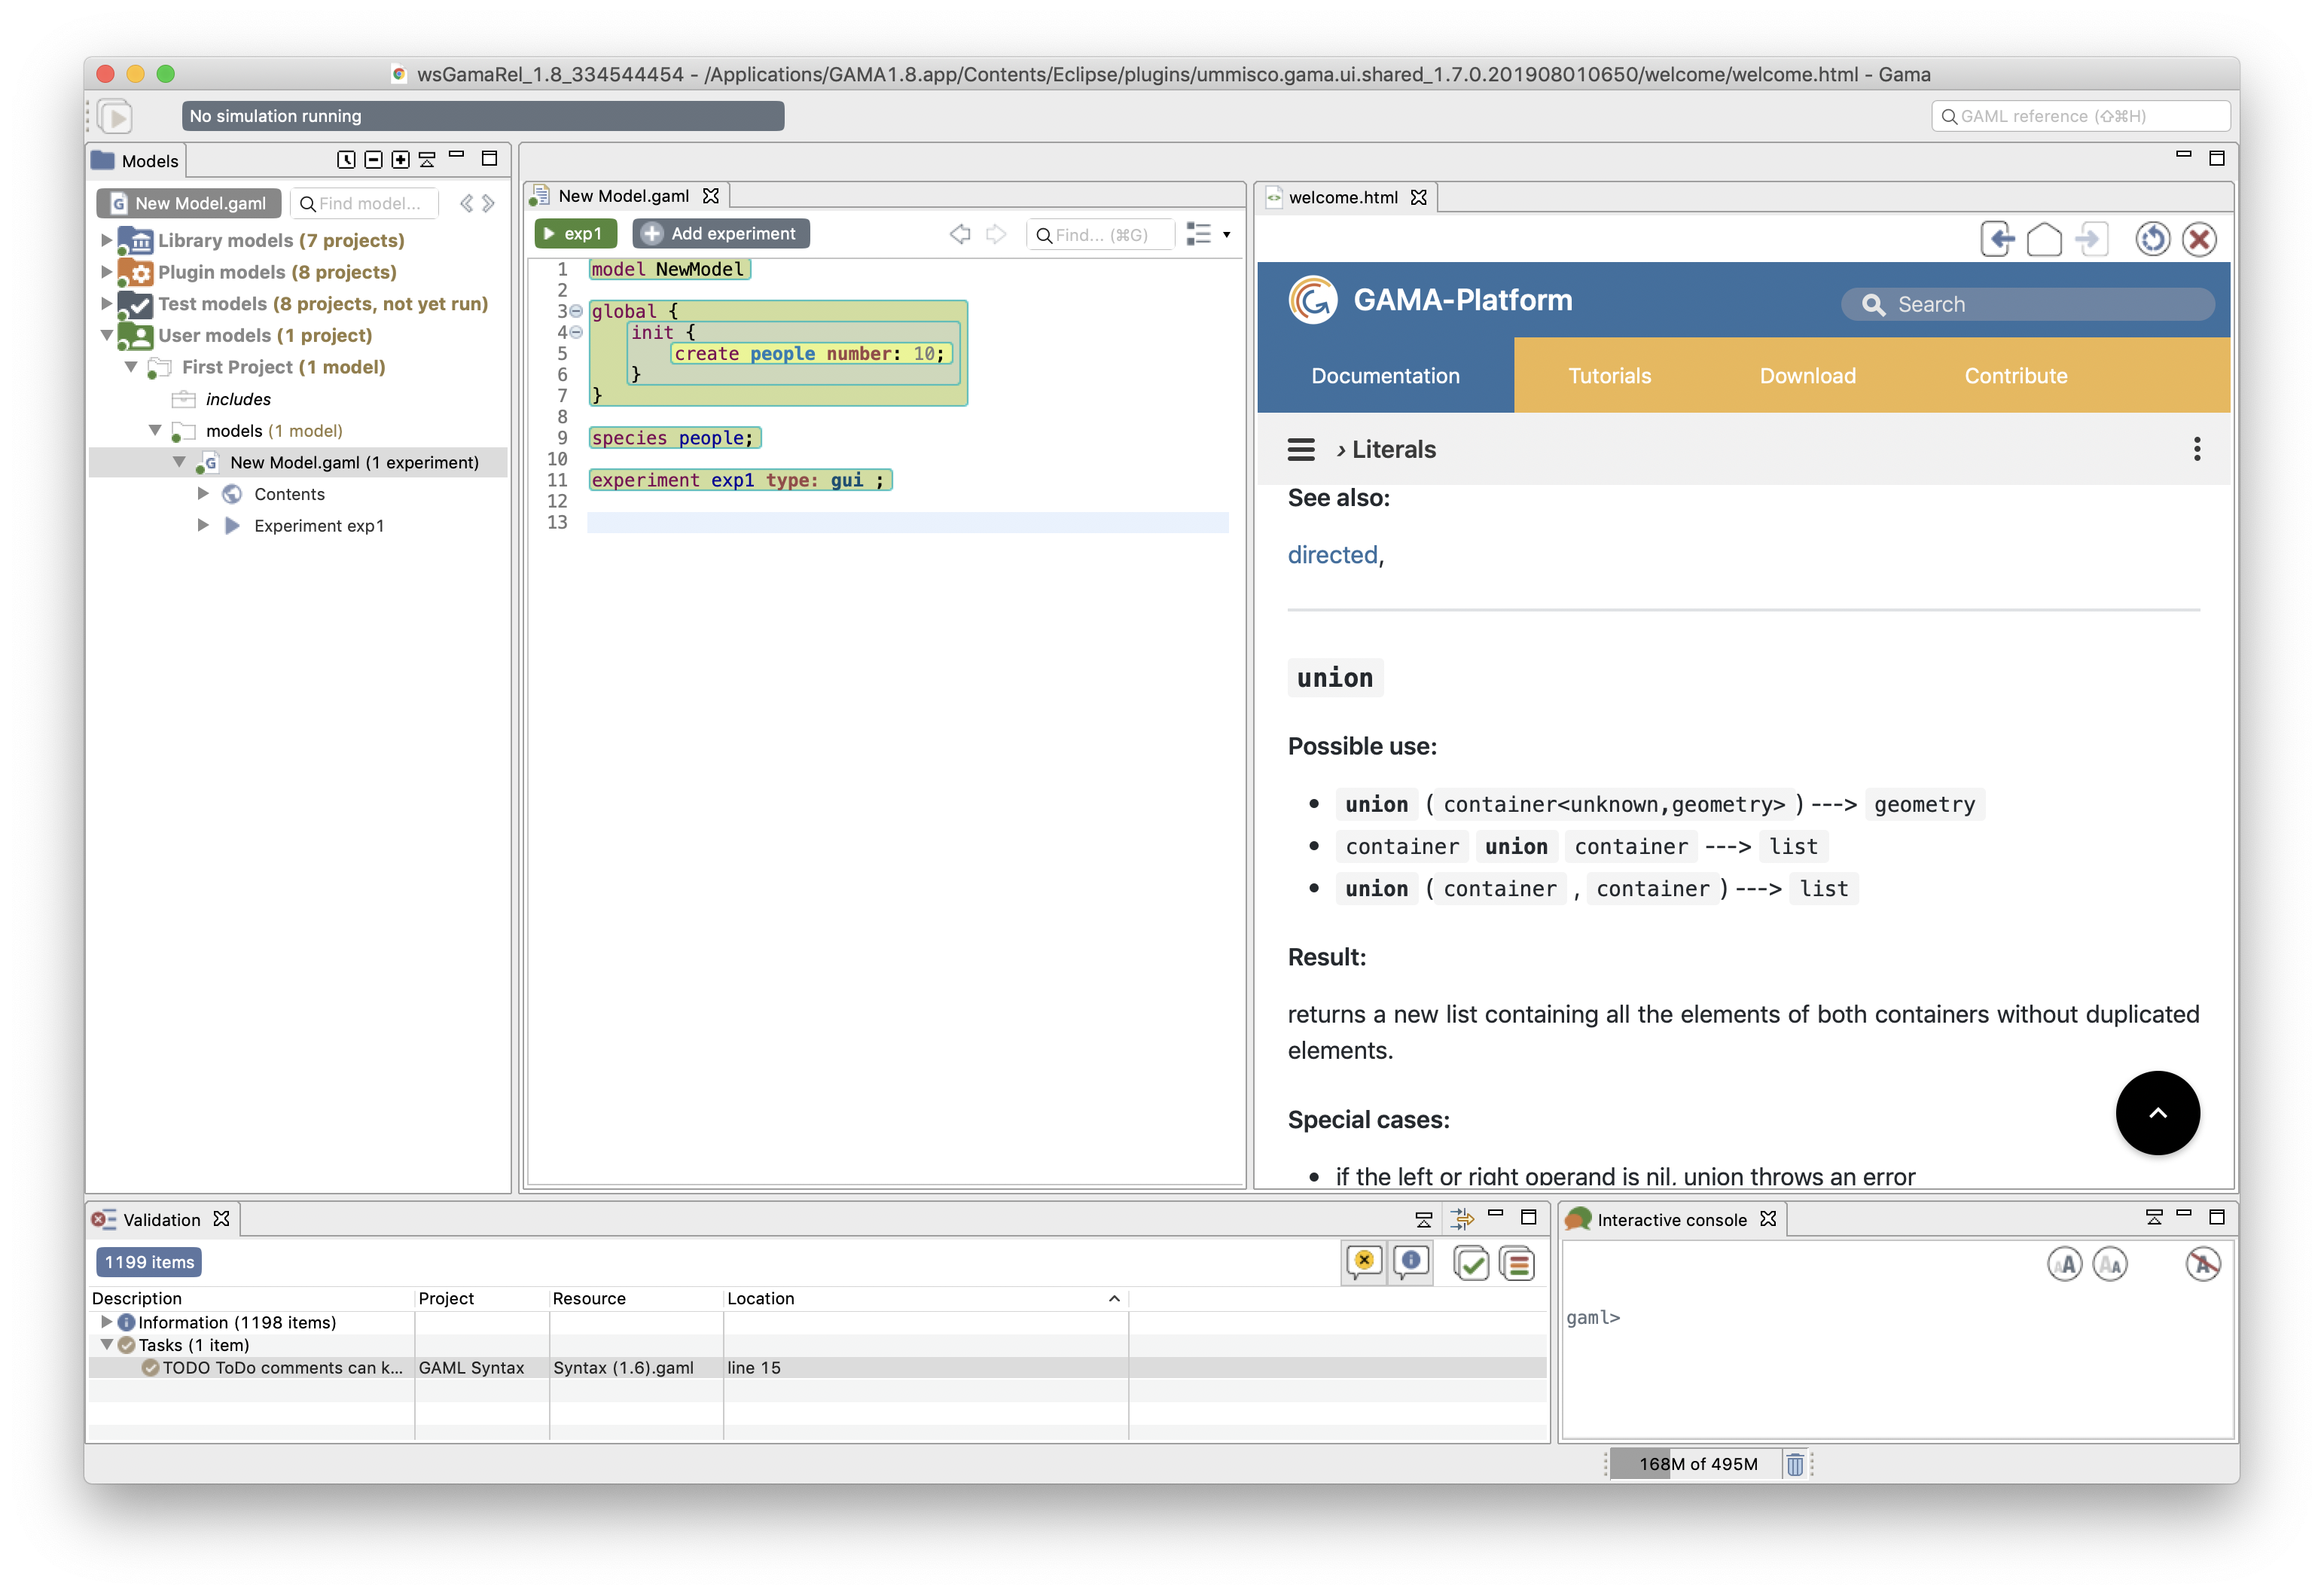
Reaching the Experimentable state requires that all errors are eliminated and that at least one experiment is defined in the model, which is the case now in our toy model. The experiment is immediately displayed as a button in the toolbar, and clicking on it will allow to launch this experiment on your model. See the section about running experiments for more information on this point.
Experiment buttons are updated in real-time to reflect what is in your code. If more than one experiment is defined, corresponding buttons will be displayed in addition to the first one.
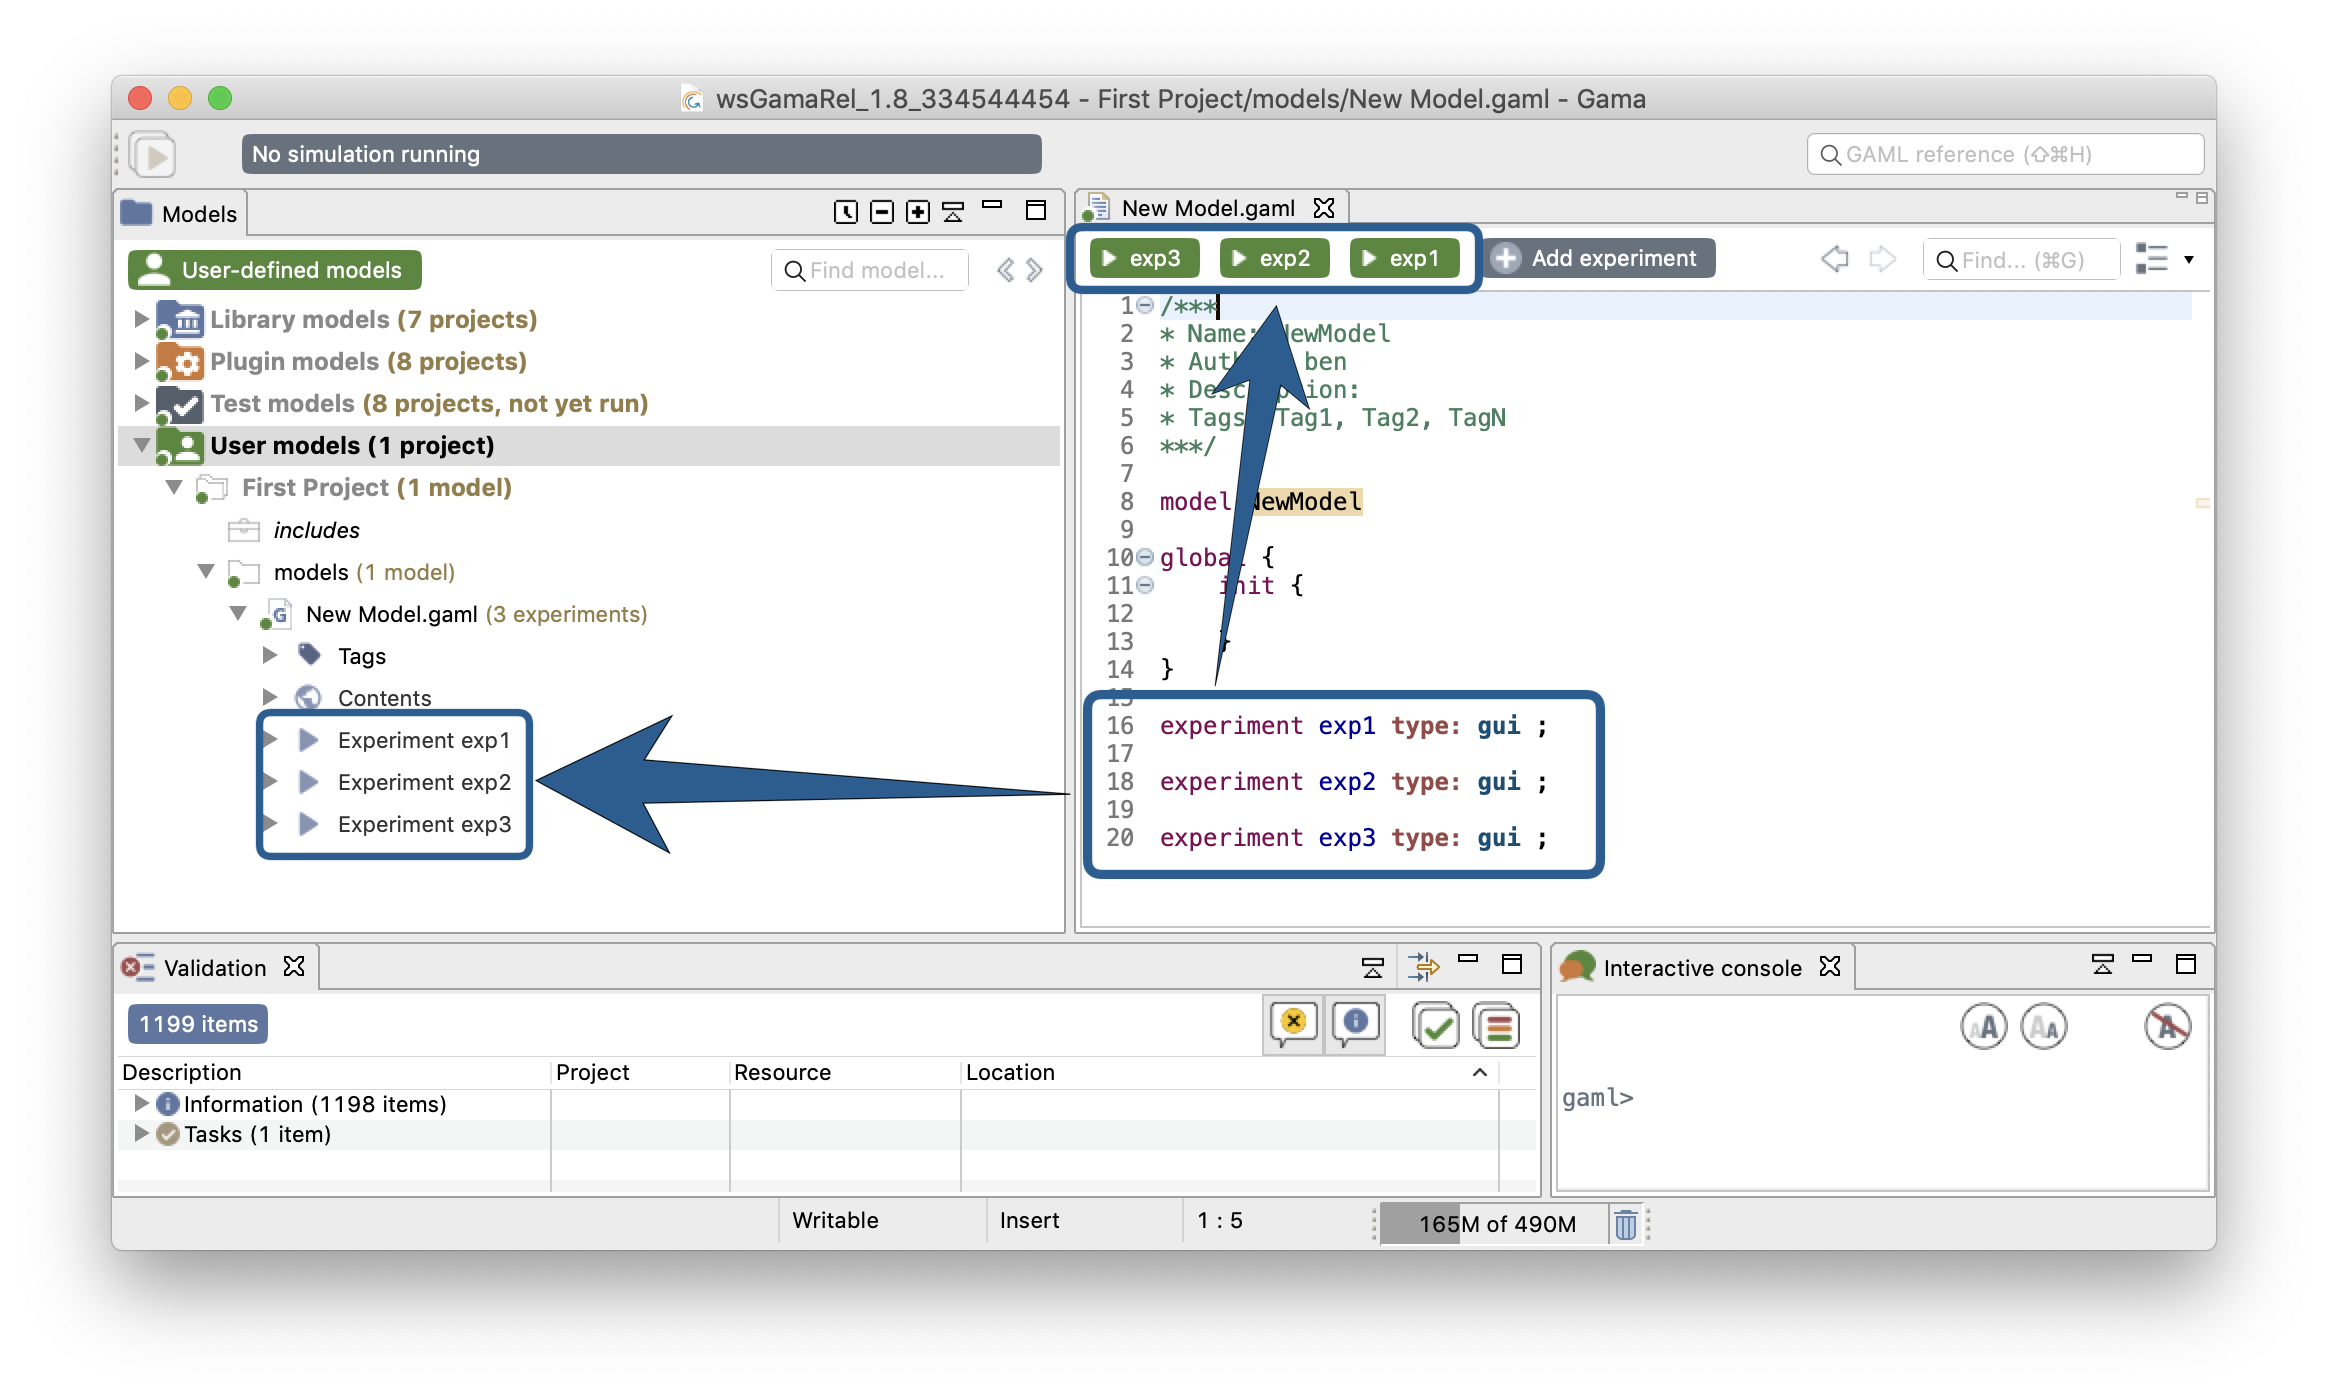
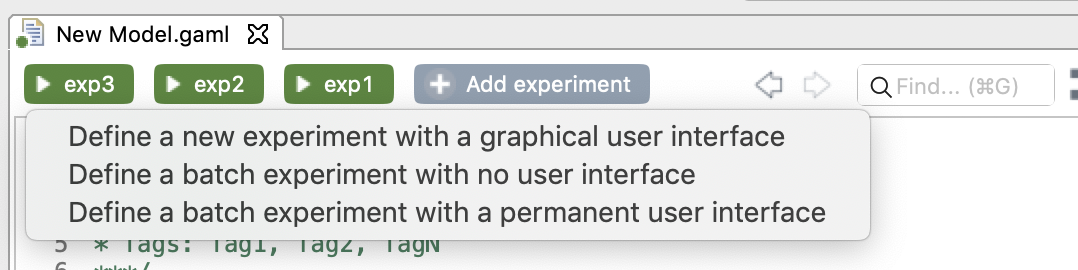
The toolbar on the top of the GAML editor displays, in addition to the green experiment buttons, a button to add an experiment in the current model.
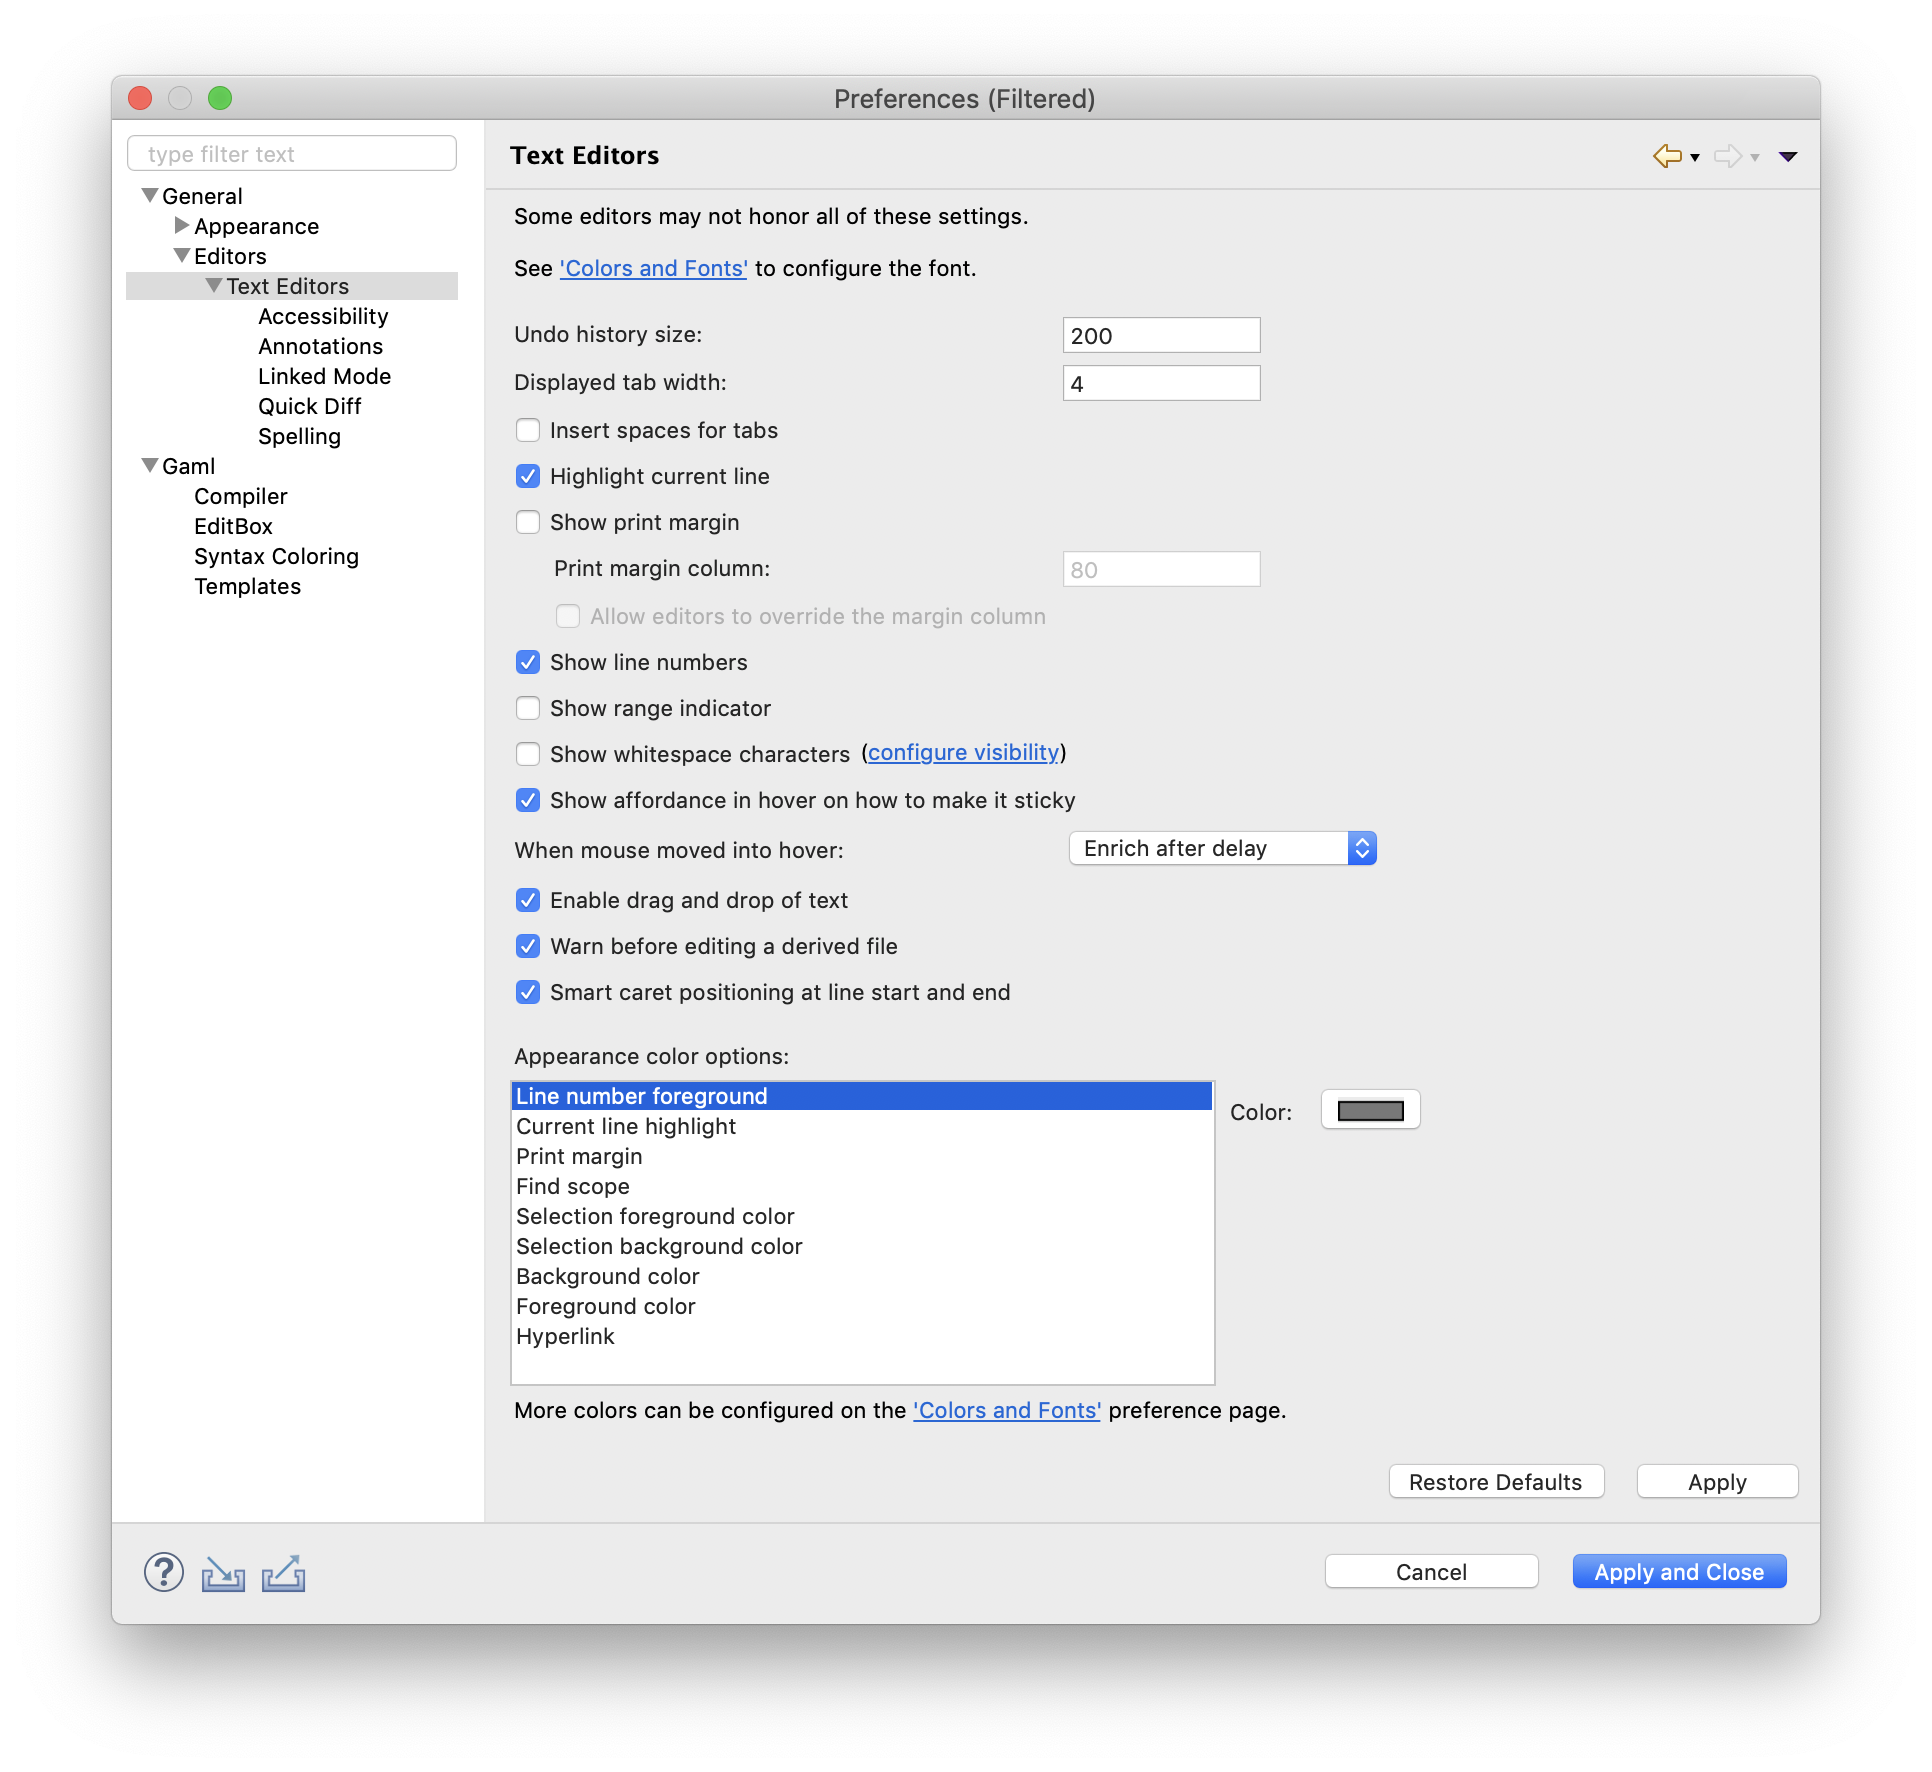
Editor Preferences
Text editing in general, and especially in Eclipse-based editors, sports several options and preferences. You might want to turn off/on the numbering of the lines, change the fonts used, change the colors used to highlight the code, etc. All of these preferences are accessible from the "Preferences..." item of the editor contextual menu.
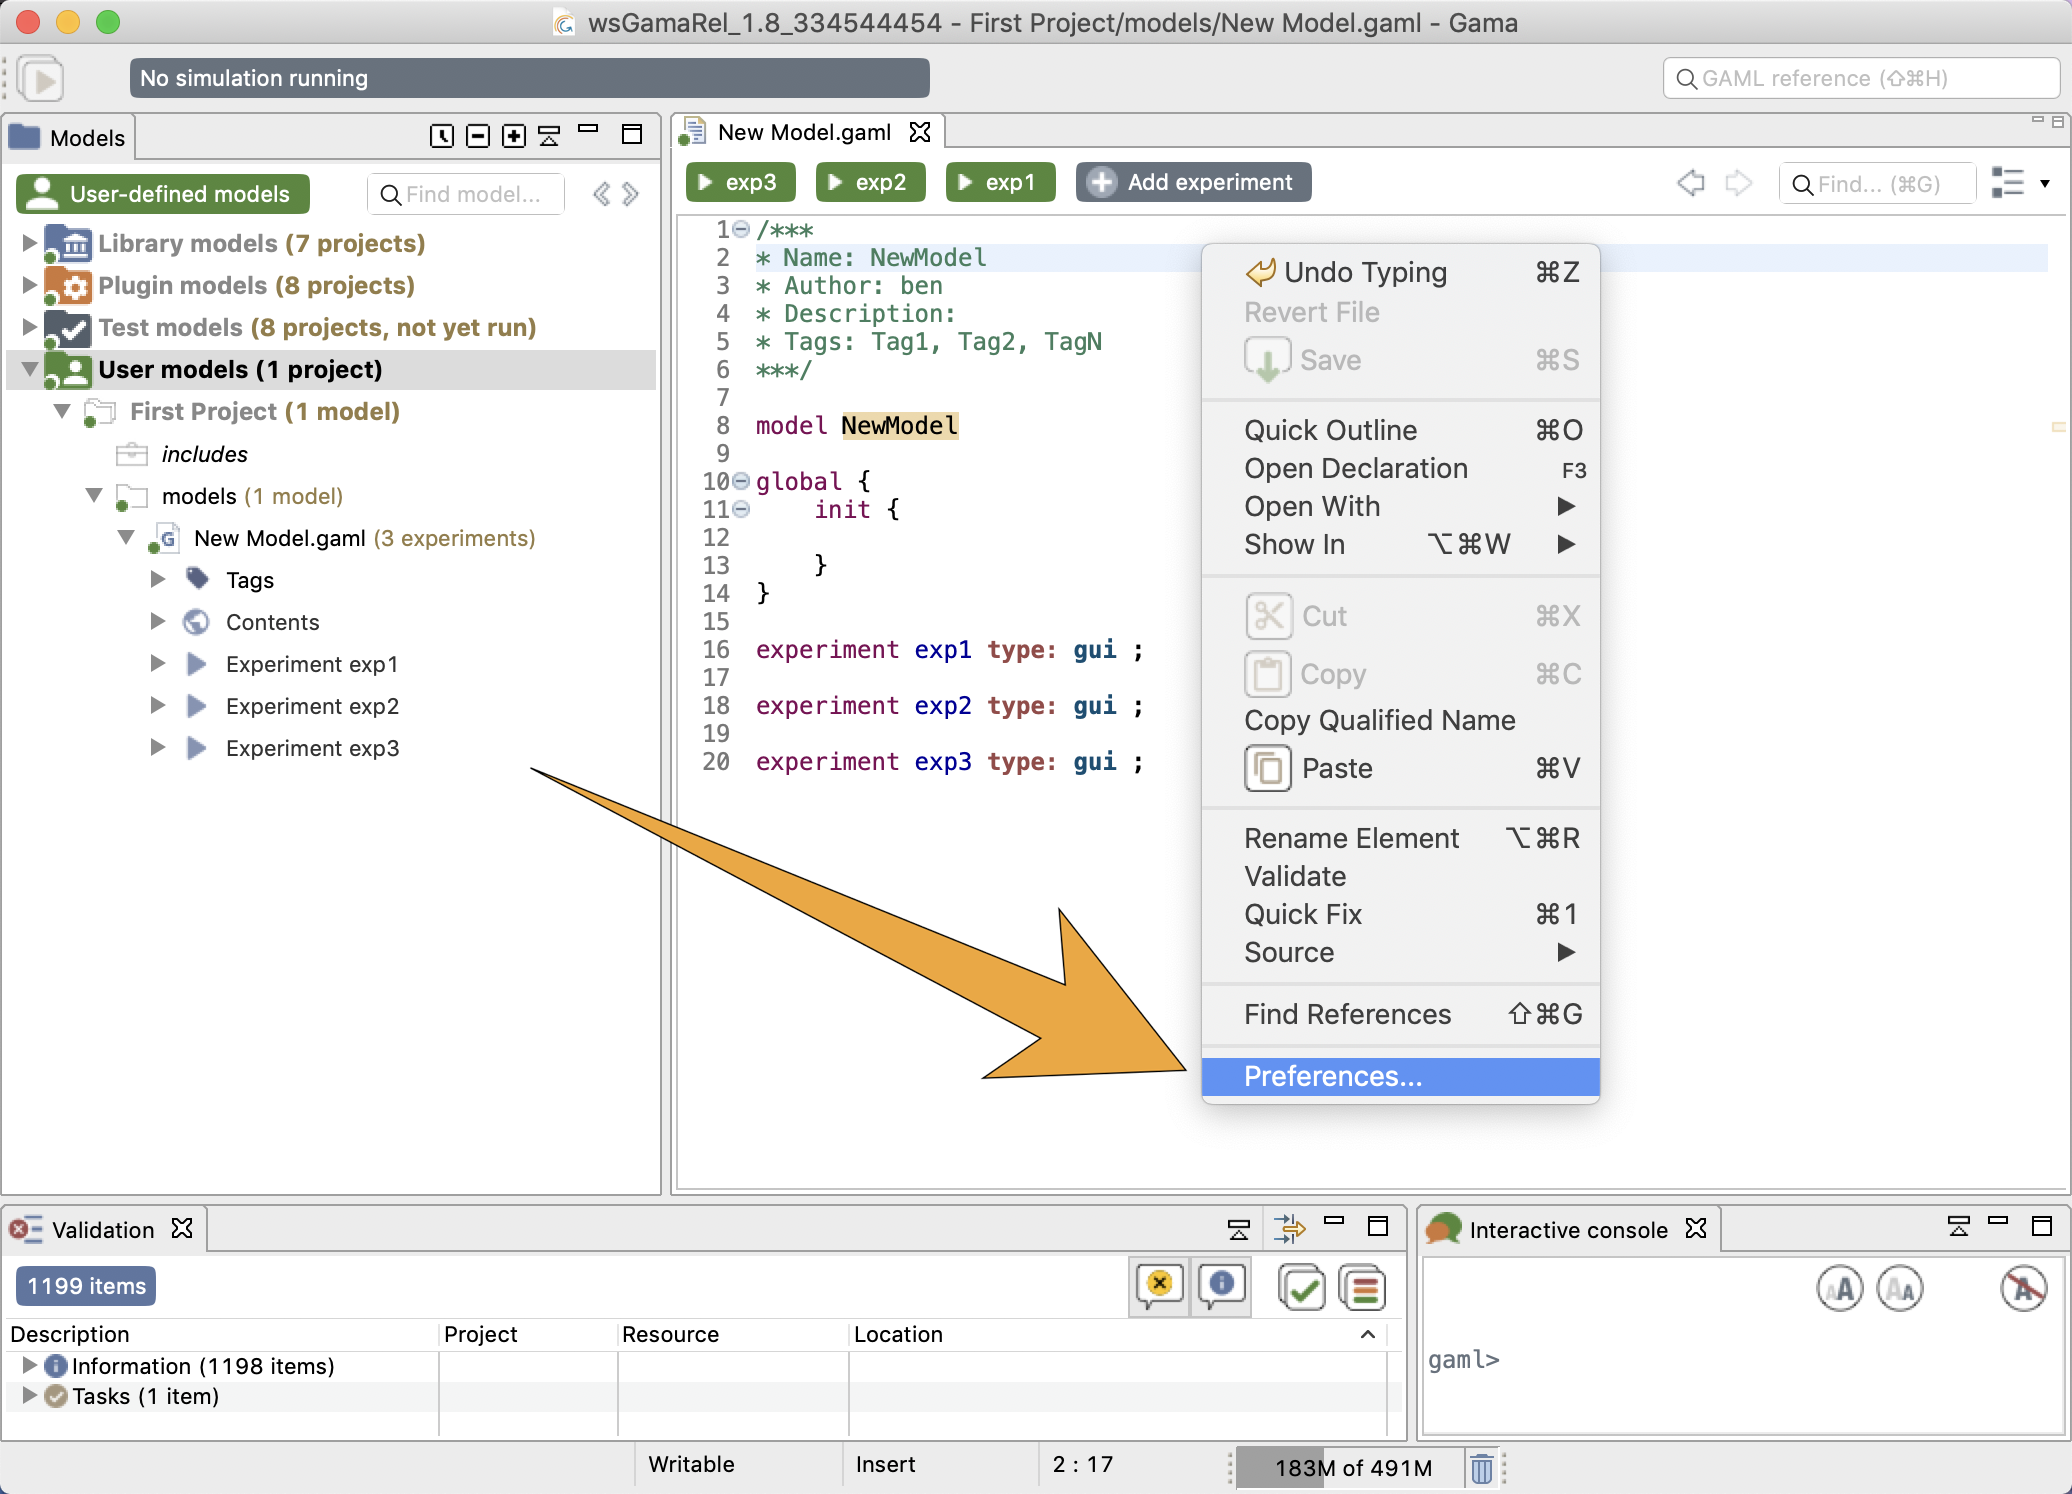
Explore the different items present there, keeping in mind that these preferences will apply to all the editors of GAMA and will be stored in your workspace.
Additional information in the Editor
You can choose to display or not some information in your Editor, from the Models menu available when the GAML editor is active.
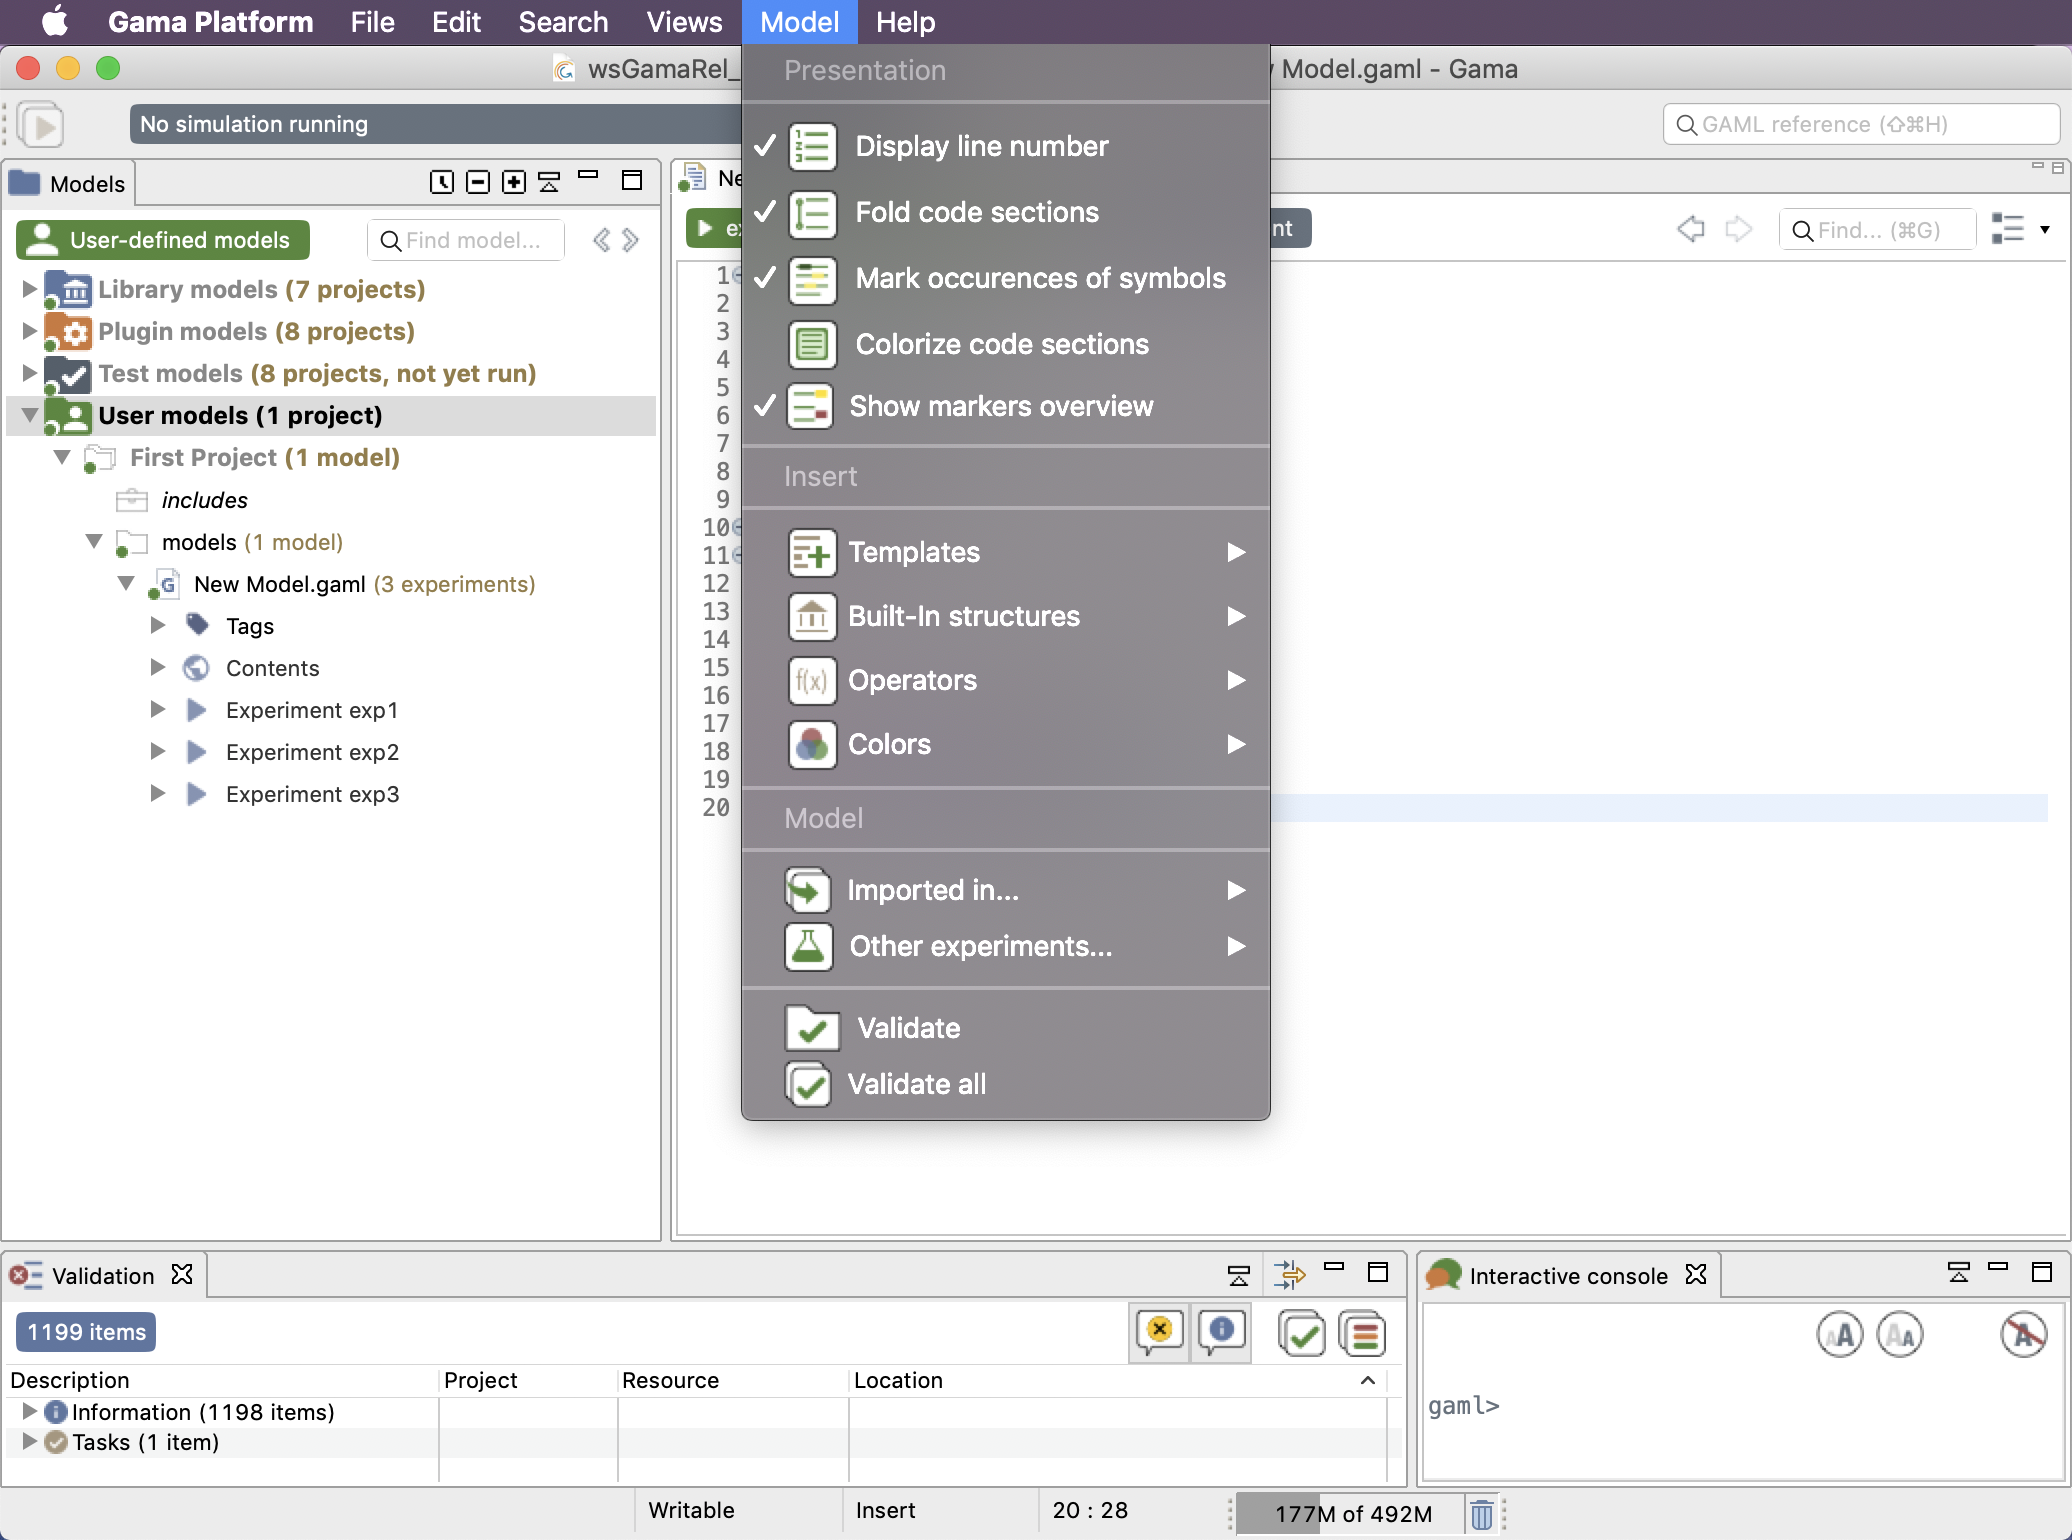
In particular, this menu allows the user to activate/deactivate the additional information that can be displayed in the editor:
- "Display line number": the display of the line number in the left margin.
- "Fold code sections": the
-and+icons on the left of each code section can fold/unfold the associated code section. - "Mark occurrence of symbols": when the name of a variable or species is selected in the code, all its other occurrences will be also marked.
- "Colorize code sections": the code section can be colorized, improving the visualization of the model organization (see below).
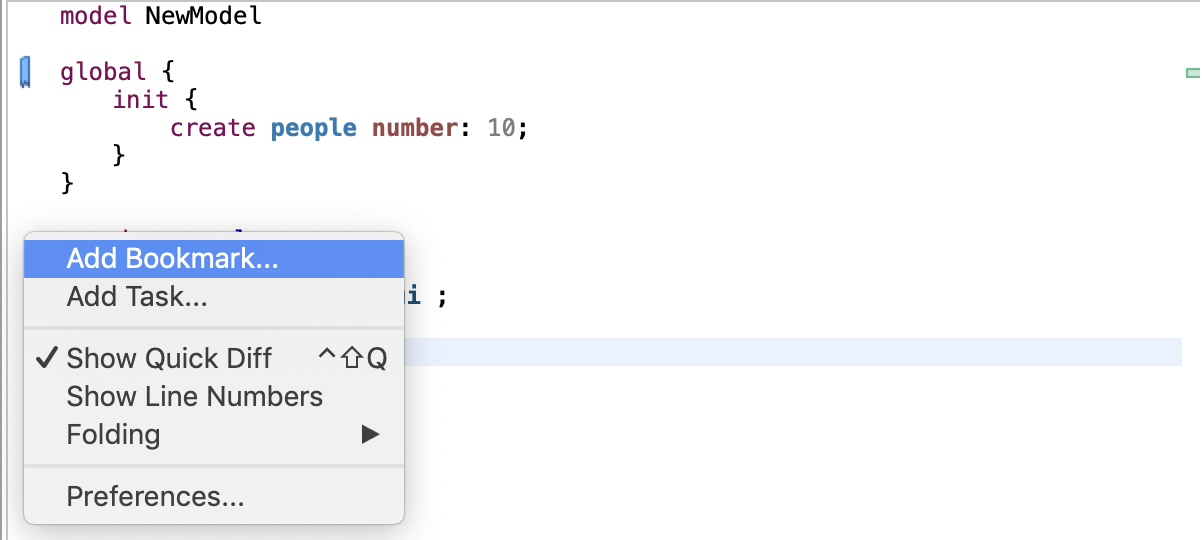
- "Show markers overview": a right-click on the left margin of the editor allows the user to add either bookmarks or tasks to the editor (with a mark on the right margin.
One particular option, shipped by default with GAMA, is the possibility to not only highlight the code of your model, but also its structure (complementing, in that sense, the Outline view). It is a slightly modified version of a plugin called EditBox.

The Default theme of EditBox might not suit everyone's tastes, so the preferences allow to entirely customize how the "boxes" are displayed and how they can support the modeler in better understanding "where" it is in the code. The "themes" defined in this way are stored in the workspace, but can also be exported for reuse in other workspaces, or sharing them with other modelers.

Multiple editors
GAMA inherits from Eclipse the possibility to entirely configure the placement of the views, editors, etc. This can be done by rearranging their position using the mouse (click and hold on an editor's title and move it around). In particular, you can have several editors side by side, which can be useful for viewing the documentation while coding a model.
Local history
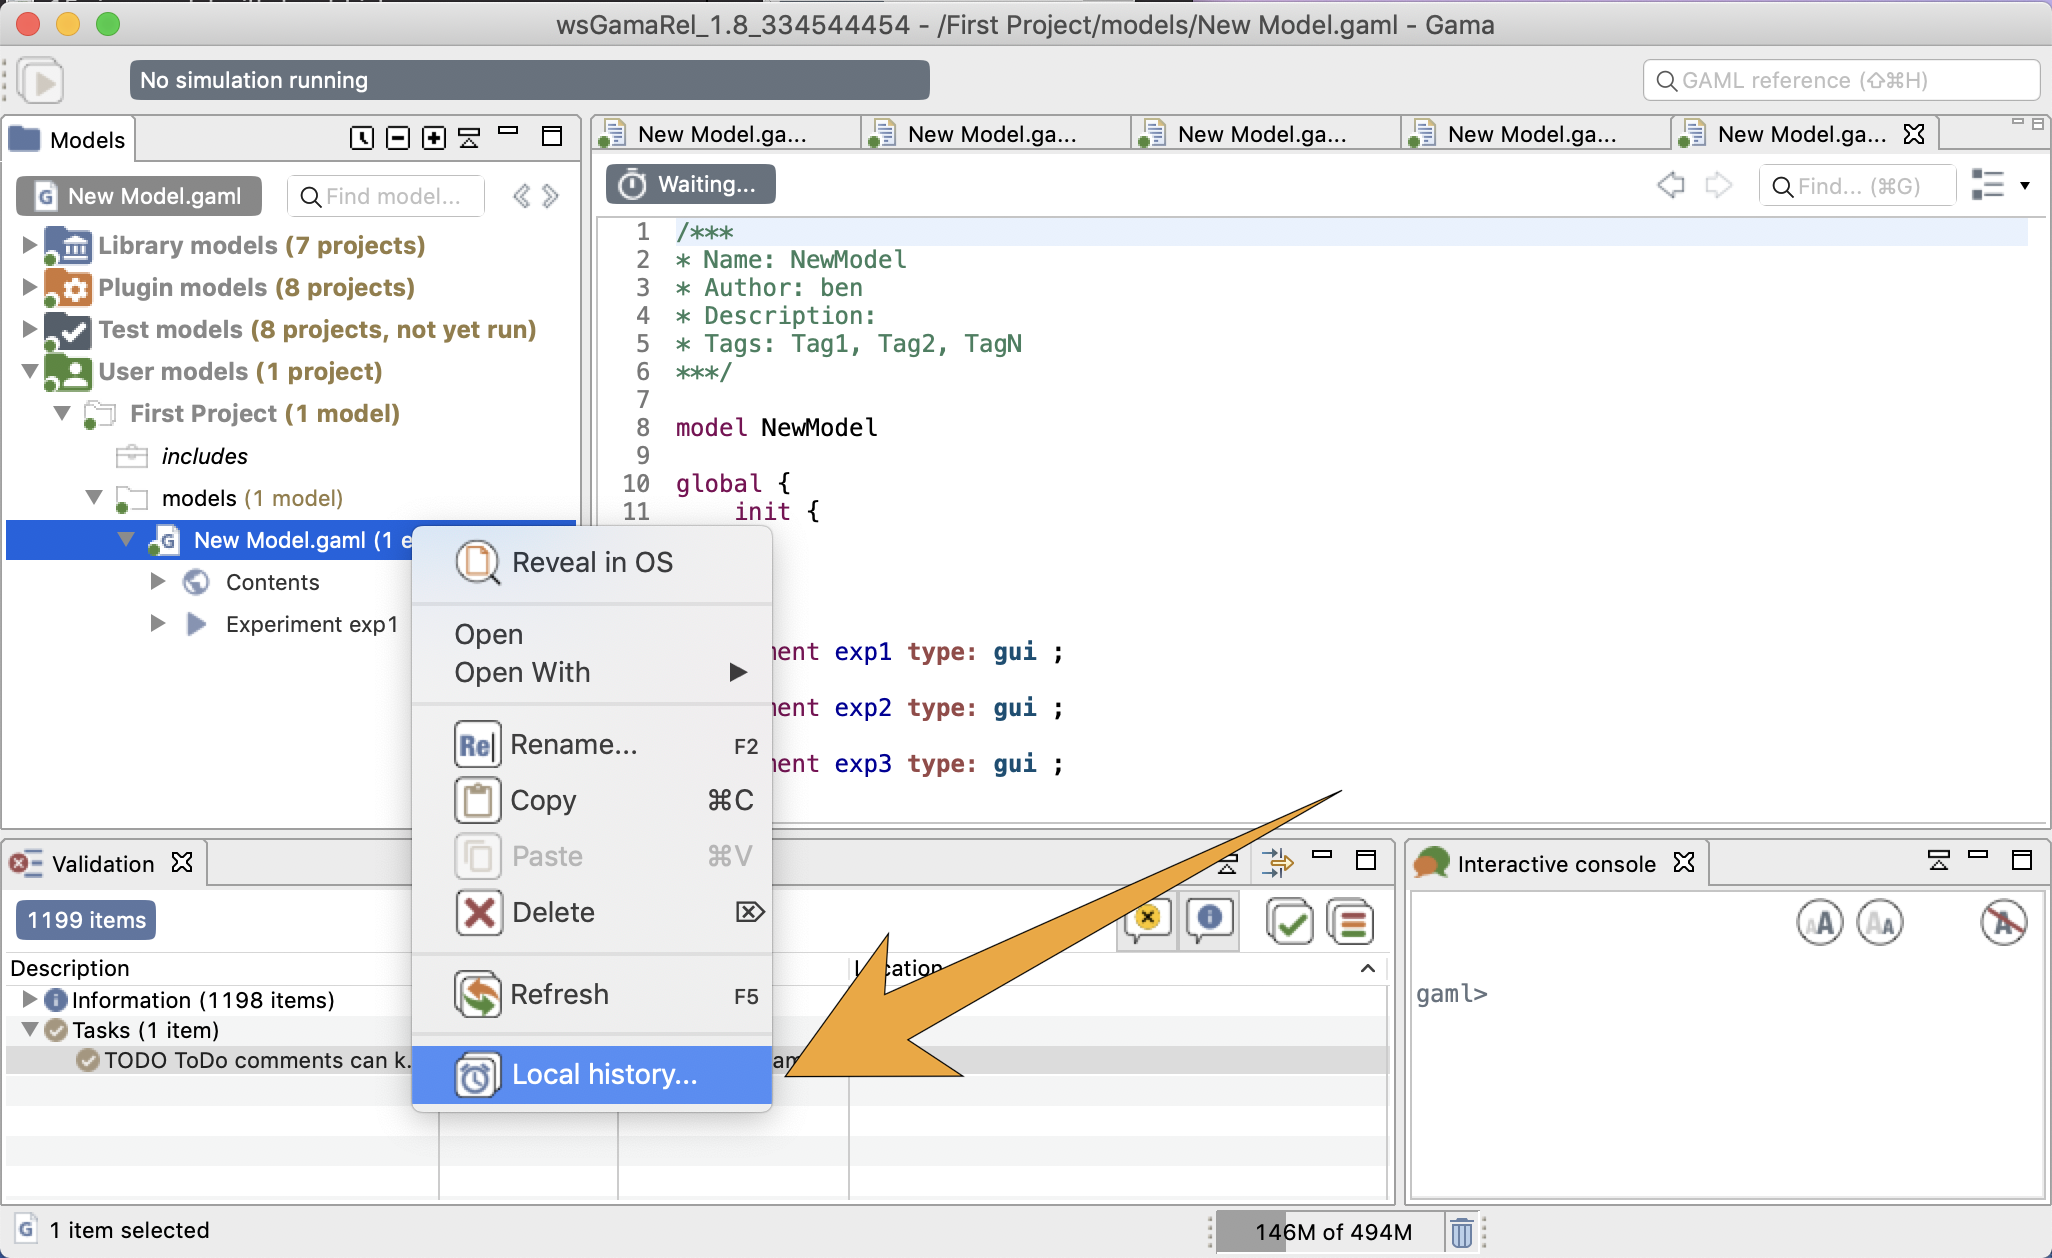
Among the various options present to work with models, which you are invited to try out and test at will, one, called Local history is particularly interesting and worth a small explanation. When you edit models, GAMA keeps in the background all the successive versions you save (the history duration is configurable in the preferences), whether or not you are using a versioning system like SVN or Git. This local history is accessible from the contextual menu on the chosen model.
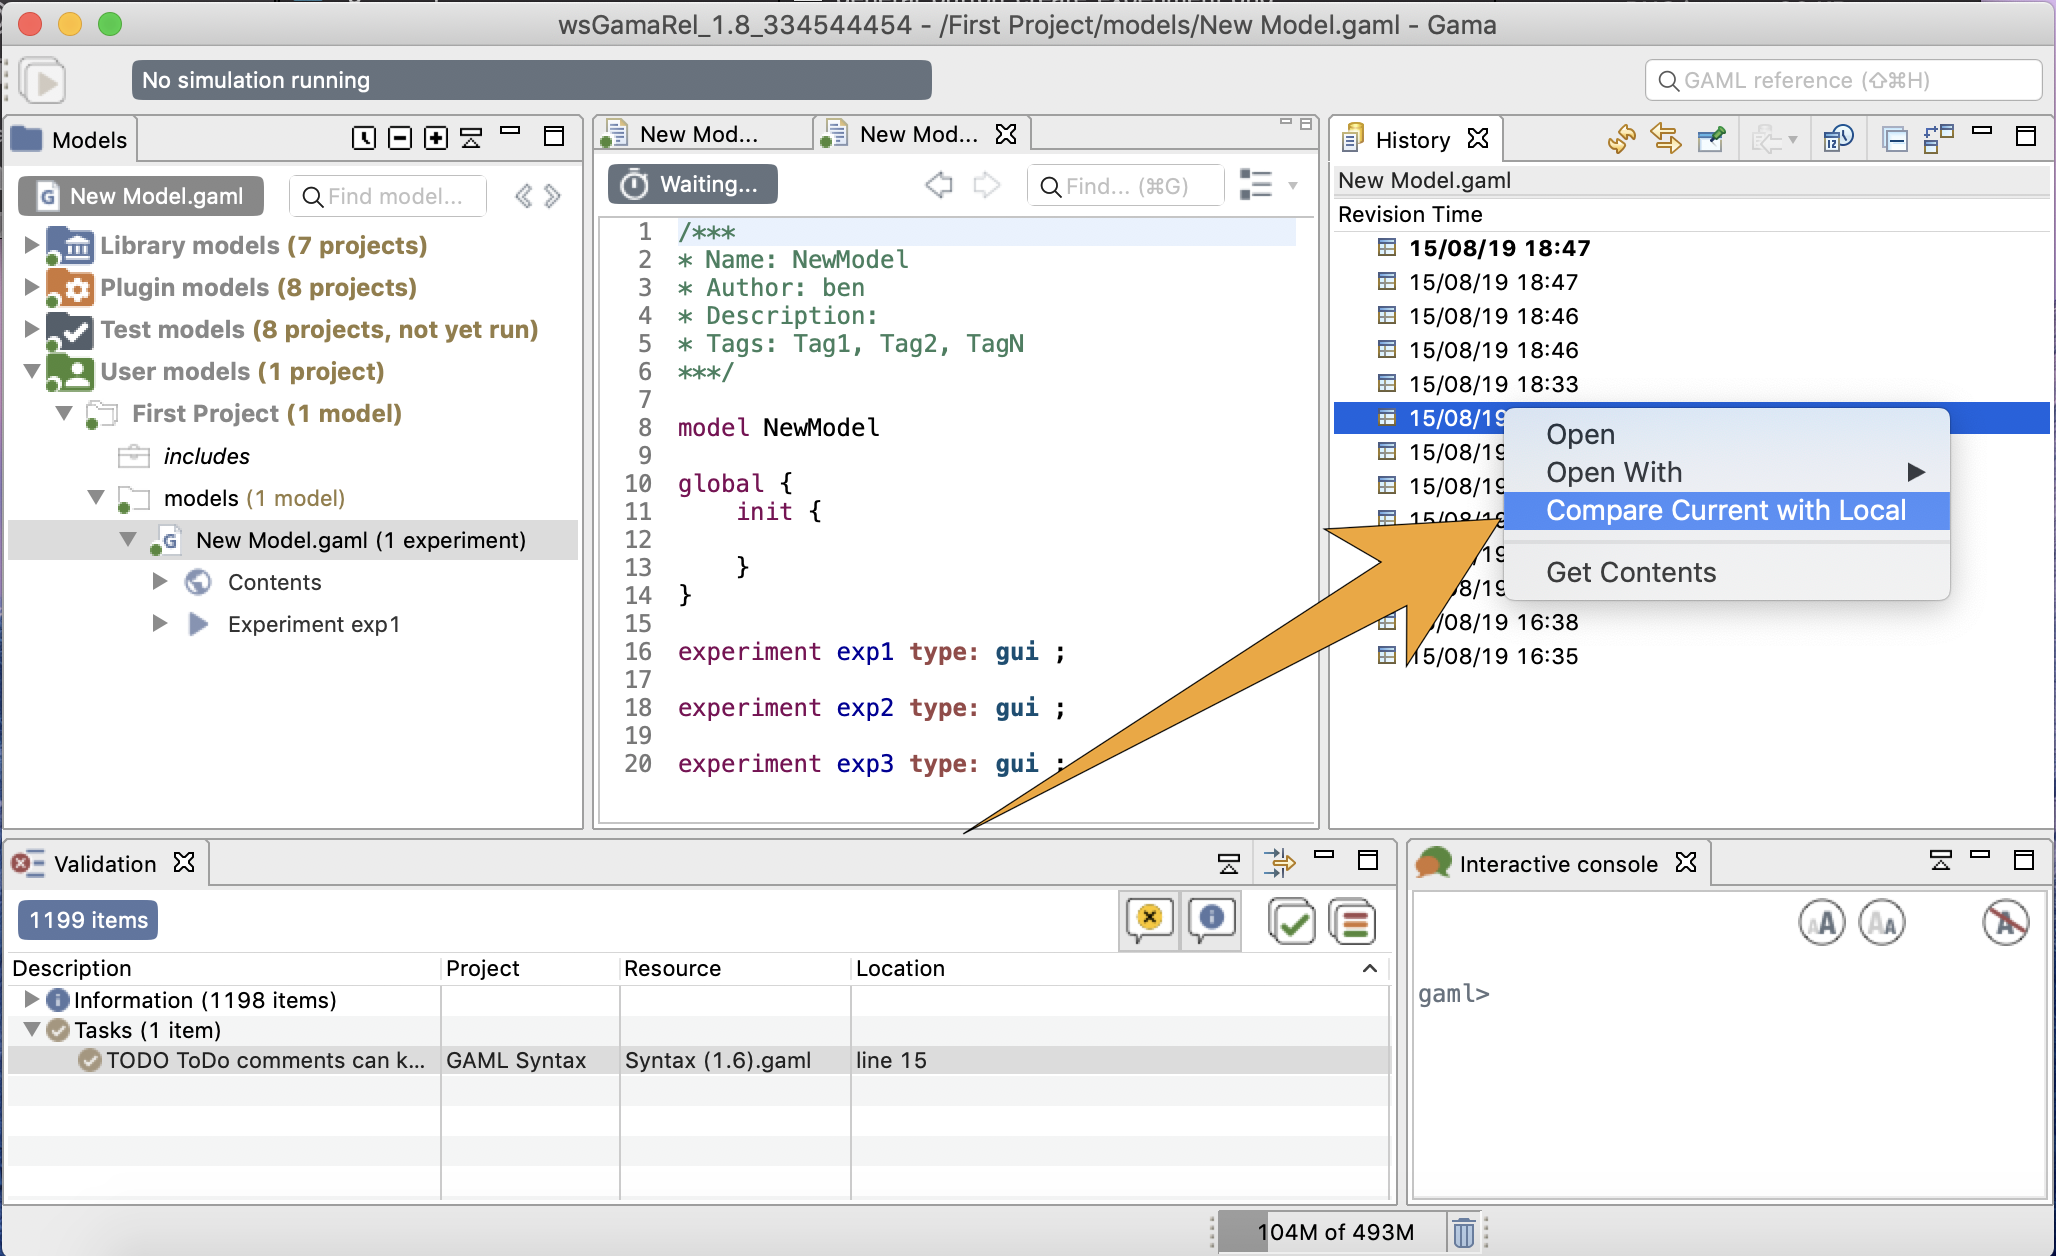
This command invokes the opening of a new view, which you can see in the figure below, and which lists the different versions of your file so far. You can then choose one and, right-clicking on it, either open it in a new editor or compare it to your current version.
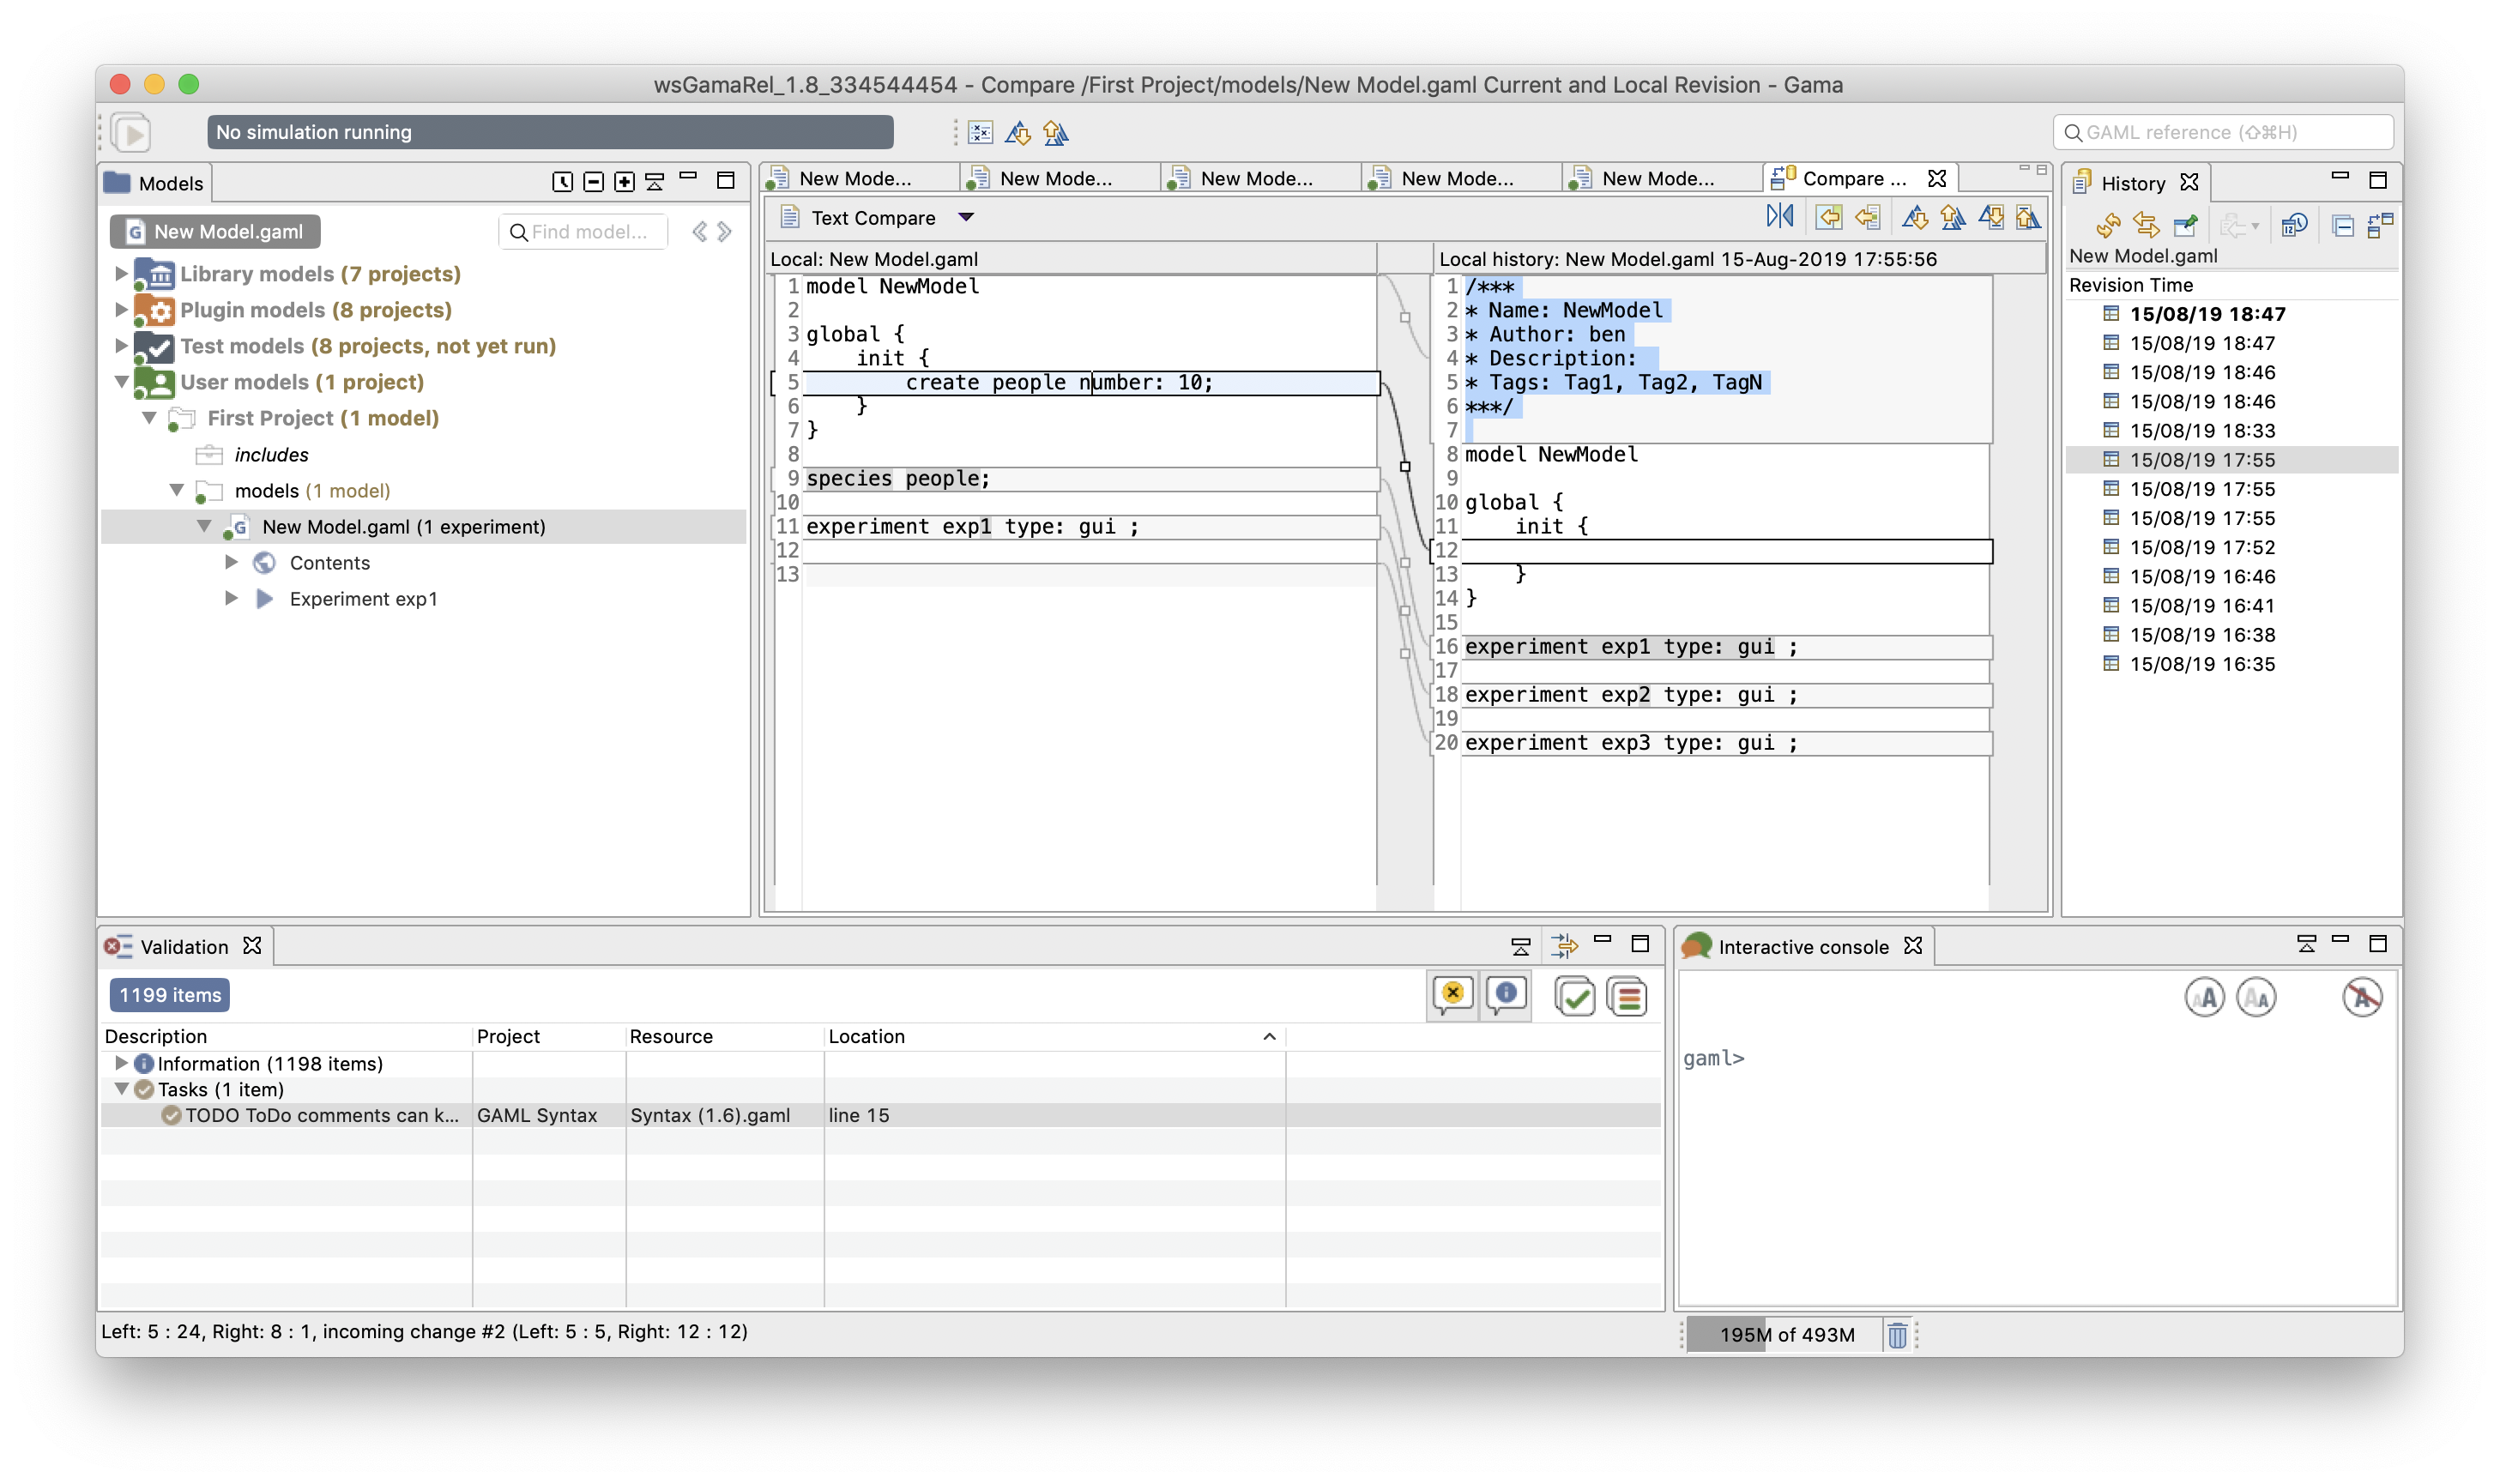
This allows you to precisely pinpoint the modifications brought to the file and, in case of problems, to revert them easily, or even revert the entire file to a previous version. Never lose your work again!
This short introduction to GAML editors is now over. You might want to take a look, now, at how the models you edit are parsed, validated and compiled, and how this information is accessible to the modeler.